
Related Manuals for HOT ROCKS HR-70-22

Summary of Contents for HOT ROCKS HR-70-22
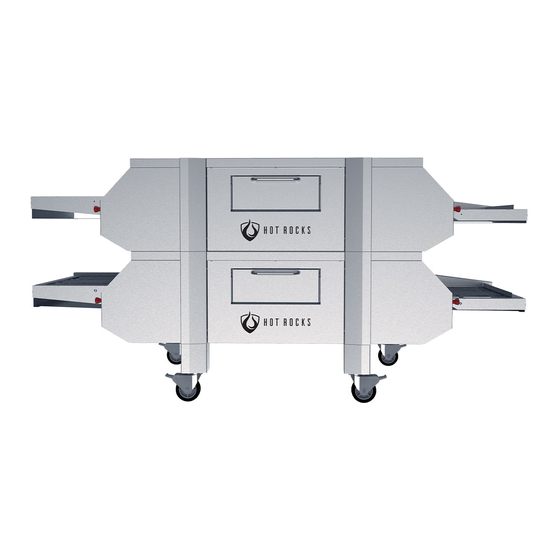
- Page 1 ALL GEN 3 MODELS User Manual Keep this manual with the oven. This is the property of the end user. Serial number User Manual / Hot Rocks...
-
Page 3: Table Of Contents
4.1.2 Top Heat Setting ..........................20 4.1.3 Bottom Heat Setting ........................... 21 4.1.4 Baking On/Off ............................. 22 4.1.5 Cooking Time ............................. 23 4.1.6 Visual Information ..........................24 4.1.7 System ............................... 24 4.1.8 Recipes .............................. 24 User Manual / Hot Rocks... - Page 4 5.1.4 Maintenance of entry and exit conveyor crumb trays ................. 42 5.1.5 General maintenance of the exterior ....................42 5.1.6 Visually inspect the oven ........................42 5.1.7 Maintenance of main conveyor crumb trays..................42 5.1.8 Lubricate both main conveyor chains .....................43-44 6. PIZZA RECIPES ............................45-46 User Manual / Hot Rocks...
- Page 5 CONGRATULATIONS! YOU ARE NOW THE OWNER OF A HOT ROCKS OVEN! Thank you for choosing us and giving us a chance to do what we love. You are part of the innovators who are revolutionizing the way pizza is baked. From managing your staff, better customer reviews, superior quality product, less waste &...
-
Page 6: Generalities
• Remove all obstacles which may interfere with the oven’s function. • Clear the work area of any items such as electrical wires, buckets, knives, etc. • Do not sit or stand on the oven. User Manual / Hot Rocks... -
Page 7: Service
DO NOT USE THIS APPLIANCE IF ANY OF ITS PARTS HAVE BEEN UNDER WATER. IMMEDIATELY CONTACT A QUALIFIED SERVICE TECHNICIAN TO INSPECT THE APPLIANCE AND TO REPLACE ANY PARTS WHICH WERE SPRAYED OR SUBMERGED UNDER WATER. User Manual / Hot Rocks... -
Page 8: Authorized Technician
It is possible to obtain these services by contacting Hot Rocks customer service or a local service companies. Refer to the Hot Rocks website for a list. -
Page 9: Labels
1.6 Labels EACH HOT ROCKS OVEN CONTAINS THE FOLLOWING LABELS (NOT TO SCALE). THEY SHOULD NEVER BE REMOVED. DANGER-WARNING Never put your hands inside the oven while the conveyor is moving. User Manual / Hot Rocks User Manual... -
Page 10: Specifications And Installation
2. SPECIFICATIONS AND INSTALLATION 2.1 Overall Dimensions HR-70-33 HR-93-33 HR-70-22 BAKING SURFACE 70 inch 178 cm 70 inch 178 cm 93 inch 236 cm CONVEYOR WIDTH 22 inch 56 cm 33 inch 84 cm 33 inch 84 cm FULL LENGTH... -
Page 11: Electrical Rating (Per Oven)
• A minimum of 6 inches of clearance all around the oven. Refer to the Hot Rocks specification sheet to be informed of the installation requirements. For additional details, refer to the following documents: • 3-0026-EA - Hot Rocks - Specification Sheet • 7-0055-EA - Hot Rocks - Technician Manual These documents are available on the Hot Rocks website. User Manual / Hot Rocks... -
Page 12: Connections
2.4 Connections Back view of the oven 2.4.1 Electrical Plug The Hot Rocks oven requires a dedicated electrical inlet to the following specifications: 208-240V/1PH/60Hz-10A. It is highly recommended to install a “twist-lock” plug. The wiring should be done by a qualified electrician, in accordance with the local codes. Example of a recommended twist lock plug * Note that the plug and receptacle are not included, only the power cord. -
Page 13: Plumbing
The gas pressure must be adjusted between 6’’ and 8’’ W.C. or 15 mBar to 20 mBar for internationals. GAS ENTRY CONNECTION The Hot Rocks oven is on casters and is to be connected to the gas line by flexible tubing. A safety chain must retain the Hot Rocks oven to the wall to prevent it from moving. The length of the safety chain must stop the flexible hose from completely straightening. -
Page 14: Exhaust And Ventilation
2.5 Exhaust and ventilation A Hot Rocks oven requires a ventilation hood to operate correctly and safely. WARNING The areas surrounding the unit should be kept clear to allow necessary air flow; which is required for proper combustion and operation. The unit should also be positioned for easy maintenance access. -
Page 15: Type Of Ventilation Installation
** The drawing above is used as an example to illustrate how the oven is to be properly vented. Actual installs may look different, but must respect the minimum values. WARNING This oven generates a lot of heat and must never be enclosed. User Manual User Manual / Hot Rocks... -
Page 16: Stacking Multiple Ovens
(shown in red). The seal must go all the way around the ovens with no gaps. WARNING Make sure that the silicone seal is smooth with no bubbles; it must not allow food particles in between units. User Manual / Hot Rocks... -
Page 17: Safety Precautions
Do not use any phones in the builgind. 5. Follow the gas supplier’s instructions. 6. If it is not possible to reach the gas supplier, contact the fire department. * Note that to restart the oven, wait 5 minutes in order to clear out any remaining gas in the oven. User Manual / Hot Rocks... -
Page 18: Operation
4. OPERATION 4.1 User interface * Note that this is referred as the “main screen.” User Manual / Hot Rocks... -
Page 19: Fan Speed Setting
Pressing the single large arrow will increase or decrease the fan speed by 1%. Pressing the double arrows, will increase or decrease by 10%. Touch the confirm button to return to the main screen. The fan speed is adjustable from 20% to 100%. * Note that this page can be password protected by the advanced user. See section 4.2 for options. User Manual / Hot Rocks... -
Page 20: Top Heat Setting
150°F (65°C) more than the bottom temperature. For more stability and an even product, we recommend setting the top temperature between 60°F (15°C) and 150°F (85°C) higher than the bottom temperature. * Note that this page can be password protected by the advanced user. See section 4.2 for options. User Manual / Hot Rocks... -
Page 21: Bottom Heat Setting
Pressing the single large arrow will increase or decrease the bottom heat by 1°F. Pressing the double arrows, will increase or decrease by 10°F. Touch the confirm button to return to the main screen. The selected value will automatically be applied. The bottom heat is adjustable between 0 and 600°F. * Note that this page can be password protected by the advanced user. See section 4.2 for options. User Manual / Hot Rocks... -
Page 22: Baking On/Off
When the button is grey, the unit is in standby mode. Use the standby mode overnight to let the electrical panel cool down. The oven can be completely shut off with the main power switch in the back of the oven. See section 2.4 for button location. User Manual User Manual / Hot Rocks... -
Page 23: Cooking Time
Icon shown during the standby mode to cooldown the oven rapidly. Once the bottom temperature cools under 250°F for 5 minutes, the icon will disappear. Icon shown when the lubrication of the main conveyor chains is due. Once the lubrication is done, the icon will disappear. User Manual / Hot Rocks... -
Page 24: Visual Information
It is possible to save up to four recipes. Selecting a recipe button applies the shown values to the actual settings. Holding the recipe button for 5 seconds will save the current setting values of the main screen to the memory of that recipe. User Manual / Hot Rocks... -
Page 25: System
Users have 2 authorization levels. For the basic user, the system page shows the icons on left picture. For the advanced user, the system page shows the icons on the right picture. See section 4.2.1 to know how to access the advanced user. Basic User Advanced User User Manual User Manual / Hot Rocks... - Page 26 Alarm page User Login Page Statistics page About page Monitoring page Lubrication page Setting page Date and Clock page Maintenance page * Authorizations can be granted by the Advanced User. See section 4.2.7 for more information. User Manual / Hot Rocks...
-
Page 27: User Login
This menu also allows an advanced user to change their password or reset it. The advanced user can also log out to be sure that their settings cannot be changed. After 15 minutes without touching the screen, the advanced user will be automatically logged out. User Manual / Hot Rocks... -
Page 28: Alarm
Clear: Resets the alarm. If the problem is not solved, the alarm will reappear. Exit: Erases the alarm message without clearing the alarm and without stopping the sound. A new icon will appear for any user under the system menu allowing them to silence the alarm. User Manual / Hot Rocks... -
Page 29: About
4.2.3 About Shows Hot Rocks contact information, the oven’s serial number and the last maintenance date. * Note that the last maintenance date can be inaccurate if time was not set properly. User Manual / Hot Rocks... -
Page 30: Monitoring
100°F to 200°F. This information is refreshed on every start up. * Note that this is an example is an example and will not be the exact details for every oven. User Manual / Hot Rocks... -
Page 31: Date / Clock
4.2.6 Date / Clock The “CLOCK” page allows the advanced user to change the date and the time. * Note that the oven works with 24 hour time. User Manual / Hot Rocks... -
Page 32: Conveyor Chain Lubrication
Always perform this maintenance while the oven is cool. See section 5.1.8 for details on how to perform the lubrication. When the lubrication is due, an alarm will pop-up on the main screen every time the oven is started. User Manual / Hot Rocks... -
Page 33: Settings
Selecting YES for the “TEMP. CHANGE WITHOUT LOGIN” will allow the basic user to change top and bottom cooking temperatures. Selecting YES for the “FAN CHANGE WITHOUT LOGIN” will allow the basic user to change the fan speed. User Manual / Hot Rocks... -
Page 34: Maintenance
When the maintenance is due, an alarm will pop-up on the main screen every time the oven is started. For more information on this maintenance refer to document 7-0055-EA - Hot Rocks - Technician Manual. This manual is available on the Hot Rocks website. - Page 35 If the oven is started as usual after a long pause, the humidity built up in the stone may cause them to crack. See section 4.5 to view the process to dry the stones. User Manual User Manual / Hot Rocks...
-
Page 36: Initial Start-Up
It could be performed by the technician on site during the installation, a Hot Rocks sales representative or by Hot Rocks customer service technician. The user must fully understand how to lubricate the chains by themselves and how to perform all other user maintenance. -
Page 37: Basic Troubleshooting Guide
Lubricate the main conveyor chains. The oven is due to lubricate OVEN NEEDS LUBRICATION every month. *If the oven is covered by the Hot Rocks warranty, contact the Hot Rocks customer service instead of a service company. User Manual / Hot Rocks... -
Page 38: Preheating The Stones
“INITIAL HEATING RAMP ACTIVATED” button. When the process has ended, the oven will turn off by itself. WARNING If the oven is started as usual after more than two consecutive days, the humidity built up in the stones may cause them to crack. User Manual User Manual / Hot Rocks... -
Page 39: Start-Up
1. Press one of the emergency buttons and address the problem if it is minor. 2. Call local service company if the problem cannot be identify or if assistance is required. 3. If the oven is covered by a Hot Rocks warranty, contact Hot Rocks customer service for assistance. User Manual /... -
Page 40: Maintenance
2 weeks or more often. The Hot Rocks oven requires regular maintenance to prevent premature failure. The following pages show the maintenance requirements of the oven for optimal operation. It is the user’s responsibility to ensure the maintenance is performance as required. -
Page 41: Maintenance Of Wire Mesh Entry And Exit Conveyors
Do NOT clean stones with liquids or it could crack. 1. Remove the cover. Removing covers 2. Press “Baking ON/OFF” to start the stone conveyor rolling and adjust the baking time to 2 minutes. 3. Clean the stones with a metal scraper and wipe the stones with a clean dry cloth. User Manual / Hot Rocks... -
Page 42: Maintenance Of Entry And Exit Conveyor Crumb Trays
3. Vacuum/clean the crumb drawer and put it back in place. Use a wet cloth to clean the crumb tray if there are stuck particles. 4. Repeat steps on other side of the oven. Removing stone conveyor crumb trays User Manual / Hot Rocks... -
Page 43: Lubricate Both Main Conveyor Chains
3. Shake the lubricant bottle for 2 minutes (FO75-0050). This lubricant is food grade and is designed for Hot Rocks application. No other lubricant will provide adequate lubrication. Using a different lubricant will void the warranty on parts that require FO75-0050 lube. - Page 44 8. Reinstall the removed panels and operate the oven as usual. Depending on the amount of lubricate applied the excess lubricant will evaporate. The evaporation will produce a temporary odorous non-toxic smell and vapor. User Manual / Hot Rocks...
-
Page 45: Pizza Recipes
6. PIZZA RECIPES All kinds of pizzas can be baked in the Hot Rocks oven. Here are some recipes that can use as a guideline to find the perfect baking setup for your own style of pizza. Topping Crust Convection Cooking temperature temperature speed time New York style 5:30 570°F 420°F minutes... - Page 46 12:00 510°F 380°F minutes detroit style 10:00 510°F 380°F minutes grandma sicilian pizza 10:45 510°F 380°F minutes chicago thin crust 6:10 530°F 380°F minutes chicago deep dish 15:00 530°F 380°F minutes User Manual / Hot Rocks...
- Page 47 User Manual / Hot Rocks...
- Page 48 2555 Alfred Nobel, Drummondville (Quebec) Canada J2A 0L5 819 395-5151 / 855 395-5252 819 395-5343 hotrocksoven.com Follow-us User Manual / Hot Rocks...
Need help?
Do you have a question about the HR-70-22 and is the answer not in the manual?
Questions and answers