
Summary of Contents for ScannerMAX Mach-DSP
- Page 1 Mach-DSP User’s Manual Mach-DSP Servo Driver and associated software Users Manual October 2020 Page 1 Document Number: MACH-DSP-9021 www.ScannerMAX.com...
-
Page 2: Table Of Contents
Advanced servo parameters Control-related (TTL Input and Output) parameters Pangolin-only servo parameters Saving and recalling scanner tunings from memory and files Built-in Tools accessed using the Mach-DSP program Test Signal generator Oscilloscope and Analog Test Point (user-defined) Outputs Dynamic Signal Analyzer... -
Page 3: Introduction
The purpose of this manual is to familiarize you with the functionality of the Mach-DSP servo driver. This manual also provides a brief introduction to the process of servo tuning, although when buying a complete system (scanners, mirrors, mount, servo driver, and cables) the Mach-DSP should arrive already tuned at the Pangolin factory. -
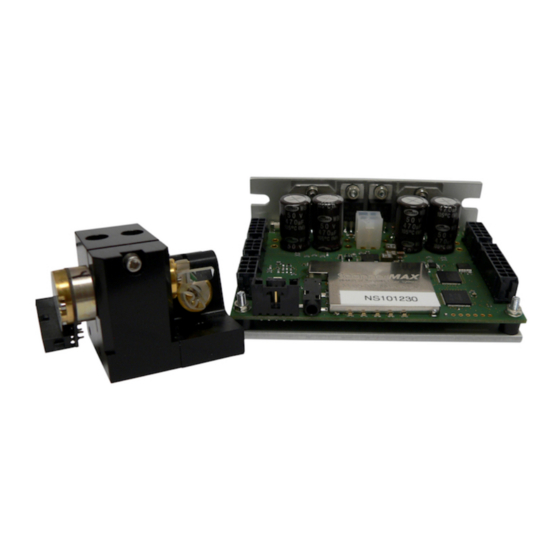
Page 4: Specifications, Dimensions And Mounting
Mach-DSP User’s Manual 2.0 Specifications, Dimensions and Mounting Analog and Digital Command Input Analog Differential Voltage Range ±10 volts differential for full scale ♦ (other voltage ranges are also possible) Analog Input Impedance 20KΩ differential ♦ FB4 and XY2-100 digital serial 3.3V direct-connect or RS-422 differential... - Page 5 Mach-DSP User’s Manual Mach-DSP Package Dimensions (millimeters) Page 5 Document Number: MACH-DSP-9021 www.ScannerMAX.com...
- Page 6 Mach-DSP servo driver for mounting purposes. Since the rear surface of the Mach-DSP may not be completely flat, and the projector housing may also not be flat, Pangolin provides thermal interface material consisting of heat sink compound filled with aluminum nitride or silver.
-
Page 7: Connector Locations And Functions
3.0 Connector locations and functions Please refer to the diagram below for an overall view of the location and function of each connector. Note that each connector on the Mach-DSP is unique, thus helping to prevent signals from becoming accidentally mismatched or misconnected. -
Page 8: Power Supply
Mach-DSP User’s Manual Power Supply Power is supplied to the Mach-DSP through a connector that is located approximately in the middle of the board, toward the rear (near the power amplifier components). The connector pin functions are shown in Table 3.1. - Page 9 Using the Mach-DSP PC application software (described in Section 7 of this manual), each axis of the Mach-DSP may select either Analog Input or Digital Input as the source of the Command signal. Analog Input is the most common, and is the default.
- Page 10 Nevertheless, if you have a single-ended source, in most cases the best way to connect it to the Mach-DSP is to connect the + output of the DAC board to pin 1 (the +X-axis command input) and/or pin 4 (the +Y-axis command input), and connect the “ground”...
- Page 11 Mach-DSP. For equipment located farther (such as typical equipment that uses the XY2-100 standard), an optional daughterboard (described later in this manual) can be fitted to the Mach-DSP, which adapts RS-422 differential signals to the 3.3V signal levels.
- Page 12 Refer to the diagram below, which illustrates the signals and phase relationships. Looking at the diagram above, you will note that signals that are sent to the Mach-DSP must change on the low-to-high transition of the clock; signals are observed by the Mach-DSP on the high-to-low transitions of the clock.
- Page 13 “Control Bits”. You will also note that the first three bits received by the Mach-DSP are designated “C2, C1, C0”. These first three bits are called “control bits”, and they designate the function of the data that is contained in the bits that follow.
- Page 14 16-bits, and Y being the least significant 16-bits as shown below. As is the case with XY2-100, signals that are sent to the Mach-DSP must change on the low-to-high transition of the clock; and signals are observed by the Mach-DSP on the high-to-low transitions of the clock.
- Page 15 The data communicated via this serial port is absorbed by the Mach-DSP at the rate that it is sent, and – unless Synchronous Sampling is selected (as described below), there is no attempt to synchronize the Mach-DSP’s servo sample clock (typically 100kHz to 300kHz) to the serial port signals.
- Page 16 100kHz sample rate. Future Expansion and Alternative Protocols It should be obvious that there is a great deal of flexibility built into the Mach-DSP, and a variety of custom applications and alternatives are possible. The number of bits used and the polarity of Clock and Frame Sync signals are all easily changed. Please contact us if you have special requirements, since they may be accommodated via firmware updates, which are easily performed by users in the field.
- Page 17 XY2-100 standard was developed. When it is desirable to run the Mach-DSP from power sent through the XY2-100 cable, you should connect the power wires from 4-pin power connector (discussed in section 3.1 of this manual) to the Red, Green, and Blue terminals on the right side of the...
-
Page 18: Status And Control Signals
These TTL outputs that can be programmed to respond in a variety of ways, using the “Control” tab of the Mach-DSP PC application. For example, one or both of these outputs can be used as a “Fault” indication – to indicate that the servo has encountered an over-temperature or over-position fault. -
Page 19: Control Panel Serial Interface
Note that in addition to serial communications signals found on this connector, the Mach-DSP also provides regulated +5V as well. This may be used to power an external control panel including OLED display, or it may be used to provide power for the optically-isolated TTL inputs or TTL outputs described in the Status / Control Interface section of this manual. -
Page 20: Test And Thermistor Interface
2.45 mechanical degrees per volt for systems that are not customized. The Command signal output is a direct reflection of the Mach-DSP analog command input. The Current signal has a fixed scale factor of 1-volt-per-amp. The AGC signal is a reflection of the voltage seen by the galvo position sensor LED driver. - Page 21 Oscilloscope and Analog Output Controls tool, found in the Mach-DSP Servo Control Application program. This is described in Chapter 8 of this manual.
-
Page 22: Scanner Interface
Mach-DSP User’s Manual Scanner interface Each scanner is connected to the Mach-DSP through a single cable that provides both the position sensor and motor drive wires. The connector pin functions are provided in Table 3.6: Table 3.6: Scanner Interface Function Position sensor photodiode current “B”... -
Page 23: Fault Detection
TTL outputs. Fuses Both of the X and Y Scanner drive outputs of the Mach-DSP are fuse-protected, to prevent damage to either the scanner or the servo system in the event of a severe electrical fault. Pangolin installs fuses whose rating is selected based on the RMS power handling capability of the scanner being driven. - Page 24 LED2 are also used together to indicate when faults occur during the operation of the Mach-DSP. Faults are indicated by LED1 and LED2 flashing back and forth, in a kind of railroad-crossing manner. The number of back-and-forth flashes will indicate the error number in accordance with the table below.
-
Page 25: Servo Overview
This chapter describes the ways in which the Mach-DSP may be configured to drive a scanner, as well as the overall servo architecture. Scanner tuning is covered in Chapter 10 of this manual. -
Page 26: Servo Configurations Possible With The Mach-Dsp
Mach-DSP User’s Manual Servo configurations possible with the Mach-DSP The Mach-DSP provides control over the gain of five fundamental signals, which are ultimately fed into a summing node, including: A signal proportional to the error between the commanded and actual position •... -
Page 27: Servo Architecture And Digitizing Resolution
Mach-DSP can deliver the precision required by the application. Servo architecture overview and block diagram A complete block diagram of the Mach-DSP servo is shown on the next two pages. This diagram can also be accessed on the HELP menu of the Mach-DSP program. - Page 28 Mach-DSP User’s Manual Page 28 Document Number: MACH-DSP-9021 www.ScannerMAX.com...
- Page 29 Mach-DSP User’s Manual Page 29 Document Number: MACH-DSP-9021 www.ScannerMAX.com...
- Page 30 By looking at the complete diagram found on the previous two pages, it is clear that the Mach-DSP servo allows for the adjustment of many different operational parameters. However, there are five primary gain controls that are most fundamental to servo tuning.
- Page 31 Low-frequency damping and High- frequency damping are used together. These five servo parameters allow the Mach-DSP to be configured as a Class 0 PD amplifier, a CLASS 1 PID amplifier, a CLASS 1 PDF amplifier, or a CLASS 1 PDFF amplifier.
-
Page 32: Dual Output Filters (Low-Pass, Notch, Or Phase-Lead)
When there are many successive resonances as shown below, it may be more handy to use a low-pass filter instead of a notch. For that reason, the Mach-DSP allows you to choose a single-pole low-pass or two-pole low-pass, having adjustable cut-off frequency and Q settings, allowing the user to make appropriate trade-offs while adjusting tuning. -
Page 33: Command Input Waveforms And Implications
Mach-DSP User’s Manual 6.0 Command Input waveforms and implications The Mach-DSP command signal may come from the built-in test signal generator, but more commonly it will come from the external analog command input connector. The type of waveform and amplitude of the command signal affects how the servo should be configured and tuned for optimal performance. -
Page 34: Step Waveforms
With the scanner operating at the required step angle, the settling performance can be monitored on the position test point with the aid of an oscilloscope, or using the oscilloscope built into the Mach-DSP Servo Control application. Rise times can be minimized by increasing the servo gain control. Typically the smoothness of settling can be improved by increasing the Low-Frequency Damping and High-Frequency Damping. -
Page 35: Raster Waveforms
Mach-DSP User’s Manual Raster (saw-tooth) waveforms There are three types of raster command waveforms (See Figure 6.3). The easiest to generate and lowest performance command is a waveform that commands an instantaneous retrace of the scanner. The scanner cannot follow an instantaneous retrace, which causes it to operate at an angle that is smaller in amplitude than commanded. -
Page 36: Vector Waveforms
Mach-DSP User’s Manual Vector Waveforms Vector waveforms consist of a series of small steps that are updated at a frequency high enough such that they create a waveform that appears continuous to the scanning system. Vector waveforms should be structured so that the commanded acceleration and velocity do not exceed the scan system saturation limits. -
Page 37: Mach-Dsp Servo Control Application Program
Control Application – a program that runs on Windows-based PCs. (Within the rest of this manual, the Mach-DSP Servo Control Application is referred to as the “Mach-DSP program”.) In the picture below, you can see what the Mach-DSP program looks like when it is first started. Page 37 Document Number: MACH-DSP-9021 www.ScannerMAX.com... -
Page 38: Setting Up Communications
Before you can begin using the Mach-DSP program, you must plug the special cable into both the computer’s USB port and the Mach-DSP servo. If you are using Windows VISTA or later, the driver will be automatically installed on your computer and the cable will be recognized virtually instantly. - Page 39 Mach-DSP User’s Manual This will show another window similar to that shown below. Click on the Port Settings tab, and then click on the Advanced button, which will display yet another window... Locate the Latency Timer setting. The default is 16, which is quite slow. Set this to either 1 or 2 to greatly improve performance.
- Page 40 Mach-DSP User’s Manual Once the cable is connected, you can start the Mach-DSP program, and then select the COM port that corresponds to the USB cable. (Note: With “legacy free PCs” that have been sold during the past decade, these PCs do not have native COM ports of their own.
- Page 41 Mach-DSP User’s Manual If you are in “Expert mode”, then the window will look different – allowing access to all of the servo parameters. Because adjusting servo parameters incorrectly could potentially damage the scanners, “Expert mode” is restricted to those customers who really need to be able to access and modify operational parameters.
-
Page 42: Menus, Toolbar, Status Area, And Control Parameters
The sections are described below. Menus and toolbar (top portion) of the Mach-DSP program Along the top of the Mach-DSP program you will find various menus and a toolbar. The toolbar allows for quick access to the built-in Oscilloscope, quick access to the Test Signal Generator, and (if you are in “Expert mode”) access to buttons that allow you to... - Page 43 Power Supply Status: When the colored block is green, this indicates that the external power supplies feeding the Mach-DSP as well as the internal power supplies (+/-15V and +3.3V) are receiving voltage sufficient to operate the servo successfully. When this...
- Page 44 Mach-DSP User’s Manual range. When the colored block is red, this indicates either that the scanner is not connected, or that there is an electrical fault with the scanner or the connecting cable. Scanner coil temp: This shows you an estimate of the scanner coil temperature.
- Page 45 Mach-DSP User’s Manual Adjustable parameters (right side) of the Mach-DSP program The entire right side of the Mach-DSP program has sliders and other user interface elements that allow you to control the behavior of the Mach-DSP servo. These controls are separated into sections on tabs. These tabs separate not only the functions, but also the user experience level expected to use the controls.
- Page 46 Mach-DSP User’s Manual Basic control parameters The controls that are found on the Basic tab are separated into three categories – those controls that adjust Command Input; those controls involved in Class 0 servo configurations; and those controls involved with Class 1 servo configurations.
- Page 47 Mach-DSP User’s Manual Input Command parameters In this section, you will find the parameters related to the input command signal. Input Source (analog or digital serial input) This selects whether the Input Command signal is derived from the 6-pin Analog Input connector, or the 8-pin header (with or without XY2-100 daughterboard) providing serial-digital command input, using either the XY2-100 protocol or FB4 protocol.
- Page 48 Mach-DSP User’s Manual In general, this controls the acceleration that the scanner will experience, therefore when greater speed is needed, this should be increased. Error-proportional (Servo) gain is used in PD, PID and PDFF servo configurations. Low Frequency Damping Gain This controls the amount of velocity (derived through differentiated position) that is fed into the summing node.
- Page 49 Position Proportional gains are all set to zero, the servo driver for that axis is disabled. This could be handy for running the Mach-DSP as a single-axis servo driver. When a single axis is disabled, the processor does not spend much time doing calculations for the disabled axis.
- Page 50 Mach-DSP User’s Manual Intermediate control parameters The controls that are found on the Intermediate tab are separated into several categories, including controls involved in Input command signal, position signal filtering, damping filtering, and power amplifier drive signal filtering. Note that there are more controls in the Intermediate section than in any other section.
- Page 51 Although typically this would be set to the same number as the “Slew rate for positive movements”, the slew rate limiter in the Mach-DSP servo driver allows separate values for positive and negative slopes, for special applications.
- Page 52 Mach-DSP User’s Manual Low Frequency Damping filter Within the Mach-DSP, low frequency damping provides gain over a Velocity term that is derived from differentiating the position signal. Differentiating an electrical signal essentially is a high-pass filter and thus, this tends to exacerbate noise in the system.
- Page 53 Mach-DSP User’s Manual For that reason, the Mach-DSP incorporates two separate filters, which may optionally be employed to control these resonances. Each filter may be bypassed (saving computational time) or may be selected as a single-pole low-pass, a two-pole low-pass, notch, or phase-lead filtering.
- Page 54 Normally these controls only need to be used when scanners are being assembled along with a Mach-DSP servo for the first time. Page 54 Document Number: MACH-DSP-9021...
- Page 55 This controls the amount of mechanical motion of the scanner to cause +10V to appear at the input of the Mach-DSP digitizer (and to appear on the test interface connector). For example, if this is set to 25.0, then a mechanical deflection of 25.0 degrees will create +10V DC on the digitizer.
- Page 56 Mach-DSP User’s Manual Note that once a servo fault is triggered, the Mach-DSP servo will shut down, and then go through a controlled startup sequence, which takes several seconds. Also note that these controls are related to the internal position signal (viewable on the built-in oscilloscope).
- Page 57 Viscous damping numbers between 1 and 20 are reasonable. Observer gain This sets the gain of the “rigid body observer” used in the Mach-DSP. When this is set to zero, then the observer is not used, and high-frequency velocity is derived simply as a result of integrating the coil current.
- Page 58 50 degrees C. If the coil temperature is allowed to exceed the maximum specified on the datasheet, permanent damage to the scanner may result. Because of this, the Mach-DSP servo includes a Coil Temperature Calculator, and systems to make sure that the coil temperature is not exceeded.
- Page 59 Mach-DSP User’s Manual to be exerted by the Mach-DSP. Therefore when the X-Y mount and environment are all well-known and controlled, or when input command waveform is never expected to cause scanner heating (for example, in laser marking or other small-signal applications), the first mode (Calculate by RMS current) should be chosen.
- Page 60 The Mach-DSP servo driver allows you to set the motor drive polarity, to accommodate right-handed or left-handed mirror orientation.
-
Page 61: Control-Related (Ttl Input And Output) Parameters
Mach-DSP User’s Manual Control-related (TTL Input and Output) parameters The controls that are found on the Control tab affect how the Mach-DSP responds to TTL Inputs, and how the Mach-DSP influences the TTL Outputs. The Mach-DSP includes two optically-isolated TTL Inputs, and two optically-isolated TTL Outputs found on the Status / Control connector (described in Table 3.3 of this... - Page 62 TTL Input being “Active” or “Inactive”. Action The Action specifies what the Mach-DSP will do when the TTL Input is in the condition described by Polarity. Possible actions are: Ignored (the TTL Input has no affect on the Mach-DSP)
- Page 63 “Condition” (described below). Condition The Condition specifies which signals and behaviors the Mach-DSP will be observing, before asserting of the respective TTL Output. Possible conditions are: Never (the TTL Output is placed in the opposite state specified by Polarity)
- Page 64 60 degrees for only a split second, and then it goes back down to 59 degrees. For safety reasons, you might want the Mach-DSP to continue to assert this condition for some number of seconds.
- Page 65 Likewise, since the TTL Outputs are delivered via optical isolators, these optical isolators do not conduct any current when power is not applied to the Mach-DSP. Therefore external machinery will not receive the correct signaling based on a non- powered Mach-DSP servo driver, possibly leading to an unsafe condition.
-
Page 66: Pangolin-Only Servo Parameters
Mach-DSP servo, and are generally not recommended to be adjusted by users. It is recommended that no changes be made to these controls without the input and advice of Pangolin. -
Page 67: Saving And Recalling Scanner Tunings From Memory And Files
Saving and recalling scanner tunings from memory and files All of the settings in the Mach-DSP servo driver described above can be saved to memory as well as a file on disk, for instant recall at power-up or at some point in the future. - Page 68 Mach-DSP User’s Manual Saving and recalling tunings from a file on disk In addition to being able to save up to four separate tunings in memory, all of the settings that make up a tuning can also be saved to a file on disk. This allows you to have a virtually infinite number of tunings, instantly accessible any time you want them.
-
Page 69: Test Signal Generator
Mach-DSP User’s Manual 8.0 Built-in Tools accessed using the program The Mach-DSP servo includes a variety of tools that are built in, which help to characterize and optimize performance. These tools can be found in the Tools menu in the Mach-DSP program. The tools are described below. Each tool occupies its own window. - Page 70 Mach-DSP User’s Manual The Test Signal Generator can generate sine-waves or square-waves (quadrature and in-phase) having a frequency from 1Hz to 500Hz. The amplitude of the Test Signal Generator is specified in hundredths of a degree, up to 40 degrees mechanical peak-to- peak (up to 80 degrees optical).
- Page 71 Mach-DSP servo loop. The window used to access the Oscilloscope is also used to direct signals to the user-defined analog outputs described in Chapter 3 of this manual.
- Page 72 Mach-DSP User’s Manual Configuring the Oscilloscope The Oscilloscope works like most modern digital oscilloscopes work today. The individual features are described below. Time-base The Oscilloscope features a time-base that can be used to view as little as 10 microseconds or as long as 100 milliseconds. The amount of time to be viewed can be selected using the drop-down list box found in the top-left of the Oscilloscope window (showing 50 microseconds per division in the picture above).
- Page 73 1 volt per division while another channel is showing 20 volts per division. The Oscilloscope found in the Mach-DSP does not offer a separate vertical sensitivity for each channel. Instead, signals of like-type are grouped together, and a single sensitivity is offered for all signals in a particular group.
-
Page 74: Dynamic Signal Analyzer
Mach-DSP User’s Manual Dynamic Signal Analyzer The Mach-DSP includes a Dynamic Signal Analyzer, which can be used to evaluate the spectral flatness and rolloff of a particular scanner tuning, as well as to locate the frequency and severity of torsional resonances. The Dynamic Signal Analyzer is accessed using the Tools menu as shown below. - Page 75 Mach-DSP User’s Manual Error Modifier (and other nonlinear correction tables) The Mach-DSP includes an Error Modifier, which can be used to progressively limit the amplitude of the Position Error signal, before it is fed to the Summing node. This helps to eliminate overshoot when squarewaves or unstructured commands are used as an input.
-
Page 76: Equipment Needed
Mach-DSP User’s Manual Tuning Instructions As described in section 7.7 of this manual, the Mach-DSP servo actually allows instant access to up to four separate scanner tunings, accessible from a menu in the Mach- DSP Servo Control Application. When a complete system is purchased (scanners, mirrors, mount, servo driver, and cables) the Mach-DSP should arrive already tuned at the Pangolin factory. - Page 77 Position Sensor AGC of each scanner. (This is because no scanners are currently connected…) On the Basic tab of the Mach-DSP program, set the Servo gain, Integrator gain, Position-Proportional gain, Low Frequency Damping and High Frequency Damping all to 0.
- Page 78 ScannerMAX mirror sets are designed to have the same inertia for both X and Y axis, adjusting both X and Y axis simultaneously is probably the best way to tune the system quickly.
- Page 79 Mach-DSP User’s Manual Increase the Low Frequency Damping control to eliminate the overshoot. At this point, the scanners should be scanning and you may adjust them in their mount, such that they are scanning toward the center of the projection surface.
- Page 80 Mach-DSP User’s Manual (You can get a better view by changing the time-base on the Oscilloscope to 50 microseconds per division and then zooming as shown below.) On the Oscilloscope, Select the Position Error signal for Channel C, and set the Error Scale Factor for 0.1 degrees per division.
- Page 81 Mach-DSP User’s Manual Continue to increase Servo Gain, Low Frequency Damping and High Frequency Damping, each one a little bit at a time, while keeping overshoot to a minimum and also while watching the Error signal (Oscilloscope Blue Trace C). The point at which the Error signal goes to zero (i.e.
- Page 82 Test Signal Generator until you have finally gotten to your intended maximum. Set the amplitude on the Test Signal Generator to 0, to allow external Command Input signals to control the Mach-DSP. Page 82 Document Number: MACH-DSP-9021...
-
Page 83: Going Beyond Pd - Adding Integration To Accomplish Pid Tuning
Figure 10.4: Without and with integration Above we have presented a figure that is intended to graphically represent Position Error signal, but this can also be seen using the Oscilloscope built-into the Mach-DSP program. Page 83 Document Number: MACH-DSP-9021... - Page 84 Mach-DSP User’s Manual Below you see a screen-shot from the Mach-DSP program. This screen shot was made after example rough PD tuning discussed in section 10.2. In this screen shot, the scanner is tuned for approximately 350 microsecond small steps (as can be seen with the blue arrow).
- Page 85 However, this problem can be largely solved by adding an additional servo term. To prepare to adjust that servo term, use the Oscilloscope in the Mach-DSP program, and set Channel D to show the Integrated Error, and set the Integrated Error scale factor to Once the Oscilloscope is setup as described above, adjust the Position-proportional gain to 5.
- Page 86 Mach-DSP User’s Manual similar to Servo Gain, and thus increasing any of these must be met with some increase of Low-Frequency Damping and High-Frequency Damping. Also note the Integrated Error trace shown above in green. For a squarewave input, ideally this should also be a squarewave – essentially having flat tops. If this is slanting upward or downward, it shows that integration must be increasing or decreasing over time to try to correct the mirror position.
- Page 87 Mach-DSP User’s Manual As was done in Step W above, you should re-check the large-signal performance after tuning for small signals. In the screen shot below, you will see that we have set the time-base for 500 microseconds per division, and set the Position Scale Factor, Error Scale Factor, and Integration Scale Factor as necessary to view a much larger waveform.
- Page 88 Mach-DSP User’s Manual Increasing the Anti-windup gain to a value that is too high will cause undershoot of the position, and long settling time. By carefully adjusting the anti-windup gain, the green trace can be made into a squarewave, which is desirable. Notice that there is still a small amount of overshoot present, as indicated by the Position Error signal.
-
Page 89: Careful Tuning Leads To Optimal Performance
Mach-DSP User’s Manual Careful tuning leads to optimal performance Within this section we will present three separate scanner tunings. All three scanner tunings use exactly the same Servo gain setting, and achieve critical damping (no overshoot). Two of the three tunings achieve the same step time (approximately 350 microseconds). - Page 90 Mach-DSP User’s Manual Adding a high amount of Integral and Position Proportional The screen shot below shows how we’ve taken the PD tuning from above, and added a tremendously high Error Integrator gain. To counterbalance the integrator and keep the servo loop stable, we’ve also added a tremendously high Position-proportional gain.
- Page 91 Indeed, it is possible to achieve critical damping with High Frequency Damping and Low Frequency Damping adjusted to levels far greater than are necessary. Tuning must be done carefully to achieve the optimal performance possible with ScannerMAX scanners and the Mach-DSP servo driver. Page 91 Document Number: MACH-DSP-9021 www.ScannerMAX.com...
-
Page 92: Pdf Configuration And Tuning
Mach-DSP User’s Manual PDF configuration and tuning With the PID tuning described above, the primary servo term responsible for accelerating the motor is the Proportional term – i.e. a term that is proportional to the error between the commanded position and actual position. The Integral term in PID tuning is only included to try to minimize the Position Error over time. - Page 93 Mach-DSP User’s Manual Continue to increase the Error Integral gain very slowly, until pronounced overshoot is seen. In this case we have increased Error Integral gain to only 5. Increase Position-proportional gain (instead of Low-Frequency Damping) to largely eliminate the pronounced overshoot seen above. With PDF tuning, you will find that the controls work in non-intuitive ways.
- Page 94 Mach-DSP User’s Manual Increase Low-Frequency Damping, and also Position-proportional gain to completely eliminate the overshoot. Continue increasing Error Integral gain, Low Frequency Damping, and Position- proportional gain to increase servo bandwidth and decrease step time. As was the case in step L of section 10.2 above, eventually you will reach a point where the...
- Page 95 Mach-DSP User’s Manual Increase the High Frequency Damping control to help eliminate the overshoot that could not be eliminated using Low Frequency Damping and Position-proportional gain alone. To decrease the step time (increase servo bandwidth), increase Error Integral gain, then use Position-proportional gain, Low-Frequency Damping and High-Frequency Damping to eliminate overshoots, as shown on the Oscilloscope.
- Page 96 RoHS and REACH Compliant: Yes RoHS and REACH Compliant: Yes Manufacturer/Brand Name ScannerMAX division of Pangolin Laser Systems, Inc. ScannerMAX division of Pangolin Laser Systems, Inc. ScannerMAX division of Pangolin Laser Systems, Inc. ScannerMAX division of Pangolin Laser Systems, Inc.
- Page 97 Mach-DSP User’s Manual 10.1 EU Declaration of Conformity 1. Product model: Mach-DSP 2. Name and address of the manufacturer or authorized representative: Manufacturerer: Pangolin Laser Systems, Inc. 9501 Satellite Boulevard, Suite 109 Orlando, Florida 32837 USA Phone: +1-407-299-2088 E-mail: contact@pangolin.com 3.
- Page 98 #1 best-selling book LASER SCANNERS: Technologies and Applications, written by Pangolin’s William R. Benner, Jr. www.LaserScanningBook.com. PATENT AND TRADEMARK INFORMATION ScannerMAX products are covered by one or more of the following patents: US Utility Patent Number: 7,092,135 US Utility Patent Number: 7,688,432...
Need help?
Do you have a question about the Mach-DSP and is the answer not in the manual?
Questions and answers