Advertisement
Quick Links
www.electricwingman.com
Builders guide – Kinetic Aerial Air-Ro
Safety First
Please build, fly and configure your drone safely. Moving propellers and mishandled
lithium batteries can cause serious damage to person and property. It is your
responsibility to operate safely when flying and handling your 'drone'!
Some related external resources (by no means exhaustive!): -
•
The Home of British FPV Racing
•
Dronesafe
Advertisement

Summary of Contents for Electricwingman Kinetic Aerial Air-Ro
- Page 1 Builders guide – Kinetic Aerial Air-Ro Safety First Please build, fly and configure your drone safely. Moving propellers and mishandled lithium batteries can cause serious damage to person and property. It is your responsibility to operate safely when flying and handling your ‘drone’! Some related external resources (by no means exhaustive!): - •...
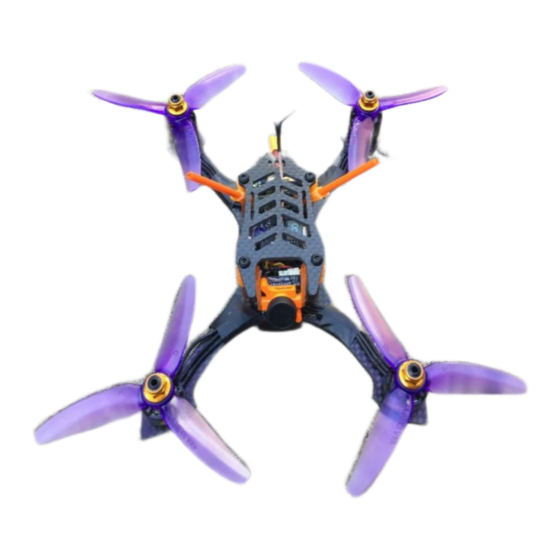
- Page 2 LiPo, suddenly you have added 60-80grams to the quad, don’t do it. Parts list Frame: Kinetic Aerial Air-Ro 3mm Flight Stack: HGLRC XJB F428 With TX20 VTX Motors: T-Motor F20ii 3750Kv Props: HQ 4x4.3x3V1S...
- Page 3 Tools: Soldering iron and solder, side trimmers, craft knife, hot glue gun, hex drivers, blue threadlock Other useful stuff: files and wet-and-dry paper, hot air gun, tweezers. Preparation and Dry Build The first thing to decide is if you want to chamfer the edges of the carbon parts. If...
- Page 4 The final piece of prep is the TX20 VTX has a large capacitor on it (a large black cube with the number 220 on it), this type of surface mount component has a nasty habit of falling off, so hot glue this to the board.
- Page 5 Fight controller: The Build I find it easiest to do the wiring in the following order: 1. First solder the XT30 pigtail and Capacitor leads to the underside of the 4in1 ESC board. 2. Trim the arms on the capacitor and solder the leads to it (not forgetting first to put heat shrink on the wires, once the capacitor is attached, push the heat shrink over the solder joins and shrink it.
- Page 6 7. Push the (Tinned) receiver wires through the holes in the receiver and solder. 8. Heat shrink the receiver 9. Solder the VTX wires to the flight controller 10. Push the (Tinned) VTX wires through the holes in the VTX and solder in place 11.
- Page 7 2. PROPS -never ever ever plug the LiPo in with props on when you are working on your quad. Quite aside from any damage to your equipment, this is likely to cause a very angry, sharp and fast moving set of blades to make contact with your face or hands and result in very serious injury.
- Page 8 Note if the flight controller will not go into DFU mode, connect to it (top right button), go to the CLI tab and type DFU and hit return, the flight controller will reboot into DFU mode and you can continue as above.
- Page 9 Scroll down, set the PID loop frequency to 4Khz, disable barometer if enabled and give the craft a name (this will be displayed on the OSD, it is common to use the pilot name) as shown below: Scroll down, set the receiver to serial based receiver and the serial receiver provider...
- Page 10 Scroll down, disable all features except OSD and dynamic filter as shown below and click on Save and reboot Once the Board reboots, reconnect and go to the failsafe tab, make sure stage 2 failsafe is enabled and set to drop (it should be by default but it is worth double...
- Page 11 If you have rebooted, reconnect and go to the PID tuning tab. The settings below are following a tuning, they will be quite close although may need a little tweaking as every build is a little different. The Tune is set up for 4S LiPos, on 3S a couple of points can be added to P term on pitch and roll.
- Page 12 Remaining on the PID tuning tab, click on Filter Settings Set the D-Term Lowpass filter to PT1 and set both Gyro Notch filter frequencies to 0 as shown below and click Save Go to the Receiver tab,...
- Page 13 Set the Channel map to TAER1234, if you are wanting to use RSSI on the OSD set the RSSI channel to 12. Because radios tend to vary a little I set 3 points on both RC deadband and yaw deadband as shown below. Click Save.
- Page 14 Go to the OSD tab and set up the items you want displayed (or disable the ones you don’t want) – not for new people, a busy OSD may be impressive but it will be distracting and lead to crashes. On the image of the screen drag and drop items to...
- Page 15 Go to the motor tab. Make sure the props are removed. Plug in the LiPo, Click the check box to confirm you have removed the props and enable motor control and raise the master slider slightly, this will start the motors spinning. Compare the direction they are spinning to the picture in the top left, if any of the motors are spinning in the wrong direction take a note of the motor number.
- Page 16 With the props still off, the flight controller still connected to the PC and the LiPo still plugged in start the BLHeli Chrome App: Click Connect: The following screen will appear. Click Read Setup The following screen will appear:...
- Page 17 If any of the motors were spinning in the wrong direction change the motor direction for that esc to reversed and when they are all set, click on Write Setup Flash all can be used to update BLHeli is necessary however currently the hardware ships with the latest version.
- Page 18 Final things Before flying for the first time (and regularly thereafter) test your failsafe (if you don’t you will have what is termed a “Flyaway” at some point where your quad departs like some homesick Mary Poppins and is never seen again.
- Page 19 www.electricwingman.com...
Need help?
Do you have a question about the Kinetic Aerial Air-Ro and is the answer not in the manual?
Questions and answers