Table of Contents
Advertisement
Quick Links
Advertisement
Table of Contents

Summary of Contents for Robots and Design Maxx DS200 Series
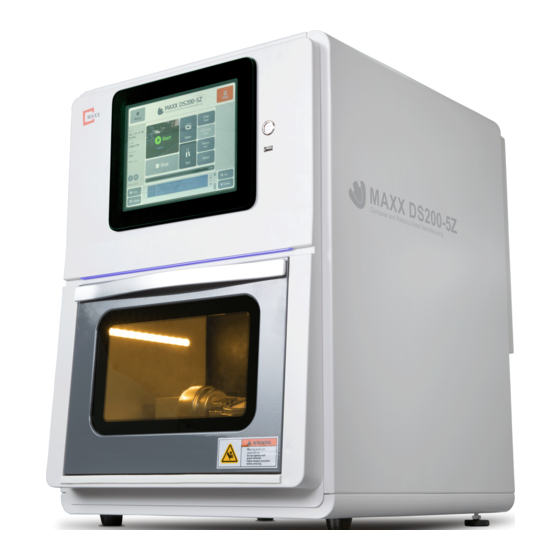
- Page 1 USER GUIDE MAXX DS200 series www.stomshop.pro...
- Page 2 Computer and Robotics Aided Manufacturing Copyright © 2016 Robots and Design Co., Ltd. This manual is used for MAXX DS200 series only. Please contact the address below for any questions. Address Pangyo-ro 700, E-707, Seongnam-City, Gyunggi-do, Korea 13516 Tel +82-31-708-2684 Fax...
-
Page 3: Table Of Contents
Computer and Robotics Aided Manufacturing CONTENTS 1. EPNC Installation ......................5 2. Description of EPNC ....................... 6 2.1 Initialization window ..................... 6 2.2 Main window ........................ 7 2.2.1 Functions of main window ..................8 2.2.1.1 Operational setting & EMO ................8 2.2.1.2 Machine status .................... - Page 4 Computer and Robotics Aided Manufacturing 3.2 Milling preparation ..................... 30 3.2.1 Mounting workpiece .................... 30 3.2.1.1 Disc type ...................... 30 3.2.1.2 Pin type ......................31 3.2.1.3 Pre-milled bar (R & D type) ................32 3.2.2 Tool ........................34 3.2.2.1 Tool specification ..................35 3.2.3 Starting NC file ....................
-
Page 5: Epnc Installation
Computer and Robotics Aided Manufacturing 1. EPNC Installation Program Installation To install the program, copy PNC folder. PNC folder is organized as below. ① <Bin> Folder <Bin> contains necessary DLL files to execute Pnc.exe and the program. Below is the description of main executable file and DLL. -
Page 6: Description Of Epnc
Computer and Robotics Aided Manufacturing 2. Description of EPNC 2.1 Initialization window Initializing window is shown as below. The machine can be initialized with only one button. Initial window of EPNC EPNC starts initializing when “HOME” is clicked. The window flashes for about 15 seconds while initializing. It stops initializing when “STOP”... -
Page 7: Main Window
Computer and Robotics Aided Manufacturing 2.2 Main window Once initialization is completed, main window will appear. Name of machine is written at the top and commonly used functions are shown on the main window. www.stomshop.pro... -
Page 8: Functions Of Main Window
Computer and Robotics Aided Manufacturing 2.2.1 Functions of main window 2.2.1.1 Operational setting & EMO Function of setup and EMO is as below. General setting and changing offset values - Refer to p.14 Setup EMO (Emergency) Button - For immediate stop - Emergency stop for hardware. -
Page 9: Machine Status
Computer and Robotics Aided Manufacturing 2.2.1.2 Machine status It shows machine’s status and activated condition. Tool - Overall information of tool that is clamped. - Tool number and work hour is shown in [hour : minute : second]. Spindle RPM - Number of spin of spindle per minute (Max: 60,000). -
Page 10: Commonly Used Functions
Computer and Robotics Aided Manufacturing 2.2.1.3 Commonly used functions Below is commonly used functions that are essential in operating the machine. Start - Starting NC file. - Once clicked, it changes to “PAUSE”. Stop - It is activated after starting NC file. - Stopping NC file. - Page 11 Computer and Robotics Aided Manufacturing Cleaning Mode DS200-5Z To clean floor of milling room. It is recommended to use with brush to dust inside of milling room. DS200-4W / 4WA To operate coolant for cleaning. Connect cleaning hose to spread coolant in milling room. Be careful not to spread it to bellows behind spindle.
-
Page 12: Nc File
Computer and Robotics Aided Manufacturing 2.2.1.4 NC File Displays information related to NC file and each functions are as shown below. ③ ④ ① ② ① Select file ② Milling start time / milling time ③ NC file name ④ NC file size ⑤... - Page 13 Computer and Robotics Aided Manufacturing Move NC file It is to change order of NC files. “Up” moves selected files upwards. “Down” moves selected files downwards. ☞ Compatible USB Below is a list of USB that are compatible with the machine OS, Microsoft Embedded CE6.0. 1) FAT16 2) FAT32 3) exFAT...
-
Page 14: Setup
Computer and Robotics Aided Manufacturing 2.3 Setup 2.3.1 Entering setup Enter password to enter setup window. 1) User P/W -> ENT (User mode) 2) Manager P/W -> ENT (Manager mode) 3) RND P/W (100321) -> ENT (RND mode) Click to not enter password when re-entering setup www.stomshop.pro... -
Page 15: Teaching
Computer and Robotics Aided Manufacturing 2.3.2 Teaching 2.3.2.1 Functions of teaching ① ② ③ ① Coordinate and offset display. Coordinate offset, teaching point and option. ② Axis jog and jog shortcut button. ③ Opening and saving changed values. • Download to Controller – save changed coordinates to controller. •... -
Page 16: Coordinate Offset & Teaching Point
Computer and Robotics Aided Manufacturing 2.3.2.2 Coordinate offset & Teaching point To change and save coordinate offset for each axis and tool position. Coordinate Offset Displays coordinates for each position. Name Description Remarks Motor coordinates. Coordinates for each axis is based on motor’s origin. G54-59 Work coordinates www.stomshop.pro... - Page 17 Computer and Robotics Aided Manufacturing Teaching Point To manage coordinates related to machine operation. Name Description Remarks Tool1-8 Position of tool 1-8 Ready Position Coordinates indicating preset position of spindle Coordinates for tool to move in fast speed to tool Tool Sensing Up sensor Tool Sensing Down...
- Page 18 Computer and Robotics Aided Manufacturing 2.3.2.3 Option To manage option data. Option Description Remarks Distance between probing sensor (tool length adjustment ZAxis Offset Origin sensor) and milling origin in millimeter. Tool Sensing High Speed Highest speed in sensing Tool Sensing Low Speed Lowest speed in sensing Tool Sensing Margin Acceptable range in tool length before and after milling.
-
Page 19: Jog
Computer and Robotics Aided Manufacturing 2.3.2.4 Jog To move motor by using jog buttons. - Displays coordinates being used (coordinates based on motor) 0.000 - Indicates current coordinates of each axis + - (Symbol) Limit for each axis is shown (indicates direction) It is indicated as + + - changes into red when it reaches the limit. - Page 20 Computer and Robotics Aided Manufacturing G53~G54 - To select coordinates Spindle Clamp / Unclamp - To open/close spindle collet - To operate vacuum or pump required for dry/wet milling. SRV-OFF - Servo motor off ▲ 100% ▼ - To control moving speed of jog (Max. 100%) Move XY.
-
Page 21: Auto Calibration
Computer and Robotics Aided Manufacturing 2.3.2.5 Auto Calibration (*Refer to 4.3.4 Auto Calibration) To calibrate the machine using calibration disc. It takes about 40 minutes to complete automatic calibration. www.stomshop.pro... -
Page 22: Tool
Computer and Robotics Aided Manufacturing 2.3.3 Tool To check overall information related tool. It is to manage tool usage. As shown above, it displays the maximum work time and current work time for each tool in “hour:minute:second” format and its usage in %. If work time for each milling is entered in minutes, it can estimate total number of milling. - Page 23 Computer and Robotics Aided Manufacturing • Maximum usage of tool When maximum work time is set to be 100 and maximum usage to be 90, user will receive warning to change the tool after 90 hours. • Activating maximum usage function of tool “M710 Macro”...
-
Page 24: Term
Computer and Robotics Aided Manufacturing 2.3.4 Term To operate the machine with G-code and M-code. www.stomshop.pro... - Page 25 Computer and Robotics Aided Manufacturing 2.3.5 Option To activate/deactivate functions of machines. Option Description Remarks Using. External Buttons And To activate external buttons (DM110 series). Door Open Sensor To stop milling when door is open. Using. Air Pressure Limit To set air pressure limitation. Using Automatically To not use purge air when the machine is stopped.
- Page 26 Computer and Robotics Aided Manufacturing If the tool error occurred Option Description Remarks Stop Stop Restart from tool changed line Restart from tool replacing line before error Restart From Beginning Restart from beginning Start next nc-file Start next NC file Require user’s confimration before restart of file.
-
Page 27: I/O
Computer and Robotics Aided Manufacturing 2.3.6 I/O I/O (Input / Output unit) Input : “ v “ appears when sensor is detected. Output : “ v “ appears when there is port output. www.stomshop.pro... -
Page 28: Log
Computer and Robotics Aided Manufacturing 2.3.7 Log It is records of machine operation. Log is used to investigate error. Option Description Remarks Refresh Refresh log tlist Select All Select all list Unselect All Unselect all list Copy to USB Copy log file to USB File type Description Remarks... -
Page 29: System
Computer and Robotics Aided Manufacturing 2.3.8 System To check general setting and software information. S/W version Soft-Limit Limitation for each axis *Do not change without manufacturer’s confirmation Spindle Information Spindle running time Change Controller I/P To change IP address of controller, I/O board and embedded PC and set Maxx Link port setting. -
Page 30: Milling
Computer and Robotics Aided Manufacturing 3. Milling 3.1 Machine power Switch on the machines power switch at the back. 3.2 Milling preparation 3.2.1 Mounting workpiece 3.2.1.1 Disc type (98Φ, step type) ① Mount disc material on disc holder. ② Check the alignment of the workpiece and fix the cover by rotating it in clock wise. ①... -
Page 31: Pin Type
Computer and Robotics Aided Manufacturing 3.2.1.2 Pin type ① Unscrew bolts of holder (use 3Φ wrench). ② Check female and male of material and put it into a hole. ③ Screw a bolt and mount it to DS200 jig. ④ Check if it is mounted correctly and screw 2 bolts tightly. www.stomshop.pro... -
Page 32: Pre-Milled Bar (R & D Type)
Computer and Robotics Aided Manufacturing 3.2.1.3 Pre-milled bar (R & D type) D Type D-type does not require extra jig. ① Insert a round bar to the desired section of the jig. ② Screw the rear pulling bolt to hold the round bar. However, leave around 1mm of room between the jig and the bar. - Page 33 Computer and Robotics Aided Manufacturing R Type R Type takes more time to be mounted and to select jig. However, it can create more precise result without connector and short post-cleaning process. ① Tighten the screw using the same torque wrench until the round bar does not move. ②...
-
Page 34: Tool
Computer and Robotics Aided Manufacturing 3.2.2 Tool Tool number and M-code is shown as below. Tool # M-Code M140 M141 M142 M143 M144 M145 M146 M147 www.stomshop.pro... -
Page 35: Tool Specification
Computer and Robotics Aided Manufacturing 3.2.2.1 Tool specification Please refer to tool specification for DS200 series as below. It is highly recommended to use tools provided from manufacturer otherwise milling quality cannot be guaranteed. Coating Shank Diameter Milling length Total length 20mm 18mm ZIRCONIA... -
Page 36: Maintenance
Computer and Robotics Aided Manufacturing 4. Maintenance 4.1 Maintenance precautions <Caution> Be careful around the milling tool. The milling tool is sharp. Broken milling tool is dangerous. Use cautiously to avoid injury. This machine is a precision instrument. Perform day-to-day management and maintenance. ... -
Page 37: Daily Maintenance
Computer and Robotics Aided Manufacturing 4.2 Daily maintenance 4.2.1 Cleaning Do not use the air blower. This machine is not compatible with an air blower. Milling waste in the machine can cause fire or an electrical accident. Do not use solvents such as gasoline, alcohol, thinner, in order to perform a warning to clean. -
Page 38: Dummy Tool
Computer and Robotics Aided Manufacturing 4.2.2 Dummy tool Preserve the machine with dummy tool inserted. To prevent oil left in spindle collet to become solid To prevent particles to go inside spindle. Dummy Tool 삽입 How to insert dummy tool ①... -
Page 39: Periodical Maintenance
Computer and Robotics Aided Manufacturing 4.3 Periodic maintenance Periodic maintenance to ensure full performance of the machine. Interval Scope of maintenance Check coolant nozzles and clean Check filter regulators and clean Check that the suction bellows are working properly. Weekly Clean the Spindle collet in accordance with these Operating procedures. -
Page 40: Replacing Consumable Parts
Computer and Robotics Aided Manufacturing 4.3.1 Replacing consumable parts Replacing tool pockets *Replace tool pocket when: Inclination occurs with tool stored inside Tool pocket becomes loose Push Limit Error occurs frequently even though tool teaching is performed ①... -
Page 41: Spindle Warm-Up
Computer and Robotics Aided Manufacturing 4.3.2 Spindle warm-up To stabilize the spin of spindle, spindle warm-up is needed. When to perform spindle warm-up After installing the machine When the spindle units are replaced. When the machine was not used for a prolonged period ... - Page 42 Computer and Robotics Aided Manufacturing 2. Enter RPM and click “SEND” ② ① ③ 3. Check RPM in “Tool” and click “Get Tool #1” then “Spindle Run” www.stomshop.pro...
- Page 43 Computer and Robotics Aided Manufacturing Spindle warm-up schedule ① Commission the spindle by running it with a tool fitted (no machining) for approximately 10 minutes. ② The maximum speed is 20% of the rated speed of the spindle. ③ Allow the spindle to run for approximately 2 minutes at a maximum of 50% of its rated speed. ④...
-
Page 44: Spindle Cleaning
Computer and Robotics Aided Manufacturing 4.3.3 Spindle cleaning Daily cleaning and maintenance To ensure that the spindle functions safety and accurately, all contact surfaces of the spindle, the mount for the spindle, the tool mount and the tool holder must be clean. Before beginning work each day, check that all surfaces have been thoroughly cleaned and are free of dust, grease, coolant, residue from precious operations and metal particles and that there is no visible damage. -
Page 45: Auto Calibration
Computer and Robotics Aided Manufacturing 4.3.4 Auto Calibration Aim of calibration Process to match coordinates of milling machine and operation coordinates. Type of calibration Auto calibration Measure origin position using 98Φ Calibration Disk Measure D-Type abutment coordinates (3) Multi Origin Auto Teaching Measure R-Type abutment coordinates (3) ATC Auto teaching Measure ATC Tool Pocket coordinates... - Page 46 Computer and Robotics Aided Manufacturing ③ Auto Calibration: Setup > Teaching > Auto Calibration Check before start Disk Thickness: enter calibration disk thickness Tool_Diameter: enter calibration tool diameter Too_Number: enter tool pocket number for calibration tool **Click Name and double click on value to enter number ...
- Page 47 Computer and Robotics Aided Manufacturing After connecting calibration cable, “V” will appear at touch signal on/off as below. “V” should only appear when calibration cable magnet is touching calibration disc. ④ “Calibration completed” window will appear when it is completed. ...
- Page 48 Computer and Robotics Aided Manufacturing 2. Multi Origin Auto Teaching (*DS200-4W / 4WA) <D-type> ① Mount D-type pre-milled bar *refer to [3.2.1.3 Pre-milled bar] ② Put calibration tool *refer to [4.3.4 Auto calibration] ③ Auto Teaching: Setup > Multi Origin > Auto Teaching ④...
- Page 49 Computer and Robotics Aided Manufacturing Check before start D-type uses G57 [Multi] Check calibration position #1~#5 Disk_Thickness: enter calibration disc thickness Tool_Diameter: enter calibration tool diameter Tool_Number: enter tool pocket number for calibration tool **Click Name and double click on value to enter number ...
- Page 50 Computer and Robotics Aided Manufacturing <R-type> ① Mount R-type pre-milled bar *refer to [3.2.1.3 Pre-milled bar] ② Put calibration tool*refer to [Auto Calibration] ③ Auto Teaching: Setup > Multi Origin > Auto Teaching ④ Start menu Select coordinate R-type uses G56 [Analog] Number of Select pre-milled bar position.
- Page 51 Computer and Robotics Aided Manufacturing 3. ATC Auto Teaching To automatically perform teaching of tool pocket X and Y coordinates. Setup > Teaching > Teaching Point > Auto Teaching ① Auto teaching Check before start Tool_Diameter: enter calibration tool diameter ...
-
Page 52: Collet Tightening
Computer and Robotics Aided Manufacturing 4.3.5 Collet tightening Milling will cause the collet to become loose, making milling bur to fall out easily. Collet must be retightened periodically. Interval Once a month, or when the total work time of the spindle exceeds 200 hours (with slight variation depending on the work situation) Procedure *refer to 4.2.2 Dummy Tool After installing milling tool, use spanner (spindle maintenance kit) to tighten the collet in anti-clockwise. -
Page 53: Trouble Shooting
Computer and Robotics Aided Manufacturing 5. Trouble shooting 5.1 Restart milling How to restart the machine when it was stopped due to an error ① Stopped during milling ② After error reset, click “START” ③ A window requesting for restart method appears Start Line Selected NC-file Ex) 7 = 7th NC code line no. - Page 54 Computer and Robotics Aided Manufacturing *Restarting when tool broken error occurs during milling For example) After milling Φ2, the machine successfully performed tool change from Φ2 to Φ1 but Φ 1 break during milling and “tool broken” error occurs at the return of the tool. ☞...
- Page 55 Computer and Robotics Aided Manufacturing www.stomshop.pro...
-
Page 56: Air Pressure Sensor Setting
Computer and Robotics Aided Manufacturing 5.2 Air pressure sensor setting Please follow below instruction to pneumatic sensor. ① Press for 3 seconds. ② Press once. ③ Press three times. ④ Set value to 0.500 by pressing www.stomshop.pro... - Page 57 Computer and Robotics Aided Manufacturing ⑤ Press once to move to next step. ⑥ Set value to 0.000 by pressing ⑦ Press twice to go back to ③. ⑧ Press for 3 seconds to go back to initial screen ①. *SMC –...
-
Page 58: Removing Atc Push Limit
Computer and Robotics Aided Manufacturing 5.3 Removing ATC push limit When performing Tool Get and Put, an error can occur due to many reasons that makes spindle to push ATC. ① Close Error message ② Move spindle manual that is pushing ATC **How to move Z-axis (vertical direction of spindle) Setup >...
Need help?
Do you have a question about the Maxx DS200 Series and is the answer not in the manual?
Questions and answers