Advertisement
Quick Links
Advertisement

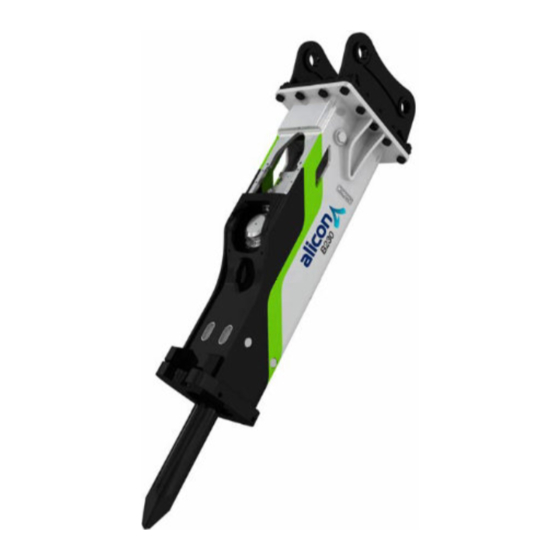
Summary of Contents for Alicon B10
- Page 1 CARE & OPERATION (MAY’13)
- Page 2 INDEX Description Page No. T CLAMP WELDING PROCEDURE ROCK BREAKER MAINTENANCE SCHEDULE GREASING PROCEDURE ROCK BREAKER BREATHER HYDRAULIC OIL FLUSHING PROCEDURE FRONT HOSES INSTALLATION PROCEDURE 7 - 8 THROUGH BOLTS TORQUING PERMISSIBLE WEAR LIMITS GAS CHARGING PROCEDURE 12-15 OPERATION –DOs AND DON'Ts 16 - 21 LONG STORAGE OF BREAKER ASSY..
- Page 3 (all models) T CLAMP WELDING PROCEDURE Similar gap between the edges to be maintained while welding bracket for Solenoid...
- Page 4 ROCK BREAKER MAINTENANCE Item Commissio 1000 ning Greasing -Chisel ,Chisel Pin Air Valve Cleaning Flushing of oil Oil Leakage - Checking Through Bolt Torque Checking - Loosening Gas Pr. Checking Chisel pin wear checking & Face changing Wear limit checking between Chisel &...
-
Page 5: Greasing Procedure
3) When the Breaker is equipped with a new chisel apply the grease first and then mount the same. Insufficient lubrication to the chisel shortens the life of front cover, chisel pins and chisel. 5) Grade of grease: lithian EP2. B10, B20, B140, B210, B300,... - Page 6 ROCK BREAKER BREATHER Location : Air breather assembly is provided on the head cap. Function / Purpose: The air breather allows free passage of air through it and sends to front head chamber during the operation of rock breaker. The fresh air ejects dust particles outside of front head thereby preventing contaminants to enter the Impact chamber.
- Page 7 HYDRAULIC OIL FLUSING PROCEDURE When Required ? 1) Flushing needs to be carried out during installation of the New rock breaker. 2) Flushing needs to be carried out every time when Rock breaker is installed after removal of the bucket.
- Page 8 FRONT HOSES INSTALLATION PROCEDURE 1. Close both stop valves 2. Mount breaker onto the excavator 3. Install both hoses on breaker to ensure no twisting at the crimp joint. After using hand, you can use spanner with proper torque...
- Page 9 WRONG RIGHT 4. Open both stop valves 5. Start the operation...
- Page 10 THROUGH BOLTS TORQUING 1. Step-1: Apply 90 kgf-m to T/Bolt of the Breaker. 2. After giving 90 kgf-m torque to T/Bolt, rotate in degree (°) clock wise as per given step-2 to achieve specified torque. 3. After torque -- Put indication mark on the T/Bolt nut and Head Cap so that the loosening of T/bolt in due course can be checked through the Window in the Bracket assy.
- Page 11 Permissible wear limits of Front cover bush –Between ID of Front cover and Chisel- When the increase in clearance between the chisel and front cover bush beyond specified values, It is strongly recommended to replace Front Cover Bush & Thrust Ring. Exceeding wear limits value may damage other component parts such as -- 1) Piston and Cylinder scoring 2) Chisel breakage...
- Page 12 Head Cap--Gas charging procedure Head Cap Pressure Table :- Rock Breaker Model B140 B210 B230 B360 B450 Head Cap Gas Pressure (Kg/Cm2)
- Page 14 Accumulator--- Gas charging procedure Accumulator Pressure Table :- Rock Breaker Model B230 B250 B300 B360 B450 Accumulator Gas Pressure Kg/Cm2)
- Page 16 Rock Breaker Operation Method 1) Proper thrust: - To break effectively, a proper thrust force has to be applied to the breaker. If a thrust Is insufficient, the hammering energy of the piston will not be sufficient for breaking rocks. The hammering force is transferred to the breaker body, arm and boom of the base machine as a result damages the structure of the machine.
- Page 17 Precaution during operation:- A) Stop the operation as soon as the hoses vibrate excessively. Check to see if the high and low pressure hoses of the breaker vibrate excessively. If so, the accumulator may be defective. B) Visually inspect whether there is a surplus of tool appearance, during operation as illustrated.
- Page 18 E) Do not use the chisel tool as a lever.- When a rock is broken by using the tool as a lever , the bolts and Chisel may be broken. F) Do not continue to hammer for more than 30 seconds on a same point. When rocks are hard, do not hammer the same place for such a long time to exceed one minute but change the point to be hammered.
- Page 19 Do not operate the breaker in water and mud. If not, the piston or the similar components may be rusted to result in the permanently damaged breaker. In case of operation in or under the water, buy underwater operation kit separately . J) Do not hammer with the cylinders extended to the end of stroke .When a rock is broken with base machine cylinder moved to the end, (the cylinder extended or retracted fully), the cylinder and each part of the base machine may be damaged.
- Page 20 M) Warm up the base machine engine from five to twenty minutes and then operate the ℃ breaker.. At temperatures below minus 20 , the hydraulic oil must be warmed up before operating. The hydraulic breaker and excavator do not begin to perform at full capacity ℃...
- Page 21 S) Never drive chisel into the material If the advance is too much and the breaker is not rocked to release the dust, chisel will be driven into the material, causing the tip to glow red hot and become soft. T) If water penetrates the percussion chamber of the hydraulic breaker, a pressure wave builds up with each stroke which will damage the stripper and the seals of the breaker and cause the lower part of the piston to rust.
Need help?
Do you have a question about the B10 and is the answer not in the manual?
Questions and answers