
Summary of Contents for Industrial Flow Solutions Stancor S Series
- Page 1 _____________________________________________________________________________________________________________________ Installation, Operation and Maintenance Manual Stancor™ S & P Series Dewatering Pumps EI-700-001 Rev --...
-
Page 2: Table Of Contents
Table of Contents Safety Guidelines: Description: Versions: Capacity: Motor Protection: Power Supply Cable*: Application: Temperature of Water: Depth of submersion: Material Specifications: Principle of Operation: Handling: Location: In Cold Weather: Cleaning: Storage: Accessories: Operation: Electrical Connections: How to Change Voltage Connections: Before starting: Checking Direction of Motor Rotation: Pump installation:... -
Page 3: Safety Guidelines
Safety Guidelines: DO NOT USE TO PUMP FLAMMABLE OR EXPLOSIVE FLUIDS SUCH AS GASOLINE, FUEL This instruction manual provides you with the OIL, KEROSENE, ETC. FAILURE TO FOLLOW THIS WARNING CAN information required to safely own and operate your product. RESULT IN PERSONAL INJURY, DEATH AND/OR Retain these instructions for future reference. -
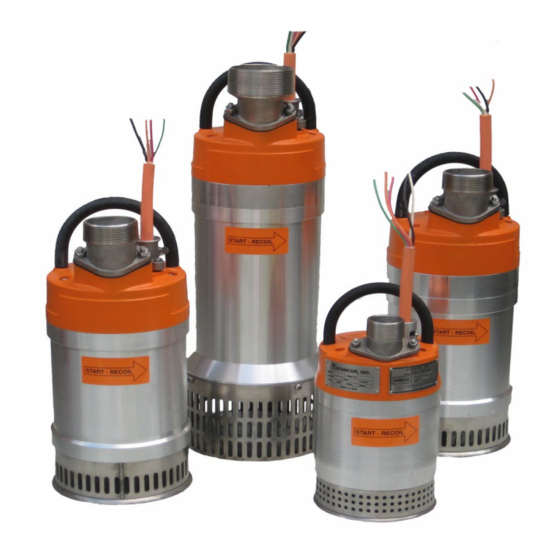
Page 4: Description
Description: Application: Clear or abrasive laden water. The “P”, “S” and “SX” series are submersible electric, centrifugal pumps. They are manufactured to be Temperature of Water: rugged, portable, and easily moved by two men or a small truck crane. The seal housing contains Temperature of water pumped should not exceed lubrication oil for the mechanical seals. -
Page 5: Cleaning
Cleaning: Protection against corrosion/erosion The pumps can be equipped with zinc anodes to Thoroughly flush the pump with clear water if it prevent galvanic corrosion when used in brackish or has been pumping clay, cement, or abrasive laden salt water. The protection adds considerably to the water. -
Page 6: Before Starting
Before starting: Checking Direction of Motor Rotation: Check that the oil is clean and at the specified level. Suspend, tilt or lay down the pump and start it. When it starts a heavy kick should be felt and seen Remove the fuses or open the circuit breaker and in a counterclockwise direction (direction of arrow check that the impeller can be rotated by hand. -
Page 7: Care And Maintenance
Care and Maintenance: This requires special tools and should be done by an authorized service facility. Before starting work on the pump, make sure that the pump is isolated from the power supply and When the pump is new or when the seals have been cannot be energized. -
Page 8: Troubleshooting
Troubleshooting: Routine Overhaul: General Check: Seal Housing Oil: Pump won't start If the pump or the pump shaft seals are new the seals should be inspected after two weeks of Cause may be: continuous operation. Power failure (zero-line voltage) or incorrect line voltage Then check the seals every second month if the Blown fuse or circuit breaker... -
Page 9: Check Of Insulation, Motor Resistance
Check of Insulation, Motor Resistance: Bearing Lubrication: In conjunction with an overhaul, the insulation Upper Bearings resistance of the stator windings should be checked. All pump models’ upper bearings are sealed Remove connection cover (10) and disconnect stator bearings and do not require maintenance. leads from the contactor assembly and terminal. -
Page 10: Power Supply Cable Replacement
Power Supply Cable Replacement: If the cable has been damaged it must immediately be replaced. The cable is reconnected in the following way: Loosen and remove screws (52) and remove cable clamp (7). Remove screws (154) Remove screws (45) and lift off connection cover (l0). Pull out the cable from connection cover and cable entry (6). -
Page 11: Wear Parts Replacement High Volume
Wear parts replacement high volume: One-piece diffuser and wear plate: Two piece diffuser and wear plate: Disassembly: Place the pump on a bench with the strainer Disassembly: outward. Loosen nuts (23) holding strainer (14). Pull Place the pump on a bench with the strainer outward. off strainer and remove washers (108) as well as Loosen nuts (23) holding strainer (14). -
Page 12: Wear Parts Replacement High Head
Wear Parts Replacement High Head: lower impeller off the shaft, being careful to save the key (164). Single impeller versions: Remove lower impeller disc (109) by removing the four Allen head bolts (96) and corresponding lock washers (96A). Remove the impeller spacer (83) Disassembly: from the shaft and any shims/washers (54) and (57) Place the pump on a bench with the strainer outward. - Page 13 impeller should be about .012" (0.30 mm). Mount lower diffuser (13) on studs (41). Put washers Tighten the nuts using the two 19 mm wrenches and (54) and inner nuts (53) on these screws. Tighten hold the inner nuts in a firm grip while the outer ones the nuts crosswise gradually so that the lower are tightened.
- Page 14 CARE SHOULD BE USED WHEN SETTING IMPELLER CLEARANCES! PUMP PERFORMANCE CAN BE DRASTICALLY ALTERED IF TOLERANCES ARE NOT ADHERED EXCESSIVE CONTACT BETWEEN IMPELLER AND DIFFUSER WILL LEAD TO PREMATURE WEAR AND/OR HIGH AMP DRAW! AFTER COMPLETION OF ANY SERVICE PROCEDURE THE PUMP SHOULD BE TESTED FOR ELECTRICAL AND HYDRAULIC PERFORMANCE IN COMPLIANCE WITH FACTORY STANDARD SPECIFICATIONS.
-
Page 15: Appendices
Appendices: List of Parts: S150 DS-A18-023 S500 HH & HV DS-A18-024 S750 HH & HV DS-A18-025 S1000 HH & HV DS-A18-063 S1500 HH & HV DS-A18-067 S2000 HH & HV DS-A18-066 S3000 HH & HV DS-A18-064 S4500 HH & HV DS-A18-065 S6000 HV DS-A18-071... -
Page 16: Appendices
Appendices: Technical Data: S150 DS-A18-001 S500 HH & HV DS-A18-006 S750 HH & HV DS-A18-011 S1000 HH & HV DS-A18-017 S1500 HH & HV DS-A18-051 S2000 HH & HV DS-A18-052 S3000 HH & HV DS-A18-029 S4500 HH & HV DS-A18-053 S6000 HV DS-A18-072 S6000 HH &... -
Page 17: Notes
Notes Industrial Flow Solutions Operating, LLC • 104 John W Murphy Drive, New Haven, CT 06513, USA • 860-399-5937 • www.flowsolutions.com Stancor™ is a trademark of Industrial Flow Solutions Operating, LLC. All rights reserved.
Need help?
Do you have a question about the Stancor S Series and is the answer not in the manual?
Questions and answers