Table of Contents
Advertisement
Quick Links
Dual Bay NaS-Server
MaNual
After Sales Support
Congratulations on purchasing this Dual bay NAS server
With the purchase of this unit you get a storage unit for pictures, music, video and other
files that needs safe keeping. In addition to this you also get a dedicated helpline and web
support solution for your convenience.
Website: www.unisupport.net
Advertisement
Table of Contents

Related Manuals for ALDI P50696

Summary of Contents for ALDI P50696
- Page 1 Dual Bay NaS-Server MaNual After Sales Support Congratulations on purchasing this Dual bay NAS server With the purchase of this unit you get a storage unit for pictures, music, video and other files that needs safe keeping. In addition to this you also get a dedicated helpline and web support solution for your convenience.
-
Page 2: Table Of Contents
1. Hardware Overview ..............................3 1.1 Power ..................................3 1.2 Ports ..................................3 1.3 Buttons ................................. 4 1.4 LED’s ..................................4 2. Installation ..................................5 3. Windows Tool ................................11 3.1 Quick Setup Wizard ............................11 3.1.1 Refresh List ............................11 3.1.2 Access via Web ..........................12 3.1.3 Setup wizard............................. -
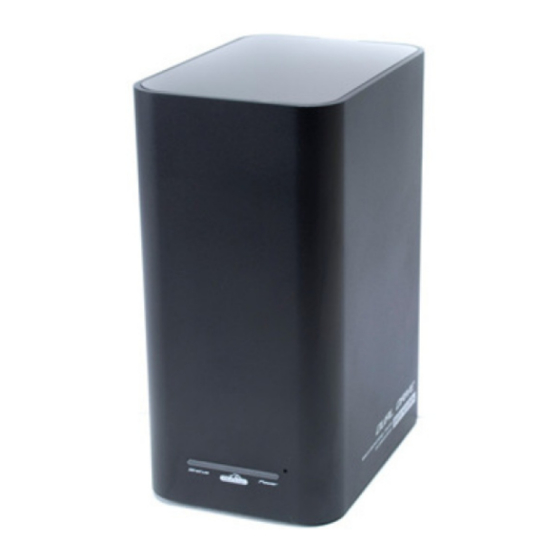
Page 3: Hardware Overview
1. Hardware Overview Power LED* Status LED Switch 1.1 Power The unit uses an external power adapter (12V DC, Maximum 4 Amps, 100-240V AC, 50-60Hz) *the power LED is only a LED not a button. 1.2 Ports LAN Port One Gigabit RJ45 Ethernet port. This connects to your router or switch via Ethernet cable. -
Page 4: Buttons
1.3 Buttons Item Description Power ON/OFF switch Press this switch to turn on or off the NAS server on the backside. Copy data from the connected USB device into the One-Touch Copy button USB device (Flash “public” folder of NAS server hard disk (it does not or External hard matter which USB port is used). -
Page 5: Installation
*Please Note: The 1st Hard Drive is defined as the NAS server drive as the NAS server system is installed on this drive. The 2nd Hard Drive is data storage only as not NAS server system is installed on this drive. - Page 6 HDD Holder Assembly Hard drives are to be mounted into the HDD Holder *this is an illustration of an assembly by user HDD mounted in HDD Holder, this is the combined product of items 3,4 and 5 Hard drive holder assembly PLEASE NOTE THAT IF ONLY 1 HARD DRIVE IS USED, PLACE IT INTO THE HOLDER AT THE RIGHT SIDE WHEN LOOKING AT THE FRONT OF THE NAS SERVER, OTHERWISE SETTINGS CANNOT BE STORED...
- Page 7 4. Install the Cover 1 (1 piece) and whole assembly is complete. • After the Hard Disk Drives are installed as per step 1 to 4, connect the network cable to LAN port of the NAS server. A typical network setup consists of computers and the NAS server connected to a router. • Connect the power to the NAS server, then press the Power ON/OFF button at the back of the NAS server to turn on the NAS server. Please note that the system boot up will take around 1 minute.
- Page 8 • Please check if the HDD is detected on the list of “USB Information”. After this click on the “Access via web” button and the below window will be shown. Pxxxxx...
- Page 9 • To install the NAS server features, click the “Browse” button and select to install NAS server features by selecting the image file “new_firmware.bin” from the folder FW release that is located on the CD-ROM that came with the NAS server. • Select the HDD and the file system which is going to be formatted. Pxxxxx...
- Page 10 • Click “Start now” to install and format the HDD, please note that it may be necessary to confirm the format and installation by clicking OK in a popup window. • Run the Windows utility “NetTool” to discover to the NAS server again. • Click on the button “access via web” and enter user name and password to enter the web GUI. The default values are admin/admin. Notes: • When the Blue LED is constant blue the boot up completed. • Press the Power ON/OFF switch to the “OFF” position to turn off the NAS server. Pxxxxx...
-
Page 11: Windows Tool
3. Windows Tool 3.1 Quick Setup Wizard This tool gives the possibility to search for every device on the network and show some informa- tion about the NAS server, it also gives the possibility to access the NAS server web page and to change the settings of the device such as description, time zone, date, time, IP etc. -
Page 12: Access Via Web
3.1.2 access via Web This function will link to the webpage of the chosen device. 3.1.3 Setup wizard To access the setup wizard the admin password needs to be entered. Default name is: admin, default password is: admin Step 1 Select the “Don’t input password next time”... - Page 13 Step 2 In step 2 the IP, subnet, gateway and DNS of the device can be altered. It is recommended to use DHCP as this will automatically get these options from the network. If a specific (Static IP) is to be used, please get the information from the ISP or network administrator. When the settings are complete, click “Next”...
-
Page 14: Share Mapping
3.1.4 Share mapping Step 1 Input current administrator’s name and password and click OK. Please note that the default name is: admin and default password is: admin. Step 2 Pxxxxx... - Page 15 login name and password: only needed if the folder you wish to share requires username and password, e.g. if you have created a folder through the web interface and set a specific user for this folder, it is necessary to enter the user name and password to obtain access to the folder Map share to local: select the folder that is to be mapped from the NAS server to the local com- puter in the first drop down box, (the folder admin is not to be used), public and any folder created in the web tool will be shown in this drop down box.
- Page 16 Write down the IP address of your NAS Server in the above case 192.168.1.43 Windows XP: click on Start and Run, this will give you a small window called run Windows Vista / Windows 7: click on the start bubble and click the search area at the bottom of the start menu Type in the IP address like this \\xxx.xxx.xxx.xxx ...
-
Page 17: Web
4. Web Input the NAS server IP in the browser to enter the NAS server web configuration page, this can also be done by starting the NetTool and clicking on “Access via web”. Please note: to access the NAS servers web configuration page it is necessary that the PC and NAS server are in the same IP and subnet range, please configure this using the “Setup Wizard”... -
Page 18: Administration
4.3 administration 4.3.1 laN Setting This section contains all LAN settings used to configure the NAS server on the network. Depending on how the network is set up, changes to this page may or may not be necessary. It is possible to choose DHCP or Static IP from “Protocol” 4.3.1.1 Work Group It is possible to change the name of the workgroup the NAS server belongs to. -
Page 19: Static Ip
4.3.1.3 Static IP Click this option if no DHCP Server present on the network or to manually enter network settings in the fields provided below this option. IP Address Enter the static IP address Subnet Mask Enter the Subnet Mask address Default Gateway Enter the Gateway IP address DNS1 and DNS2 (both optional) -
Page 20: System Settings
4.3.3 System Settings The basic settings of NAS server can be set at here. Including “Device Name”, “Description”, “Date”, “Time Zone”, “Http Port” and the NTP can be enabled or disabled here. Device Name Enter a valid name for the NAS server, includes: ’0-9’ , ’a-z’ , ’A-Z’ , ’-‘ , ’_’ Description Enter a valid description of the NAS server, includes: ’0-9’... -
Page 21: Ftp Server Setting
4.3.4 FTP Server Settings Enable ftp server Enable or disable the FTP server part of the NAS server Enable anonymous login(as guest) Enable or disable download and upload using anonymous login Connection Setting Choose limit connections to limit the amount of client PCs that can login at the same time or select no limit to disable the limit Client PC’s Language... -
Page 22: Usb Devices
4.3.5 uSB Devices Attached USB hard disks and flash disks will be shown here. RAID When you have configured RAID-1 configuration and you experience a single disk failure, you will be able to see status message as seen below. Here you can see that Raid error is stated. When you have replaced the faulty hard drive with a new one the NAS server will rebuild the RAID-1 configuration by mirroring everything on the healthy hard drive to the new hard drive and therby restoring the RAID-1. -
Page 23: Printer Server
4.3.6 Printer Server Please note: The NAS server only accept USB Printers; multi-function printers are not supported. Please follow the steps below to install USB printer. 4.3.6.1 Windows XP Go to the Control Panel Go to printers and Faxes Click add a printer either by clicking on this in printer tools or right clicking in the printers and faxes window and selecting Add Printer Pxxxxx... - Page 24 Click next to start the printer installation wizard Click “Local printer attached to this computer” Remember to remove the check mark in “Automatically detect and install my Plug and Play printer” Click Next Click on “Create a new port” In Type of port, select “Standard TCP/IP port” Click Next Pxxxxx...
- Page 25 Click Next In “Printer Name or IP Address” enter the IP address of the NAS that was found using the “NetTool” Click Next In Device Type, select Standard and select “Generic Network Card” from the drop down box Click Next Pxxxxx...
- Page 26 Click Finish Search for the manufacturer of the printer in the left window and select the printer in the right window. If the driver is not listed in the drivers already in windows, please download the printer driver from the printer manufacturers website and install it either by pressing “Have Disk” or using the built-in setup feature in the printer driver.
- Page 27 Give the printer a name; it can be an advantage to type NAS in front of the printer name to indicate that the printer is connected to the NAS. Also select whether or not to use the printer as default printer. Click next Select whether or not to print a test page Click Next...
-
Page 28: Windows Vista
If a test page was printed, the above picture will be shown. Press the OK button when the printer has printed the test page 4.3.6.2 Windows vista Go to the Control Panel Go to Hardware and Sound Click add a printer Pxxxxx... - Page 29 Click on “Create a new port” In “Type of port” select “Standard TCP/IP Port” Click Next In “Hostname or IP address”, type in the IP of the NAS server found in the “NetTool” Click Next In Device Type, select “Standard” and select “Generic Network Card” from the drop down menu Click Next Pxxxxx...
- Page 30 In the left hand window select the manufacturer of the printer In the right hand window select the printer If the printer is not listed here, download the driver for the printer from the printer manufacturers website and install it by either using the Setup software in the windows driver or by clicking on “Have Disk”...
-
Page 31: Windows 7
4.3.6.3 Windows 7 Go to “Devices and Printers” Click on “Add a printer” Pxxxxx... - Page 32 Click on “Add a local printer” Click on ”Create a new port” In type of port select “Standard TCP/IP port” Click Next In “Hostname or IP address”, type in the IP address of the NAS server found in the “NetTool” Click next Pxxxxx...
- Page 33 In the left hand window select the manufacturer of the printer In the right hand windows select the printer If the printer is not listed here, download the driver for the printer from the printer manufacturers web- site and install it by either using the Setup software in the windows driver or by clicking on “Have Disk” Click next Give the printer a name;...
- Page 34 Select ”Do not share this printer” Click next Here you can select whether to print a test page Click finish to finish the printer installation Pxxxxx...
-
Page 35: Web Based Management
4.3.7 Web Based Management In share list, click the name of the root folder that is to be used, e.g. public. Clicking the icon next to a folder name (shown in the Document folder list) will activate this folder. Back Off: click this button to go back to the previous folder. File upload: gives the possibility to upload files to the selected folder. -
Page 36: User Management
4.3.8 user Management Here it is possible to create and delete users. It is also possible to alter the users username and password. Clicking on the icon to the left of the user name will bring up the “modify user properties” page. 4.3.9 Group Management A group is used to give several users the same rights, e.g. -
Page 37: Folder Management
Click on the icon to the left of the user name will bring up the list of users in the NAS server and will allow them to be added to the group. 4.3.10 Folder Management Here it is possible to create or delete folders. When a folder is added, clicking the icon to the left of the name will bring up the folder administration page. -
Page 38: Media Server Settings
4.3.11 Media Server Settings Activate the UPnP AV Server by putting a check mark in the box next to the name. Select a folder to use for the Media server in “Share media files in” and select the time between rescans of the shared media files in “Set time interval to rescan”... -
Page 39: Backup
iTunes Server Choose Enable or Disable the iTunes server part of the NAS server. Server Name Enter valid name for the server, includes: ’0-9’ , ’a-z’ , ’A-Z’ , ’-‘ , ’_’ , ‘ ‘; If iTunes, The sever name will be listed in the shares in iTunes. Port Enter a valid number. - Page 40 Select backup source Here it is possible to select the what is to be backed up, it can be either local or remote files and folders. Please note that either source or destination must be a local folder on the NAS server Select backup destination Here it is possible to select the destination of the backup, it can be either local or remote files and folders.
- Page 41 Input the file information which you want to backup, then click “Test Availability” button to test availability result. if the result is OK, it shows your input information is right. remote: NFS Server NFS (Network File System) allows a system to share directories and files with others over a network.
-
Page 42: Bittorrent
local: the other hard drive share The function of this section is the same as the “Local: public”, it just uses another folder than public. When the job has been set up correctly, please click add to add it to the backup list If desired, the job can be run manually, click “Go”... - Page 43 Global settings Here it is possible to choose which folder to store the torrent files in. The max download and upload rate can be limited to a specific download and or upload rate. Seed options: Seed infinitely – After the downloaded finish. The file will seed until stopped. add a new job Download a Bit Torrent seed (*.torrent) you want from the internet.
-
Page 44: Tools
There are four operations we can do: Detail Show the detail information of the job. Start If you want to running the job clicks this button. Stop If you want to stop the job click this button. Delete Stop and delete the job then you can add other jobs Please note: It is possible to add up to 10 jobs. -
Page 45: Hard Disk Utilities
4.3.15.2 Hard Disk utilities Two functions can be found in this option. 1. Format: Format a hard disk for use with the NAS server (User management ONLY works on a hard disk installed inside the NAS server). · Hard drive capacity must be at least 10GB. 2. -
Page 46: Hard Disk Suspend Management
4.3.15.3 Hard disk Suspend Management You can setup the time before the NAS server enters Sleep mode to save power. The sleep time is activated only when no input or output is detected for the time duration set. 4.3.15.4 Firmware upgrade If a new firmware is released for the NAS server it is possible to update the NAS server in this menu. -
Page 47: Save & Restore Configuration Files
4.3.15.5 Save & restore Configuration Files This menu gives the possibility to backup or restore the NAS server settings to or from an external device. Save: The configuration file will be downloaded (Internet Explorer users will need to click on the protection bar on top and click choose “Download File”) restore: This function gives the option of restoring the NAS server configuration from a previously saved configuration. -
Page 48: System Log
4.3.15.8 System log An activity log from the NAS server can be viewed here. 4.3.15.9 e-mail sending This page allows the server to send an E-mail if important changes are made to the NAS server or if the NAS server encounters severe problems such as a crash or hard disk failure. Pxxxxx... -
Page 49: Faq
Send me an E-mail when important settings changed or severe problems occurred: enables the sending of E-mails when changes are made or problems occur within the NAS server. SMTP Server: enter the name of the SMTP server that is to send the mail, please obtain the SMTP server from the E-mail provider. -
Page 50: Appendix 1
appendix 1 What is raID? RAID, short for Redundant Array of Independent Disks, is a combination of two or more disks with the aim of providing fault tolerance and improving performance. There are several different levels of RAID, with each providing a different method of sharing or distributing data amongst the drives. The NAS server supports RAID levels 0, Linear and 1. -
Page 51: Disposal
DISPOSal Electrical and electronic equipment (EEE) contains materials, parts and substances, which can be danger- ous to the environment and harmful to human health if waste of electrical and electronic equipment (WEEE) is not disposed of correctly. Equipment, which is marked with the WEEE logo (as shown on the left), should not be thrown away with your household waste.
Need help?
Do you have a question about the P50696 and is the answer not in the manual?
Questions and answers