
Summary of Contents for Brillcam BVR-3808PS
- Page 1 Brillcam Network Video Recorder GUI & WEB User Manual Brillcam Inc. www.brillcam.com support@brillcam.com Document Version : V4.01.01 Update : 2020.08 Brillcam Inc. Copyright 2020-2021...
-
Page 2: Table Of Contents
Main menu introduction ......................39 System management ....................40 3.1.1 General settings ......................40 3.1.2 Time settings ....................... 41 3.1.3 User Management ....................... 42 3.1.4 Disk Management ....................... 43 3.1.5 Log Management ......................44 Brillcam Inc. Copyright 2020-2021 Page 2 , Total 83... - Page 3 Human detection ......................69 Upgrade management ....................71 3.7.1 System information ..................... 71 3.7.2 NVR FW Update ......................72 3.7.3 IPC FW Update ......................73 WEB Operation ......................... 74 Preparation ........................75 Brillcam Inc. Copyright 2020-2021 Page 3 , Total 83...
- Page 4 Local Web Access ....................... 75 Remote Web Access ....................79 4.3.1 UPnP/DDNS Remote Access Setup................79 Port Forwarding Remote Access Setup ..............80 FAQs/Troubleshooting ......................81 Glossary of Terms ........................83 Brillcam Inc. Copyright 2020-2021 Page 4 , Total 83...
- Page 5 Thank you for purchasing Brillcam NVR! This user’s manual is designed as a reference tool only and is applicable to all Brillcam 3000 Series model NVRs. Some features and options may vary model to model. For a brief overview of your device please refer to the NVR Quick Start Guide included with your device.
- Page 6 UI to use either Internet Explorer, Mozilla Firefox 49.0.2, Safari 11. Connect and manage all Brillcam Wi-Fi and PoE cameras connected to your network via an Ethernet cable for ultimate ease and convenience. The NVR provides blazing uplink speed of up to 1000 Mbps as well as a max incoming bandwidth speed of 320Mbps.
- Page 7 Network Network indictor blinks green when network connection is functioning properly. USB Interface Universal Serial Bus (USB) ports for additional devices such as USB mouse. Backend Panel Index Description Index Description Brillcam Inc. Copyright 2020-2021 Page 7 , Total 83...
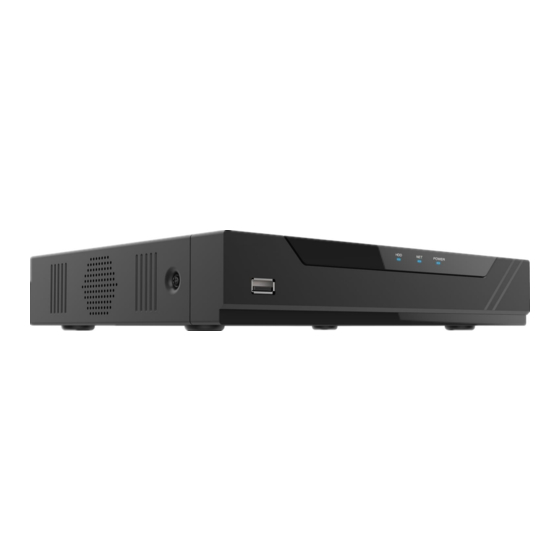
- Page 8 VGA Interface (DB9 Connector) AUDDIO IN USB 3.0 Interface HDMI Interface LAN Network Interface Power switch Audio Output Network interfaces with PoE function (8 interfaces for BVR-3808PS, 16 interfaces for BVR-3816PD) BVR-3504PS: Front Panel Name Description Status Indicator Power Power indicator turns green when system is running.
- Page 9 Index Description Index Description Power Supply VGA Interface (DB9 Connector) AUDDIO IN (Optional) USB 3.0 Interface HDMI Interface LAN Network Interface PoE Ethernet Interface Audio Output BVR-3809ND: Front Panel Name Description Brillcam Inc. Copyright 2020-2021 Page 9 , Total 83...
- Page 10 Status indicator blinks red when data is being read from or written to HDD. Network Network indictor blinks green when network connection is functioning properly. USB Interface Universal Serial Bus (USB) ports for additional devices such as USB mouse. Brillcam Inc. Copyright 2020-2021 Page 10 , Total 83...
- Page 11 Status indicator blinks red when data is being read from or written to HDD. Network Network indictor blinks green when network connection is functioning properly. USB Interface Universal Serial Bus (USB) ports for additional devices such as USB mouse. Backend Panel Brillcam Inc. Copyright 2020-2021 Page 11 , Total 83...
- Page 12 Network Network indictor blinks green when network connection is functioning properly. USB Interface Universal Serial Bus (USB) ports for additional devices such as USB mouse. Backend Panel Index Description Index Description Brillcam Inc. Copyright 2020-2021 Page 12 , Total 83...
- Page 13 Description Index Description AUDDIO IN (Optional) LAN Interface AUDDIO OUT USB 3.0 Interface VGA Output (DB9 Connector) HDMI Interface 12 VDC Power supply Controller port, Alarm In/Alarm Out (optional) Power Switch Brillcam Inc. Copyright 2020-2021 Page 13 , Total 83...
- Page 14 ● A hard drive - not included ● Four hard drive fastening screws - included Note: Before installing the hard drive, make sure the NVR is powered off with the power cable disconnected. Brillcam Inc. Copyright 2020-2021 Page 14 , Total 83...
- Page 15 VGA port on your monitor/screen and the other end to the VGA port on the back panel of your NVR. 2. Connect the included mouse to the USB connection on the front or back of the NVR. Brillcam Inc. Copyright 2020-2021 Page 15 , Total 83...
- Page 16 Then, connect the other end of the cable to the NVR. 4. Connect cameras to power. Note: For PoE NVRs/cameras: connect an Ethernet cable to the PoE port attached to the camera. Brillcam Inc. Copyright 2020-2021 Page 16 , Total 83...
- Page 17 NVR. For non-PoE NVRs/cameras: Connect the power adapter to the power port attached to the camera. Then, plug the adapter into a wall outlet or power strip. Brillcam Inc. Copyright 2020-2021 Page 17 , Total 83...
- Page 18 System icon. Then, on the new window, click Display from the list on the left column of options. Change your resolution from 1280x1024 to 1920x1080 and click Apply down below. Your NVR will reset to effect the change. Brillcam Inc. Copyright 2020-2021 Page 18 , Total 83...
- Page 19 Press and hold the power button on the front of the device for roughly 10 seconds. The device will shut down. To turn the device back on, press the power button on the front panel and allow the device to turn back on. Brillcam Inc. Copyright 2020-2021 Page 19 , Total 83...
-
Page 20: Startup Wizard Walkthrough
"Start", enter the next step, mobile phone monitoring configuration wizard; if the user directly clicks the upper right corner , it will directly exit the configuration wizard page. Brillcam Inc. Copyright 2020-2021 Page 20 , Total 83... -
Page 21: Mobile Access
Click "+", then scan the QR code of the device ID on the right to add the device as above picture shown. 1.2 Time settings Click Next then come to the “Time Settings” page, here the user can set the time, time zone and if to start the time synchronization etc. Brillcam Inc. Copyright 2020-2021 Page 21 , Total 83... -
Page 22: Network Settings
Next: click to go to next page; 1.3 Network settings Click next to come to the “Wired Network Configuration” page, here the user can make the parameters of the wired network settings. Brillcam Inc. Copyright 2020-2021 Page 22 , Total 83... -
Page 23: Remote Monitoring
Back: click to go back to the previous page; Next: click to go to next page; 1.4 Remote monitoring Click the “Next” to come to the page to add the NVR into the APP. Brillcam Inc. Copyright 2020-2021 Page 23 , Total 83... -
Page 24: Connected Cameras Management
NVR. Plug and play as default mode. The cameras can be added automatically after plug into the NVR automatically as default until all channels are full. Brillcam Inc. Copyright 2020-2021 Page 24 , Total 83... - Page 25 Through click “Search”, the NVR can search the connected the cameras which are in the same network as the NVR automatically, the searched cameras will be shown in the list. The Brillcam cameras can be searched by any IP address, the ONVIF or 3 party cameras can be searched only when their IP address are the same segment as the NVR.
- Page 26 Remove All: the user can click it to remove all added cameras from the NVR. • : the user can click it to change the camera’s encoding parameters including Streaming type, resolution, frame rate etc. as below. Brillcam Inc. Copyright 2020-2021 Page 26 , Total 83...
-
Page 27: Hdd Management
Apply: click it to save the settings. Cancel: click it to cancel the settings. 1.6 HDD Management Next to go to the “HDD management” window to manage the Hard Disk as below. Brillcam Inc. Copyright 2020-2021 Page 27 , Total 83... -
Page 28: Recording Time Settings
All Day: the user can click it to set the all day as the recording. • Daytime: the user can click it to set the recording time only day time from 8:00 am to 20:00 pm. Brillcam Inc. Copyright 2020-2021 Page 28 , Total 83... -
Page 29: Nvr Login
"OK" to enter the "Modify User" page to change the password. User password, click "OK" to return to the login page and enter "Log in with the password you just changed" as below. Brillcam Inc. Copyright 2020-2021 Page 29 , Total 83... -
Page 30: Channel Window Introduction
: the channel video is lost, or disconnected; : there is is input alarm notification; 2.3 Main menu introduction Right click on the screen the main menu will be displayed as below. Brillcam Inc. Copyright 2020-2021 Page 30 , Total 83... -
Page 31: Ip Camera
Shut Down: it allows the user to come to the system shut off page. 2.4 IP Camera In the page “IP Camera”, the user can add, delete, edit the cameras connected with the NVR. Brillcam Inc. Copyright 2020-2021 Page 31 , Total 83... -
Page 32: Main Menu
Please check the chapter 1.5 for descriptions. 2.5 Main menu In the page “Main menu”, the user can set all parameters for the NVR and cameras connected. Please check the chapter 3.0 for the detailed information. Brillcam Inc. Copyright 2020-2021 Page 32 , Total 83... -
Page 33: Mobile Monitoring
8 Split: the user can select 8 channels to show simultaneously from the channel 1-8, 9-16; • 9 Split: the user can select 9 channels to show simultaneously from the channel 1-9, 10-18; Brillcam Inc. Copyright 2020-2021 Page 33 , Total 83... -
Page 34: Network Settings
Refresh: click to refresh the new settings; Default: click it to restore all parameters to the default settings; Apply: it allows the user to save the settings. Cancel:: it allows the user to give up the settings. Brillcam Inc. Copyright 2020-2021 Page 34 , Total 83... -
Page 35: Manual Record
Select Channels for playback: It allows the user to select which channel to playback from the list; • Date: it allows the user to select the time for videos searching and playback. Brillcam Inc. Copyright 2020-2021 Page 35 , Total 83... -
Page 36: Image Adjustment
The user also can move the mouse and click the time to start the video play from the clicked time. 2.11 Image Adjustment The user can select “Image” to set the image shows of the channels on the NVR as below. Brillcam Inc. Copyright 2020-2021 Page 36 , Total 83... -
Page 37: Ptz Operation
Pattern : it allows the user to set the pattern of the PTZ model, maximum can be set 4 patterns. o Pattern: the dropdown box allows the user to select the pattern No. Brillcam Inc. Copyright 2020-2021 Page 37 , Total 83... -
Page 38: Start Tour
Delete: it allows the user to delete the curise settings. o Stop: it allows the user to stop the curise. 2.13 Start Tour The user can select “Start Tour” to apply the tour as below. Brillcam Inc. Copyright 2020-2021 Page 38 , Total 83... -
Page 39: Guide
• Shutoff: it allow the user to shut off the device. Main menu introduction In the page “Main menu”, the user can set all parameters for the NVR and cameras connected. Brillcam Inc. Copyright 2020-2021 Page 39 , Total 83... -
Page 40: System Management
The user can select “Manage” to start to set the system settings. 3.1.1 General settings The user can select the “General” tab to set the general settings of the device as below. Brillcam Inc. Copyright 2020-2021 Page 40 , Total 83... -
Page 41: Time Settings
Interval(M): it allow the user to set the time synchronised interval time. • Apply: it allows the user to apply the settings. • Cancel: it allows the user to cancel the settings. Brillcam Inc. Copyright 2020-2021 Page 41 , Total 83... -
Page 42: User Management
Add user: it allow the user to add one more user account for the device with the user’s login password and the operation right. • Apply: it allows the user to apply the settings. • Cancel: it allows the user to cancel the settings. Brillcam Inc. Copyright 2020-2021 Page 42 , Total 83... -
Page 43: Disk Management
Format: it allow the user to format the select HDD disk. • Apply: it allows the user to apply the settings. • Cancel: it allows the user to cancel the settings. Brillcam Inc. Copyright 2020-2021 Page 43 , Total 83... -
Page 44: Log Management
Query: it allow the user to click to search the log which will be listed in the below tab. • Delete: it alows the user to delete the searched log. • Apply: it allows the user to apply the settings. Brillcam Inc. Copyright 2020-2021 Page 44 , Total 83... -
Page 45: Maintenance Management
Restore to the default: it alows the user to restore the device’s parameters to the factory settings. • Apply: it allows the user to apply the settings. • Cancel: it allows the user to cancel the settings. Brillcam Inc. Copyright 2020-2021 Page 45 , Total 83... -
Page 46: Network Management
The user can select the “Lan” tab to set the Lan network parameters of the device as below. • Network card: the current default network card is Networkcard 1; • MAC: it shows the MAC address of the Lan network. Brillcam Inc. Copyright 2020-2021 Page 46 , Total 83... -
Page 47: P2P Settings
Refresh: it allows the user to refresh the NVR Internet connection status. Apply: it allows the user to save the settings. Cancel:: it allows the user to give up the settings. Brillcam Inc. Copyright 2020-2021 Page 47 , Total 83... -
Page 48: Email Settings
Apply: it allows the user to save the settings. Cancel:: it allows the user to give up the settings. 3.2.4 WAN Network settings The user can select the “WAN” tab to set the NVR’s WAN network parameters. Brillcam Inc. Copyright 2020-2021 Page 48 , Total 83... -
Page 49: Pppoe Settings
Apply: it allows the user to save the settings. Cancel:: it allows the user to give up the settings. 3.2.5 PPPoE settings The user can select the “PPPoE” tab to set the NVR’s PPPoE network parameters. Brillcam Inc. Copyright 2020-2021 Page 49 , Total 83... -
Page 50: Channel Management
Apply: it allows the user to save the settings. Cancel:: it allows the user to give up the settings. 3.3 Channel management The user can select “Channel” to start to set the channel parameters settings. Brillcam Inc. Copyright 2020-2021 Page 50 , Total 83... -
Page 51: Ip Camera Settings
The user can select the “Lan” tab to set the Lan network parameters of the device as below. After the channels are full of connection cameras, the more cameras cannot added until one of added cameras is removed from the NVR manually. Manually add the cameras mode. Brillcam Inc. Copyright 2020-2021 Page 51 , Total 83... - Page 52 Through click “Search”, the NVR can search the connected the cameras which are in the same network as the NVR automatically, the searched cameras will be shown in the list. The Brillcam cameras can be searched by any IP address, the ONVIF or 3 party cameras can be searched only when their IP address are the same segment as the NVR.
- Page 53 Copy: click it to copy the above settings to other channels. Apply: click it to save the settings. Cancel: click it to cancel the settings. Brillcam Inc. Copyright 2020-2021 Page 53 , Total 83...
-
Page 54: Channel Settings
Apply: click it to save the settings. • Cancel: click it to cancel the settings. 3.3.3 Image settings The user can select the “Image” tab to set the channel image parameters of the device as below. Brillcam Inc. Copyright 2020-2021 Page 54 , Total 83... -
Page 55: Poe Settings (Effective In Poe Models)
Cancel: it allows the user to cancel the settings. 3.3.4 PoE settings (effective in PoE models) The user can select the “PoE Management” tab to set the PoE port of the device. Brillcam Inc. Copyright 2020-2021 Page 55 , Total 83... -
Page 56: Privacy Settings
Area: It allows the user to set the privacy area, totally 4 zones can be set. : it allows the user to set the area; : it allows the user to delete the set area. Brillcam Inc. Copyright 2020-2021 Page 56 , Total 83... -
Page 57: Record Management
The user can select “Record” to start to set the record parameters settings. 3.4.1 Playback Please refer to chapter 2.10. 3.4.2 Recording time The user can select the “Recording time” tab to set the recording time parameters of the device. Brillcam Inc. Copyright 2020-2021 Page 57 , Total 83... - Page 58 Default: it allows the user to click it to restore the parameters to the default settings. o Copy: it allows the user to copy the settings to other channels. o Apply: it allows the user to apply the settings. Brillcam Inc. Copyright 2020-2021 Page 58 , Total 83...
-
Page 59: Backup
Start Backup: the user can click it to start the archives backup process. Please be noted that if there is no backup disk installed, there will be the notification promoted as below. Brillcam Inc. Copyright 2020-2021 Page 59 , Total 83... -
Page 60: Alarm Management
Apply: it allows the user to apply the settings. • Cancel: it allows the user to cancel the settings. 3.5 Alarm management The user can select “Alarm” to start to set the Alarm parameters settings. Brillcam Inc. Copyright 2020-2021 Page 60 , Total 83... -
Page 61: Motion Detection
Set Schedule Date: it allows the user to set the schedule date with the different working periods. • Copy: it allows the user to copy the settings to other channels. • Apply: it allows the user to apply the settings. Brillcam Inc. Copyright 2020-2021 Page 61 , Total 83... -
Page 62: Motion Detection
Apply: it allows the user to apply the settings. • Cancel: it allows the user to cancel the settings. There will be alarm notification window promoted when there is motion detection alarm triggered as below. Brillcam Inc. Copyright 2020-2021 Page 62 , Total 83... -
Page 63: Alarm Input
Apply: it allows the user to apply the settings. • Cancel: it allows the user to cancel the settings. There will be alarm notification window promoted when there is alarm input alarm triggered as below. Brillcam Inc. Copyright 2020-2021 Page 63 , Total 83... -
Page 64: Video Loss
Apply: it allows the user to apply the settings. • Cancel: it allows the user to cancel the settings. There will be alarm notification window promoted when there is video loss triggered as below. Brillcam Inc. Copyright 2020-2021 Page 64 , Total 83... -
Page 65: Local Alarm
Type: it allows the user to select the type of the local alarm from Disk full, Disk error, IP address conflict, Cable disconnected. • Linage: it allows the user to set the linkage actions for screen, email or beep. Brillcam Inc. Copyright 2020-2021 Page 65 , Total 83... -
Page 66: Ai Video Management
Line crossing detection and alarm means that the user draws a detection line on the channel image video through the NVR (the camera of the channel must support the intelligent alarm function), and then detects whether an object has crossed the detection line of this setting; Brillcam Inc. Copyright 2020-2021 Page 66 , Total 83... - Page 67 Apply: it allows the user to apply the settings. • Cancel: it allows the user to cancel the settings. There will be alarm notification window promoted when there is line crossing alarm triggered as below. Brillcam Inc. Copyright 2020-2021 Page 67 , Total 83...
-
Page 68: Intrusion Detection
Twinkling: it allows the user to enable or disable to set the twinklong of the line when there is line crossing detection alarm happened. • Sound.: it allows the user to enable or disable the sound when there is detection. Brillcam Inc. Copyright 2020-2021 Page 68 , Total 83... -
Page 69: Human Detection
The user can select the “human detection” tab to set the parameters of the human detection of the device. Human detection alarm means that there will be alarm triggered when the human is detected in the video by the camera. Brillcam Inc. Copyright 2020-2021 Page 69 , Total 83... - Page 70 Apply: it allows the user to apply the settings. • Cancel: it allows the user to cancel the settings. There will be alarm notification window promoted when there is intrusion detection alarm triggered as below. Brillcam Inc. Copyright 2020-2021 Page 70 , Total 83...
-
Page 71: Upgrade Management
The user can select “Upgrade” to start to set the upgrade parameters settings. 3.7.1 System information The user can select the “system version” tab to check the device system version information as below. Brillcam Inc. Copyright 2020-2021 Page 71 , Total 83... -
Page 72: Nvr Fw Update
NVR firmware, and prepare a USB disk to keep the firmware in its root directory path. And then please insert the USB disk to the NVR USB interface. The NVR can recognize this USB disk, and then follow the below step to update the NVR FW. Brillcam Inc. Copyright 2020-2021 Page 72 , Total 83... -
Page 73: Ipc Fw Update
3) Please copy this firmware to the USB disk, and insert it to the NVR’s USB interface, and then execute the above IPC update process to finish the firmware update. During the IPC firmware update, there is firmware update process as below to show it. Brillcam Inc. Copyright 2020-2021 Page 73 , Total 83... -
Page 74: Web Operation
If there is still the problem, please contact your seller for the technical support. WEB Operation The device’s web interface provides a channel monitor menu, search, alarm setup, system setup, PTZ control, monitor window etc. Brillcam Inc. Copyright 2020-2021 Page 74 , Total 83... -
Page 75: Preparation
In the web user interface, enter the login credentials for your device. If this is the first time accessing the device, the username and password will both be admin. Click on Login. Brillcam Inc. Copyright 2020-2021 Page 75 , Total 83... - Page 76 Please click here to download and install the plugin prompt in the middle of the screen. Click Run to download the plugin. The browser will then show the live feed of your connected device in the web user interface. Brillcam Inc. Copyright 2020-2021 Page 76 , Total 83...
- Page 77 There are different tabs for the user to check and make the parameters settings. Playback: Log searching: Brillcam Inc. Copyright 2020-2021 Page 77 , Total 83...
- Page 78 Configuration: P2P for mobile access: Brillcam Inc. Copyright 2020-2021 Page 78 , Total 83...
-
Page 79: Remote Web Access
DDNS item, click the enable checkbox, and then click the Apply button on the bottom right. 6). In Write down the entire Domain Name field, including the white text that says:.www.3322.org. Click the UPnP item and click the enable button. Brillcam Inc. Copyright 2020-2021 Page 79 , Total 83... -
Page 80: Port Forwarding Remote Access Setup
This guide will help you take the step necessary to port forward on the router. Follow these steps, and 16). then return to the NVR. Login to your NVR, open the main menu then go to menu -> Network. 17). Brillcam Inc. Copyright 2020-2021 Page 80 , Total 83... -
Page 81: Faqs/Troubleshooting
A privacy mask or screensaver may be enabled. • There might be a malfunction with the NVR hardware. 5. Real-time video color is distorted. Below are a few possible reasons why this may be occurring Brillcam Inc. Copyright 2020-2021 Page 81 , Total 83... - Page 82 Use a 120 Ohm resister between the PTZ cables to reduce interference. • The PTZ cable is too long or signal degradation is too great. 12. Motion detection does not work. Brillcam Inc. Copyright 2020-2021 Page 82 , Total 83...
-
Page 83: Glossary Of Terms
UPnP – UPnP stands for Universal Plug and Play, and it is a protocol used to easily connect devices to the internet. VoIP – Voice over Internet Protocol, it’s for IP voice to be transmitted on the network. Brillcam Inc. Copyright 2020-2021 Page 83 , Total 83...