Table of Contents
Advertisement
Quick Links
Advertisement
Table of Contents

Summary of Contents for Shirtal DiaCam DIACAM360
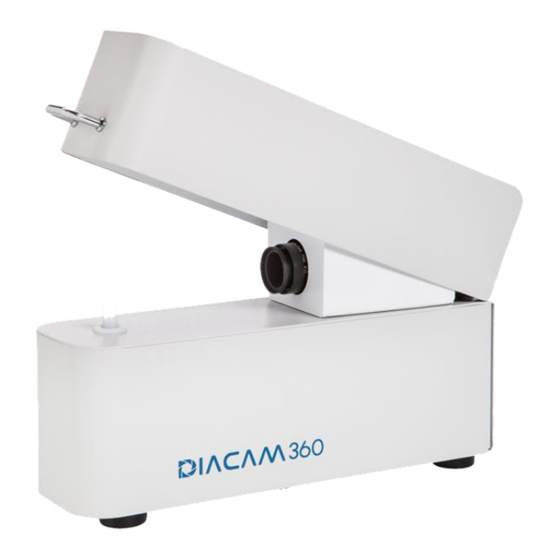
- Page 1 User Manual ° Fully automated 360 Imaging & Marketing System www.DiaCam360.com...
-
Page 2: Table Of Contents
.................. Preliminary preparations ..................1. Unpacking ................2. Device Assembly ................. 3. Software installation ..................Operating DiaCam360 ..............1. Switching on the system ................2. Start software ................3. Main screen ..............4. Scan - scan a new item .............. - Page 3 In order to fully enjoy your new DiaCam360, all you have to do is to place the desired diamond you want to shoot, close the lid and push the button. We shall do all the rest.
- Page 4 Keep this guide in a safe place for future reference. In any case the DiaCam360 is transferred to another user, transfer the user's manual as well, together with the device, to the new owner.
-
Page 5: Technical Specifications
• damaged, or after the device has been dropped. Do not make any changes on the device or its power cord. Only Shirtal DiaCam ltd is • permitted to repair the device in order to prevent any danger as a result of faulty repair works. - Page 6 Shirtal DiaCam ltd shall have no liability for any damage caused by: Operating not in accordance with the user instructions provided in this manual. • Repair and/or attempt to repair the device, by anyone other than Shirtal DiaCam ltd. • Damage or impairment of the power cord.
-
Page 7: Components
Components Handle for Grip handle opening the lid Lens Replaceable holding tip Bottom unit Top unit Power receptacle Power cable inlet Suction tube Suction tube inlet inlet Power cable inlet USB cable Bottom unit Top unit Holding tips Power cord Power and suction braid Wooden noise box... -
Page 8: Preliminary Preparations
After removing the device from its packaging inspect the device for its integrity. In case of any doubt, do not use the device and immediately contact our customer service at support@DiaCam360.com. Device Assembly Essential and safety components of the device have been already assembled at the factory. - Page 9 Top unit, and the other end to the power and suction inlet on the back of the Bottom unit 2.5. Place the Bottom vacuum unit of the DiaCam360 inside the wooden noise box, insert the cables through the hole on the side and close the upper lid. Place the wooden noise box on the floor.
-
Page 10: Software Installation
3.2. Under "Software" click on "Click here" next to “Download the latest version on DiaCam360 software” 3.3. Click on "Save" to save the file "DiaCam360.exe" and wait until saving process is finished 3.4. Double click on "DiaCam360.exe" that was previously downloaded 3.5. - Page 11 3.6. Wait for the software to build the installation files and then click on “Next” 3.7. Read the License Agreement and Approve by clicking "I accept the terms in the license agreement" and click “Next” 3.8. Click “Next” to approve installation path and directory and “Install” to start the installation 3.9.
- Page 12 3.10. Double click on "DiaCam360" shortcut on your desktop to launch DiaCam360 software 3.11. Enter the Activation code and Email address sent to you by Shirtal DiaCam ltd and click “Next” 3.12. Enter or change your company details and click "Start application"...
- Page 13 3.14. Make sure to click and check the check box “Always trust software from IDS Imaging Development Systems GmbH” and click “Install” then finally click “Restart” to enable driver's installation and restart the computer...
-
Page 14: Operating Diacam360
Operating DiaCam360 Switching on the system The DiaCam360 system will switch on automatically by the software only when initiating a scan. When scan process ends the system will switch off automatically after ~10 seconds. Start software Double click the DiaCam360 software shortcut on your desktop. -
Page 15: Scan - Scan A New Item
Choose “Diamond”, “Gem Stone”, “Rough” or “Jewelry” Jewelry items cannot fit inside the DiaCam360 system. This feature is relevant only for DiaCam360 PLUS systems. 4.3. Click on “Diamond” and then click on “White” for white color stones, “Yellow” for yellow color stones, “Pink” for pink color stones or “Blue” for blue color stones. - Page 16 Click on “White”, “Gray” or “Black” to choose the desired background. * For Black Background the black attachable part must be inserted inside the DiaCam360 lid. * For White and Gray Backgrounds, the attachable part must be out of the lid.
- Page 17 * For White and Gray Backgrounds, the attachable part must be out of the lid. Jewelry items cannot fit inside the DiaCam360 system. This feature is relevant only for DiaCam360 PLUS systems. 4.4. Click "Back" to choose a different item or click “Open Camera” to turn ON the...
- Page 18 4.5. Open the DiaCam360 lid, place the item you wish to photograph inside, make sure its table is facing the camera and use the blue grid lines to align the stone is in the middle of the screen 4.6. Use the right and left arrows at the bottom to fine-tune the position of the stone so it will face the camera and click "Next".
- Page 19 and according to the stone size. Once clicking on one of the buttons the “Auto Crop” button will turn to “Off”. Click on the “Auto Crop” to enable the automatic crop. 4.9. Image Settings A professional picture editing tool to adjust: “Brightness”...
- Page 20 “Change Settings” reflects the configuration that controls the scan page design under “Settings”. Mark or un-mark the check box ( ) of any option to add or remove from the scan page: "Owner’s details and logo" "Front stone’s picture" "Back stone’s picture"...
- Page 21 “360° window size” - Increase or decrease the size of the 360° main window to 50%, 75%, 125% or 150% from the current window size. “Pro-Toolkit” A professional picture editing tool to adjust: “Saturation” – The strength of the color. “Hue”...
- Page 22 4.13. Enter the relevant item’s details: For Diamond, Rough or Gem Stone enter manually or choose from the list: "Scan name/item #" (mandatory field) "<Item> Type" – will be shown according to the item chose "Shape" ...
- Page 23 When choosing/writing "GIA" or "HRD" or "IGI" under "Lab" and entering certificate number under "Certificate #" and weight under "Weight" the "Get Certificate" button will be available (only within the Premium Package). Click on the button and wait for details and certificate file to be filled automatically.
-
Page 24: My Scans- Manage All Scans
My Scans – Manage all scans Click "My scans" 5.1. Search and sort scans Use the search tool to search any specific scan or any scan with a specific parameter Click on one of the items on top to show only scans from a specific item ... - Page 25 5.2. Scan information In the main scan’s row the following details can be found: Thumbnail – double click on it to open a large picture of the stone Item – Diamond, Rough, Gem Stone or Jewelry Type – the type of the item Scan Name/LOT# - the scan’s name (mandatory field) Shape Weight...
- Page 26 Background – reflects the background used for the scan (Black, Gray or White). Pair Link – if a scan is part of a pair scan, the pair link will be shown. Click “Edit” enter editing mode and change or add any relevant information and settings.
- Page 27 Click “Download MP4 Video” to save the mp4 file to your computer. Click “Create MP4 Video” to create an MP4 Video of a scan and wait for the upload process to end. ** This is relevant only when Premium Package is enabled and video was not created automatically for some reason or when creating scans while Premium Package is disabled.
- Page 28 Update Rapnet – Mark the check box ( ) of the scan/s you would like to update and click on Click “Update” to update the links of the selected scans on Rapnet. Click “Delete” to delete the links of the selected scans from Rapnet. Click “Cancel”...
-
Page 29: Settings - Change User And System Settings
Settings – change user and system settings 6.1. Click "Settings" 6.2. Company Details tab These details will appear in each scan’s page. Enter or change your company details: Company name First name Last name Phone Number ... - Page 30 "Front stone’s picture" "Back stone’s picture" "Certificate" Add more details to each scan link (available only for scans stored on DiaCam360's cloud and within the Premium Package): Click “Modify scan link” Choose “Add scan name” to add the scan’s name to the link ...
- Page 31 6.4. My Storage tab Not relevant when storing on DiaCam360's special cloud storage. For external FTP storage: Enter the following details: "Protocol” – choose between FTP, FTPS implicit or FTP explicit “Host" – name or IP of the FTP server ...
- Page 32 For external Amazon storage: Enter the following details: "AWS Access Key” “AWS Secret Access Key" "AWS Bucket" "Region" Click "Save" to keep changes or "Cancel" to discard changes. 6.5. Calibration tab Click “Calibrate Colors” and wait for a successful message. 6.6.
- Page 33 Change DiaCam360's working directory by entering a new path under "Folder Path" In case proxy settings are required in you network to have internet connect you can enable proxy: Mark or un-mark the check box ( ) "Enable"...
-
Page 34: Support
6.7. Rapnet tab Enable Rapnet feature to automatically update Rapnet with links of scans (available only within the Premium Package): Click on "Enable" Enter your Rapnet ID under "Ranet ID number" Click on "Validate ID" and wait for successful message ... -
Page 35: Contact
7.3. Click “Open DiaCam360 Support tab” to open a new internet explorer window directing to Diacam360 support page: www.DiaCam360.com/Support. Contact 8.1. Click "Contact"... -
Page 36: Replacing Holding Tips
8.2. Enter all your details and reason of contact and send us by email. 8.3. Click "Send". Replacing holding tips 9.1. The DiaCam360 device is supplied with different holding tips to fit most of the various stone shapes and sizes NO grip ring - suitable mostly for square and small Fancy stones. - Page 37 Three grip ring - suitable for most large stones with thick girdle. 9.2. In case the stone does not stand straight try turning the stone in place or try to hold it on a different facet. 9.3. Since the angle of the groove is not symmetric each tip can be inserted in two directions.
- Page 38 Open the lid of the device and pull the existing holding tip upwards 9.5. Use some force and push the new holding tip downwards in order to replace the previous one Please note the position of the adjustment notches at the bottom of the holding tip, they should align perfectly with the notches of the grip slot.
-
Page 39: Warranty Certificate
** The two black O-rings, on the main pole that holds the tips, are tend to dry after a while especially because of weather changes. In case the holding tips does not come out smoothly you can apply a little of Vaseline or Lobello lip balm stick on the O-rings. - Page 40 Dear DiaCam360 family member, Shirtal DiaCam ltd congratulate you on the purchase of the DiaCam360. The DiaCam360 device you purchased has a full warranty by Shirtal DiaCam ltd for the period specified in this document and subject to its terms.
Need help?
Do you have a question about the DIACAM360 and is the answer not in the manual?
Questions and answers