Advertisement
Quick Links
Advertisement

Summary of Contents for AltaRacks ALTA SIX GPR
- Page 1 Hello Operator ALTA GPR installation and user manual...
- Page 2 Designed using military grade product development methods, and rigorously tested the ALTA SIX GPR and the ALTA QUATTRO GPR are build to last. Please join us on social media and YouTube for latest updates. We never spam. Please directly contact us if you have any issues with your product.
- Page 3 Step one- Latch assembly • The hardware provided is 3/8 inch, bolts, nut, washers, and lock washer • The latch is installed on the vertical beam opposite side of the ALTA RACKS sticker close to the bottom pivot • Look for three holes (1) on the side of beam •...
- Page 4 Step two-Hitch assembly installation • Align the vertical beam pivot point (1) with hitch pivot point (2) and interior plate • Drop the main beam in to the round grove of the interior plate and align with holes on the receiver hitch.
- Page 5 • Using a adjustable wrench tighten the jam nuts on the set bolt to secure the location Fully engage latch • Test the latch assembly multiple times to ensure correct locking • For visual instruction see our You Tube instructions under our page (altaracks)
- Page 6 OUTER Safety Pins (OSP) assembly Your rack will come with two OSPs. they are both 5/8 in diameter • The colored pin is to be installed closest to the main vertical beam • The bolt with rubber housing is installed where the nut is welded on the receiver hitch •...
- Page 7 Step four- Vehicle installation • Assemble the anti-sway unit and slide on to the receiver hitch as shown (1), this unit can be facing up or down. It depends on clearance. Some bumpers interfere with the nuts pointing up • Insert assembled section in to your vehicle hitch (2) •...
- Page 8 Step five- Top Horizontal bar installation • Tools-9/16 • The top horizontal bar is installed towards the vehicle (1) • The mounting bracket points down (2) • Secure the 3/8 bolts, nuts, and washers and tighten until there is no movement in the bar (3) •...
- Page 9 Step six- lower horizontal bar assembly • Tools 9/16 • Install on the opposite side of the latch (1) • The bar will be on the lower portion of the bracket (2) • Tighten single bolt • There may be a little play in this bar •...
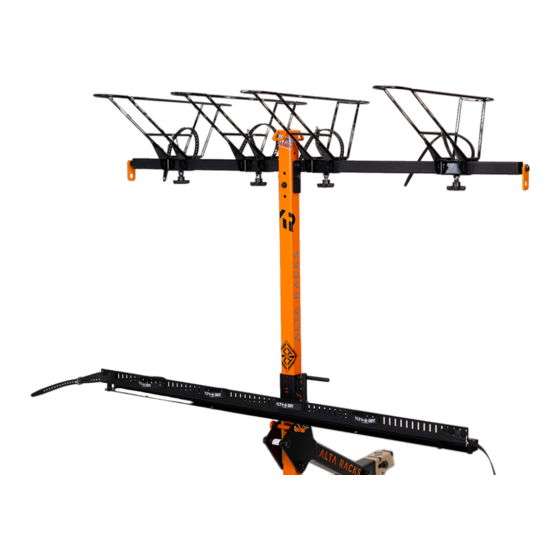
- Page 10 Installing the baskets and bottom sliders Slide the baskets on to the top bar one at a time and install tightener knobs, separate about 7 inches apart. Separation is based on bike size and fit. Baskets lean to the left, load bike from right to left. Slide the bottom sliders on to the bottom horizontal bar, for shorter wheelbase bikes point strap up ward.
- Page 11 ALTA SIX GPR • Power straps on top and bottom need to be secured around the wheels and locked prior to operation of the rack Operation • Antisway must be installed and fully secure, with no play in that area, operation of the rack without the anti-sway unit shall void your warranty.
Need help?
Do you have a question about the ALTA SIX GPR and is the answer not in the manual?
Questions and answers