Table of Contents
Advertisement
Advertisement
Table of Contents

Related Manuals for Neatsvor A&S X500

Summary of Contents for Neatsvor A&S X500
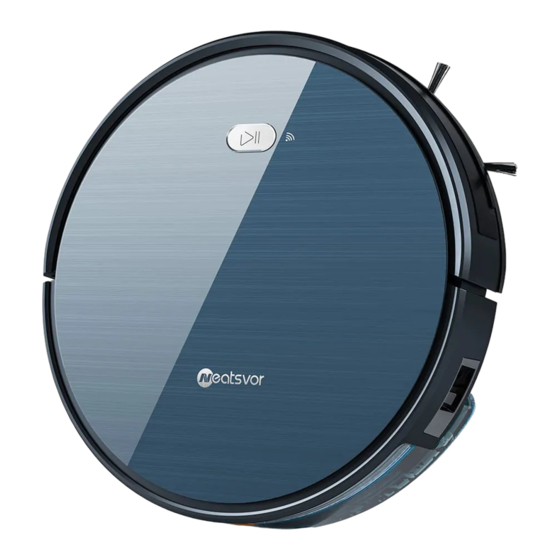
- Page 1 Robotic Vacuum Cleaner...
- Page 3 Welcome Neatsvor X500 service@szhtny.cn cnchip.net.cn...
-
Page 4: Product Maintenance
Menu 1.Wi-Fi Setup Instructions 2.Safety Instructions 3.Product Components 3.1 Name of Parts 3.2 Products Specifications 3.3 Product Characteristics 4.Instructions for Use 4.1 Attention 4.2 Remote Controller Instructions 4.3 Operating Instructions 5.Product Maintenance 5.1 Side Brush Cleaning and Replacement 5.2 Cleaning of Dust Box and Filter 5.3 Maintenance of Water Tank Components 5.4 Maintenance of Rolling Brush Components 5.5 Maintenance of Other Components... - Page 5 Wi-Fi Setup Instructions Wi-Fi Setup Instructions Scan the QR code in Figure 1 to download and install “WeBack” APP, or download and install from other APP stores. Figure 1 Open App, directly log in if you have a “WeBack” account; if not, you can select “New User” to sign up, and click on "Add a device"...
- Page 6 Wi-Fi Setup Instructions Wi-Fi Setup Instructions Do as Figure 6,restart the device,press and hold for 3-5 seconds until the machine beeps.The Wi-Fi indicator flashes and voice prompts "Connecting network",which means the device enters configuration mode,click "Quick mode" to enter the "Connect to the device" interface. Depending on the signal strength of the Wi-Fi, it may take few seconds or more.
-
Page 7: Safety Instructions
Safety Instructions... - Page 8 Safety Instructions...
- Page 9 Safety Instructions...
-
Page 10: How To Remove The Battery
Safety Instructions 06.How to remove the battery: Take out two screws on the battery cover with a screw driver. Take out the battery cover. Take out the battery and unplug the electric wires to remove the battery. -
Page 11: Product Components
Product Components 3.1 Names of Parts Main Body Charging Base 2*AAA Batteries (Excluded) Remote controller Power Adapter Cleaning Tool Water Tank Component Side Brush High-effecient Filter Accessories of some models may be slightly different and they are subject to the actual received products. - Page 12 Product Components Main Body 1.Bumper 2.Wi-Fi Indicator 3.Control Button Main Body 1.Universal wheel 2.Electrode slice 3.Side brush 4.Barrery cover 5.Side wheel 6.Rolling brush components 7.Dust box...
- Page 13 Product Components Main Body 1.DC power jack 2.Power switch 3.Dust box release button Dust Box 1.Per-filter 2.High-efficient filter 3.Filter sponge 4.Dust box 5.Dust box cover...
-
Page 14: Charging Base
Product Components Water Tank Component 1.Tank sealing cap 2.Water tank 3.Mop Charging base 1.Charging indicator 2.DC power jack 3.Charging terminal... - Page 15 Product Components 3.2 Product Specifications Structure 3.0 kgs Electronic 14.4 2500mAh Accessory Plan/Single Room/Edge/Spot/Mopping Process Parameters 120min...
-
Page 16: Product Characteristics
Product Components 3.3 Product Characteristics Multiple smart cleaning modes 4 cleaning modes are designed to suit different needs,which can be switched by the remote controller and App,greatly improves the cleaning efficiency and saves 30% of the power. Humanized design It is simple to operate,pressing the Control Button to start cleaning. Follow the Voice Prompt and let the robot start working for you. - Page 17 Instructions for Use 4.1 Attention When it is working, please help to remove the unfriendly obstacles.Put the furniture and home appliances such as tables and chairs in the house neatly, the robot will clean up smoothly to give you a clean new home. If the robot works at the stairway, the edge of the step, or the entrance to the narrow area among the furnitures, etc,please place a fence to ensure it is safe and running smoothly.
-
Page 19: Remote Controller Instruction
Instructions for Use Remote controller instruction Plan Cleaning (Smart Cleaning) Mopping Cleaning Schedule Setting controller. controller... - Page 20 Instructions for Use Plan Cleaning button No matter what mode the robot is in,this button will bring it to the plan cleaning mode. Return for Auto Charging Pressing this button to shift the mode as recharging,and the logo will be displayed on the screen of the remote controller.
- Page 21 Instructions for Use 4.3 Operating Instructions Placement of the Charging Base Place the charging base against the wall. Do not place any objects within 3.3 ft to the left / right and 6.6 ft to the front, and do not place any mirrors or other reflective objects within this distance.
-
Page 22: Charging Modes
Instructions for Use Charging modes Please keep the power switch turned on before charging the machine. Charge mode A: Fix the charging pin into the DC power jack of the robot and plug in the power supply. Please keep the power switch turned on before charging the machine. Charge mode B: Press Return for Auto charging button on the remote controller or Press Recharge icon on App to auto dock the Robot with the charging base. -
Page 23: Automatic Charging
Instructions for Use Automatic charging Pressing the Return for Auto Charging on the remote controller to make the robot return for charging. When Cleaning is completed or the battery is too low,the robot will automatically start finding the charging base to charge itself. Pls keep the charging base energized,otherwise the machine will not be able to find the charging base. -
Page 24: Switching Modes
Instructions for Use Switching Modes Startup 01.Make sure the power switch on the side of the robot is turned on. 02.Press the Control button or the Cleaning mode on the remote controller to start the robot. Pause The pause function is to switch the robot from the operating mode to the selected mode,and the robot can be paused by the following operations: 01.Press the Control button on the robot to pause the robot. - Page 25 Instructions for Use Use of Water Tank When charging, please remove the water tank to avoid danger. How to add water? Open the tank sealing cap, fill it with enough water and slowly inject water into the water tank. When charging, please remove the water tank to avoid danger. How to fix the microfiber mop? Seal the tank sealing cap,then fix the microfiber mop to the velcro on the bottom of the water tank.
- Page 27 Instructions for Use ☆ Once the power switch is turned off, all Schedule will be cancelled. ☆ Once the schedule setting is succeeded,the robot will start working at the scheduled time everyday. Press the"Schedule Setting" button to set the scheduled cleaning time for the robot.(e.g.
-
Page 28: Cleaning Modes
Instructions for Use Cleaning Modes Plan Cleaning (S shape Cleaning) Edge Cleaning The robot will perform the smart plan The robot will clean along the cleaning in S shape according to the room longest edge of the room. environment. Single Room Cleaning Spot cleaning The robot will perform the concentrated Close the door of the single room,press... - Page 30 Product Maintainance Dump all debris form the dust box into the garbage. Remove the pre-filter.
- Page 31 Product Maintainance Open the high-efficient filter cover, and remove the high-efficient filter and filter sponge. It is not recommended to wash the high-efficient filter with water. Please pat off the debris carefully. Wash the dust box and pre-filter.
- Page 32 Product Maintainance 1. Dry the dust box and filter components. Keep them dry to ensure a longer service. 2.After the pre-filter is used for 15~30 days, it should be washed once. 3. The maximum service life of the high-efficient filter is 3 months. 1.
- Page 34 Product Maintainance Remove the mop. Wash and dry the mop.
- Page 35 Product Maintainance Pour out the rest of water from the water tank. Clean the tank and dry it.
- Page 36 Product Maintainance 5.4 Maintenance of Rolling Brush Components Open the rolling brush components. Remove the rolling brush and clean off all debris and hair.
-
Page 37: Maintenance Of Other Components
Product Maintainance 5.5 Maintenance of Other Components Electrode slice Sensor Use the cleaning tools or a dry soft cloth to periodically clean the electrode slice of robot chassis and the sensor window. Charging terminal Use a cleaning tool or soft cloth to clean the charging terminal. - Page 38 Common Faults 6.1 Faults Description Faults Possible Reasons Solutions The electrodes between the main body Make sure that the electrodes between and the charging base are not the main body and the charging base contacted properly. are properly contacted. The robot can not be charged.
-
Page 39: Replaceable Modules
Common Faults 6.2 Replaceable Modules Glass Panel Shell Side Brush Components Left Side Wheel Component Right Side Wheel Component Fan Components Left Side Brush Universal Wheel Right Side Brush Components Bottom Shell Dust Box Components Rolling Brush Components Water Tank Battery Battery Cover Application:...
Need help?
Do you have a question about the A&S X500 and is the answer not in the manual?
Questions and answers
пылесос во время зарядки должен быть включён или отключен ? НА САМОМ ПЫЛЕСОСЕ ЕСТЬ ТУМБЛЕР ВКЛЮЧЕНИЯ И ВЫКЛЮЧЕНИЯ
The Neatsvor A&S X500 vacuum cleaner should be turned on while charging. If the charging base is switched off while the robot is on, it may lead to loss of power.
This answer is automatically generated
Каким цветом должна светится кнопка на роботе сверху во время зарядки,
Здравствуйте Прошивка на русском для этого устройства есть и прошивается ли оно