Table of Contents
Advertisement
Quick Links
Advertisement
Table of Contents

Summary of Contents for ELETTROMEDIA HERTZ HMD8 DSP
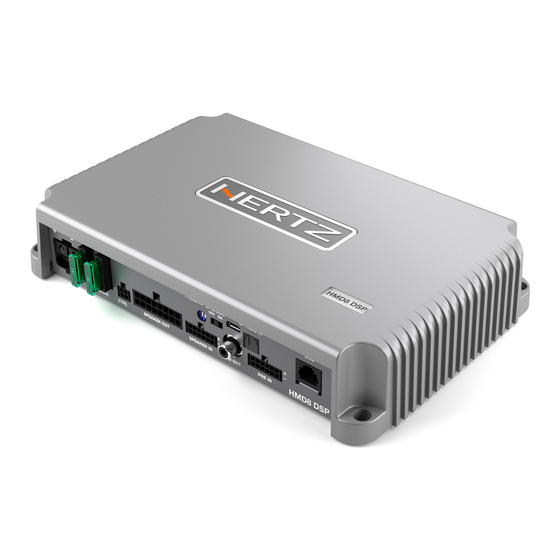
- Page 1 HMD8 DSP USER’S MANUAL rev. 1.2 hertzaudiovideo.com...
-
Page 2: Table Of Contents
USER’S MANUAL HMD8 DSP/ Index 1. PRODUCT DESCRIPTION / PRECAUTIONS ........................... 3 2. PACKAGE CONTENTS ................................4 3. HMD8 DSP INSTALLATION ..............................5 3.1 DEVICE INSTALLATION ..............................5 4. CONNECTION PANEL DESCRIPTION ............................. 6 1 POWER ....................................6 2 FUSE ....................................7 3 CTRL (REM IN-OUT. -
Page 3: Product Description / Precautions
USER’S MANUAL HMD8 DSP/ 1. PRODUCT DESCRIPTION / PRECAUTIONS Thank you for purchasing the HMD8 DSP amplifier for your marine sound system. Your amplifier has been designed and manufactured to exacting standards in order to ensure years of musical enjoyment in your vessel. For maximum performance, we highly recommend that you have your new amplifier installed by an authorized Hertz dealer. -
Page 4: Package Contents
USER’S MANUAL HMD8 DSP/ 2. PACKAGE CONTENTS - HMD8 DSP amplifier CONTROL 1 - Multipolar cable, Rem/Control: CONTROL 2 REM IN REM OUT IN 6 IN 5 IN 4 - Multipolar cable, Input Pre-IN: IN 3 IN 2 IN 1 IN 6 IN 5 IN 4... -
Page 5: Hmd8 Dsp Installation
USER’S MANUAL HMD8 DSP/ 3. HMD8 DSP INSTALLATION External size Mounting size 224 mm / 8.81 in. 243 mm / 9.56 in HMD8 DSP HMD8 DSP How to mount WARNING for all cable INPUT/OUTPUT DEVICE INSTALLATION The following represents the sequence for a typical amplifier installation, using an aftermarket source unit. Additional steps and different procedures may be required in some applications. -
Page 6: Connection Panel Description
USER’S MANUAL HMD8 DSP/ 4. CONNECTION PANEL - DESCRIPTION HMD8 DSP POWER UPGRADE OPTICAL IN PRESETS OFF ON HMD8 DSP FUSE x 2 CTRL SPEAKER OUT SPEAKER IN SUB OUT PRE IN POWER. + Power (11-15 VDC or 22-34 VDC according to POWER silk-screened value): connection terminal for power supply positive pole. -
Page 7: Fuse
USER’S MANUAL HMD8 DSP/ FUSE 30 A blade protection fuse for 12V power supply or 15 A blade protection fuse for 24V power supply. In case the fuse needs to be replaced, use same type and value as the original. 2 X 30A (HMD 8 DSP 12V) 2 x 15A... -
Page 8: Speaker Out
USER’S MANUAL HMD8 DSP/ SPEAKER OUT. HMD8 DSP is provided with a 16 pole multipolar connector to manage the power output signals. 320 mm / 12.6 in. FRONT VIEW 10 mm 0.39 in. OUT 1 + OUT 1 - OUT 2 + OUT 2 - OUT 3 + OUT 3 -... -
Page 9: Sub Out
USER’S MANUAL HMD8 DSP/ SUB OUT. Pre-amplified output subject to low pass filtering optimized to drive a mono amplifier for an external subwoofer or active subwoofer. OPTICAL IN. HMD8 DSP accepts at its input PCM signals up to 192 kHz / 24 bit sampling frequency rate. Connect a fiber optic cable with a TOSLINK connector. -
Page 10: Connections
USER’S MANUAL HMD8 DSP/ 5. CONNECTIONS POWER SUPPLY AND REMOTE TURN ON HEX KEY 2,5 mm POWER PRESETS UPGRADE OPTICAL IN OFF ON 15 mm / 0.6 in. HMD8 DSP FUSE x 2 CTRL SPEAKER OUT SPEAKER IN SUB OUT PRE IN 8 AWG Max EXTERNAL SUBWOOFER... -
Page 11: Memory Selection Switch
USER’S MANUAL HMD8 DSP/ MEMORY SELECTION SWITCH Together with the amplifier, a three-position switch is provided for manual selection of memories. The connection scheme is shown in the image below. CONTROL CONNECTION CABLE Memory 3 CTRL2 Brown CTRL 2. REM IN Blue Memory 1 Pink... -
Page 12: Digital Optical In Input Signals
USER’S MANUAL HMD8 DSP/ 2. PRE INPUT ZONE 1 + ZONE 2 POWER UPGRADE OPTICAL IN PRESETS OFF ON HMD8 DSP FUSE x 2 CTRL SPEAKER OUT SPEAKER IN SUB OUT PRE IN After market Source IN 1 ZONE 1 IN 2 IN 3 ZONE 2... -
Page 13: Output Signals
USER’S MANUAL HMD8 DSP/ OUTPUT SIGNALS POWER UPGRADE OPTICAL IN PRESETS OFF ON HMD8 DSP FUSE x 2 CTRL SPEAKER OUT SPEAKER IN SUB OUT PRE IN OUT 1+ 16: White 8: White/Black OUT 1- 15: White OUT 2+ OUT 2- 7: White/Black 14: White OUT 3+... -
Page 14: Pc Connection
USER’S MANUAL HMD8 DSP/ PC CONNECTION 1. HMD8 DSP connection with PC HMD8 DSP USB cable (provided) -
Page 15: Configuration Software
USER’S MANUAL HMD8 DSP/ 6. CONFIGURATION SOFTWARE This section describes the main features of the configuration software: Navigator. The software was designed to be adopted by all products with onboard DSP in the Hertz marine catalog and future ones: when you connect the device to the software, it automatically configures itself to display the interface of that specific device connected. -
Page 16: Save And Load The Configuration
USER’S MANUAL HMD8 DSP/ SAVE AND LOAD THE CONFIGURATION The software provides the ability to save the current configuration to a file, upload one already saved on your PC and other important features. These are available on the top command bar, as shown in the image below. OPEN Load configuration from a file saved on the PC. -
Page 17: Audio Setup
USER’S MANUAL HMD8 DSP/ Settings The image below shows the general settings panel: Sampling frequency: allows you to set the sampling frequency used by the audio processor (DSP). Language: allows you to set the software interface language. Unit of measure: allows you to set the unit of measurement choosing between centimeters (cm) or inches (in). WARNING: the DSP mounted on this device is capable of processing the signal only at 48 kHz. - Page 18 USER’S MANUAL HMD8 DSP/ 6.4.1.3 OUTPUT CHANNELS DEFINITION The output channels represent the points where the sound is reproduced, i.e. where the speakers are physically connected. Ultimately, the output configuration is the one that most characterizes the audio system. It is important to have the system project clearly in mind before starting: the type and the position of loudspeakers, the need for bridged channels, how many listening areas must be created.
-
Page 19: Sources
USER’S MANUAL HMD8 DSP/ 6.4.1.8 MEMORIES CONFIGURATION The memories act on all the output channels and serve to give a particular nuance setting to the system. Unlike the previous settings which are an essential and fixed part of the setup, the memory can be activated or deactivated by the end user while listening. -
Page 20: Input Channels
USER’S MANUAL HMD8 DSP/ 6.4.3 INPUT CHANNELS The Input channels depend directly on the currently selected source. Each source has its number of inputs and its type of inputs. In this amplifier the input channels are analog for the MASTER source and digital for the OPTICAL source. - Page 21 USER’S MANUAL HMD8 DSP/ • DIGITAL INPUT CHANNELS The image below shows the inputs panel for the OPTICAL source. Remark: for digital input channels sensitivity should not be adjusted. The image below shows one of the input settings panels for the OPTICAL source. The input channel can be: •...
-
Page 22: Output Channels
USER’S MANUAL HMD8 DSP/ 6.4.4 OUTPUT CHANNELS The output channels represent the fundamental elements of the audio system: in the final analysis they can be considered like installed speakers. In the software, each channel has a color associated with it: when a specific channel is selected, the graphic interface elements that concern it take up that same color. -
Page 23: Output Channel Groups
USER’S MANUAL HMD8 DSP/ 6.4.5 OUTPUT CHANNEL GROUPS Each output channel can be associated with one or more groups. If the output channel is associated with one or more groups, its volume will also be adjusted according to the volumes of the associated groups. The association with the groups can be performed in the output channel settings panel. -
Page 24: Listening Zones
USER’S MANUAL HMD8 DSP/ 6.4.6 LISTENING ZONES The idea behind the zones is to provide the possibility to divide the output channels when they are spatially distant from each other so much as to consider them in different environments. The division into zones is therefore justified if the layout of the output channels is distributed over different environments. -
Page 25: Mixer
USER’S MANUAL HMD8 DSP/ 6.4.7 MIXER The mixer allows you to adjust the mixing percentage of the input channels on each output channel. The mixer is accessible through the top command bar. To exit the mixer, press the related button again. The image below shows the graphic interface of the mixer. -
Page 26: Delays And Distances
USER’S MANUAL HMD8 DSP/ 6.4.8 DELAYS AND DISTANCES This setting is based on an automatic system that calculates the time needed for the sound to get from the speaker to the listener’s ear. Preliminary remarks Sound moves through the air at a speed of 343 m/sec (1.125 ft/sec) at a temperature of 20 °C (68 °F). If you know the distance from the sound emission point, you can then calculate the time the sound takes to get to the listener’s ear. - Page 27 USER’S MANUAL HMD8 DSP/ • DISTANCES The following image shows the mini map panel and the functions related to the position of the speakers. This panel is a miniature map showing the position of the speakers belonging to the selected zone. The icon relating to the currently selected output channel is highlighted on the map.
- Page 28 USER’S MANUAL HMD8 DSP/ • LOUDSPEAKER POSITION PANEL The image below shows the loudspeaker position panel and its functions. Maximum distance limit: this function is active by default and allows you to move the loudspeakers inside the red dotted line. This limit represents the maximum distance of the speakers allowed by DSP delay lines; if all the speakers in the map were moved away from the listening point, the red circle would increase its radius and a gray circle will appear in the center to indicate the prohibited area within which the speakers cannot be positioned.
- Page 29 USER’S MANUAL HMD8 DSP/ Confirmation button: it updates the speaker positions and calculates delays. The distances set are displayed on the output channels panel. By clicking on this button, a warning message is shown as in the following image: With a check mark in the appropriate boxes it is possible to choose the sources to which the delays should be applied.
-
Page 30: Crossover
USER’S MANUAL HMD8 DSP/ 6.4.9 CROSSOVER With the crossover section it is possible to set different bands for every output channel. Remark: the output channel you are acting on is indicated by the foreground color of the crossover panel. The image below shows the crossover parameters that it is possible to set: Type: allows you to choose the type of crossover. - Page 31 USER’S MANUAL HMD8 DSP/ 4. BAND PASS The Band Pass type is the combination of the previous two (high and low pass); it is possible to select the name, slope and frequency for both filters. • NAME After the type has been selected, the name filter option will display the following models: 1.
-
Page 32: Equalizer
USER’S MANUAL HMD8 DSP/ 6.4.10 EQUALIZER With the equalizer it is possible to emphasize or attenuate some frequencies rather than others. The equalizer setting can be performed in two ways: • Graphic equalizer • Parametric equalizer The following functions are available for both the graphic and parametric equalizers. Equalizer type selection: allows you to select the equalizer type between graphic or parametric. -
Page 33: Memories
USER’S MANUAL HMD8 DSP/ After selecting the filter type it is possible to set the Gain, Frequency and the Form factor (Q), except for Flat where it is not possible to set any parameters. The minimum and maximum Gain is -12 dB and +12 dB. For Notch or All-pass the gain is set to 0 dB and cannot be changed. - Page 34 USER’S MANUAL HMD8 DSP/ • MEMORIES SETTINGS PANEL The image on the side shows the settings panel for the memories. The memories can be: • renamed; • disabled / enabled. WARNING: when a memory is disabled it is definitively unusable. It is not possible to rename or customize it.
- Page 35 USER’S MANUAL HMD8 DSP/ • PARAMETRIC EQUALIZER The following functions are available for both the graphic and parametric equalizers. Equalizer panel: allows you to select the memory equalizer filter panel. Delta volume panel: allows you to select the memory delta volume panel. See Memory volume (see sec.
- Page 36 USER’S MANUAL HMD8 DSP/ • PARAMETRIC EQUALIZER With the parametric equalizer it is possible to set more parameters for every section than the graphic equalizer. WARNING: the parameters of each section of the parametric equalizer are linked to each other. When a parameter is changed, it may cause changes to other parameters.
- Page 37 USER’S MANUAL HMD8 DSP/ MEMORY VOLUME 6.4.11.2 The selected memory allows this further customization for the output channels volumes. Remark: this function is applied to the output channels only when the memory is selected. Delta volume checkbox: allows you to enable or disable this additional feature of the selected memory. Delta volume level: adjusts the delta volume related to the output channel level.
- Page 38 USER’S MANUAL HMD8 DSP/ MEMORY DELAY 6.4.11.3 The selected memory allows this further customization for the output channels delays. Remark: this function is applied to the output channels only when the memory is selected. Delays checkbox: allows you to enable or disable this additional feature of the selected memory. Delays unit of measurement: it allows you to set the unit of measurement of delays by choosing between distance (cm) or time (ms).
-
Page 39: Graph
USER’S MANUAL HMD8 DSP/ 6.4.12 GRAPH 1 GRAPH The Graph displays the frequency response of the output channels. On the x-axis there is the frequency in hertz (Hz), represented with a logarithmic scale; on the y-axis the amplitude of the signal is represented in decibels (dB). 2 GRAPH SETTINGS The image below shows the graph settings panel to select what to observe on the graph. - Page 40 USER’S MANUAL HMD8 DSP/ 3 GRAPH RESIZE When the graph resize button is clicked, the graphic layout adopted by the software is shown in the image below. As you can see, the input channels panel and the zone volume panel are hidden, while the output channels panel takes on a reduced graphic layout.
-
Page 41: Work Notes
USER’S MANUAL HMD8 DSP/ 6.4.13 WORK NOTES The Work Notes panel allows you to capture a snapshot of the whole current configuration. This function makes a copy of the current configuration to the clipboard. The images below show the Work Notes panel both when it is empty and when it contains snapshots. Camera button: allows you to take a snapshot of the current configuration. -
Page 42: Extended Functionalities
USER’S MANUAL HMD8 DSP/ EXTENDED FUNCTIONALITIES The software dynamically reshapes depending on the device to which it connects. During synchronization, the device communicates the current configuration but also the details inherent to the functionalities it implements. These functionalities are divided between Wizards and Features (see sec. -
Page 43: Features
USER’S MANUAL HMD8 DSP/ 6.5.2 FEATURES Within this group are instead all the extensions that can be activated or deactivated by the user during system operation. Remark: HMD8 DSP does not implement any features. 6.5.3 REAL TIME ANALYSIS WARNING: the Real time analysis functionality (RTA) is not a measuring instrument! It is an aid for setting up the audio system. -
Page 44: Status Bar
USER’S MANUAL HMD8 DSP/ 6.5.4 STATUS BAR The status bar is located at the bottom of the configuration software and provides some useful information for the user. In particular, some icons are shown on the right side of the status bar as in the following images: Warning: indicates the presence of potential configuration problems. -
Page 45: Troubleshooting
USER’S MANUAL HMD8 DSP/ 7. TROUBLESHOOTING SYNCHRONIZATION WITH A PC 1. HMD8 DSP operating problems If, when calibrating the system with HMD8 DSP connected to a laptop there are operating problems, try disconnecting the laptop power supply cable. With the laptop working on battery power you avoid a possible voltage difference in the USB ground between the vehicle (HMD8 DSP) and the ground (PC). -
Page 46: Technical Specifications
USER’S MANUAL HMD8 DSP/ 8. TECHNICAL SPECIFICATIONS POWER SUPPLY HMD8 DSP 12 V HMD8 DSP 24 V Power supply voltage / fuse: 11 ÷ 15 VDC / 2 x 30 A 22 ÷ 34 VDC / 2 x 15 A Operating power supply voltage: 6.5 V ÷... - Page 47 PART OF ELETTROMEDIA - 62018 Potenza Picena (MC) Italy - T +39 0733 870 870 - F +39 0733 870 880 - www.elettromedia.it...
Need help?
Do you have a question about the HERTZ HMD8 DSP and is the answer not in the manual?
Questions and answers