Table of Contents
Advertisement
Quick Links
Advertisement
Table of Contents

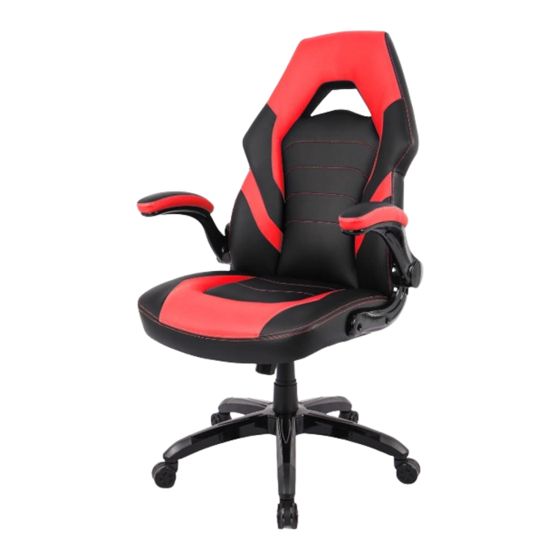
Summary of Contents for RIMIKING RIMI-2857
- Page 1 I N S T R U C T I O N M A N U A L Model:RIMI-2857...
-
Page 2: Assembly Guide
833-969-2075 rimikingservice@outlook.com ASSEMBLY GUIDE Congratulations, you are now the owner of a brand new Rimiking chair! Before enjoy the comfort chair, you have to put it together.This Assembly Guide will take you through the basic assembly process. To make sure your assembly goes smoothly, please follow the assembly instructions, especially the important safety information. -
Page 3: Package List
1 (770) 298-8947 833-969-2075 rimikingservice@outlook.com PACKAGE LIST Back Cushion Seat Cushion Arms Quantity: 1 Quantity: 1 Quantity: 2 Seat Plate Lift Star Base Quantity: 1 Quantity: 1 Quantity: 1 Lift Cover Casters Bolts M6*20mm Quantity: 1 Quantity: 5 Quantity: 4 Bolts M6*25mm Plastic Caps Wrench... -
Page 4: Assembly Instruction
1 (770) 298-8947 833-969-2075 rimikingservice@outlook.com ASSEMBLY INSTRUCTION STEP 1 : Turn the Star Base(6) upside down, then press the Casters(8) into the holes at the end of each base leg, insert the Lift(5) into the center hole of the Star Base, the Lift Cover(7) should be placed over the Lift. - Page 5 1 (770) 298-8947 833-969-2075 rimikingservice@outlook.com ASSEMBLY INSTRUCTION STEP 2 : Align the Seat Plate(4) over the pre-drilled holes underneath the Seat Cushion(2), make sure that the front of the seat plate is facing the front of the Seat Cushion. Attach the Seat Plate to the Seat Cushion using Four Bolts M6*20mm(9), tighten all the bolts with the Wrench(12), being careful not to miss-thread the bolts or damaged the seat.
- Page 6 1 (770) 298-8947 833-969-2075 rimikingservice@outlook.com ASSEMBLY INSTRUCTION STEP 3 : Turn the Seat Cushion upright and align the center hole of the Seat Plate over the lift, then push the Seat Cushion down onto the lift firmly until the connection is secure.
- Page 7 1 (770) 298-8947 833-969-2075 rimikingservice@outlook.com ASSEMBLY INSTRUCTION STEP 4 : Attach the Arms(3) to the Seat Cushion(2) with Four Bolts M6*25mm(10), using the Wrench(12). Note 1: Arm rests are labeled with an "L" (left) or "R" (right) to show which sides they should be placed on.
- Page 8 1 (770) 298-8947 833-969-2075 rimikingservice@outlook.com ASSEMBLY INSTRUCTION STEP 5 : Lay the Back Cushion on the seat of the chair with the top of the cushion toward the front. Attach the Back Cushion(1) to the Arms by inserting Two Bolts M6*25mm(10) in the Lower holes with the Wrench(12). Note : Do not tighten all the bolts to 100%, make sure it have space to adjust in the next steps.
- Page 9 1 (770) 298-8947 833-969-2075 rimikingservice@outlook.com ASSEMBLY INSTRUCTION STEP 6 : Rotate the back of the chair up, then secure it with the Top Two Bolts M6*25mm(10) with the Wrench(12). Adjust the balance on each side of the chair, and fully tighten all the bolts at this step.
- Page 10 1 (770) 298-8947 833-969-2075 rimikingservice@outlook.com ASSEMBLY INSTRUCTION STEP 7 : Press the Plastic Caps(11) into the Arms holes to cover the bolts. CAUTION: Make sure all bolts and screws are fully tightened before using chair. Lubricate all moving parts and tighten all bolts/screws every 6 month or whenever needed.
- Page 11 1 (770) 298-8947 833-969-2075 rimikingservice@outlook.com INSTRUCTIONS FOR USE 1.Seat Height:Paddle-shaped lever on the right side To raise: While taking your weight off chair, lift lever up. To lower: While seated, lift lever up. At the proper height, your feet should rest flat on the floor. 2.Tilt Tension: Long stem under the seat cushion with knob To increase tension: While seated, turn knob forward...
- Page 12 1 (770) 298-8947 833-969-2075 rimikingservice@outlook.com INSTRUCTIONS FOR USE 3.Operating the tilt lockout To let your chair tilt back,pull the control handle out. To stop your chair from tilting,sit forward,then push the control handle in.
-
Page 13: Safety And Maintenance
1 (770) 298-8947 833-969-2075 rimikingservice@outlook.com SAFETY AND MAINTENANCE Do not stand on the chair, Do Not use the chair as stepladder. Use this product for seating one person at a time. Do not use the chair unless all bolts and screws are firmly secured. Avoid contact with sharp objects to prevent puncturing the fabric. -
Page 14: Limited Warranty
LIMITED WARRANTY Rimiking promises to repair or replace any Rimiking chair that is found to be defective in material or workmanship within one (1) year from the date of original purchase so long as you, the original purchaser, still owns it. This is your sole and exclusive remedy. - Page 15 1 (770) 298-8947 833-969-2075 rimikingservice@outlook.com RETURN POLICY : We adopt a 30 days return policy which means that all products purchased on this website may be returned to us within the timeframe. You need to contact us within 30 days after the product(s) came into your possession and the product(s) must be returned to us without any undue delays.
- Page 16 833-969-2075 1 (770) 298-8947 rimikingservice@outlook.com...


Need help?
Do you have a question about the RIMI-2857 and is the answer not in the manual?
Questions and answers