Table of Contents
Advertisement
Quick Links
Pre-assembly preparation
Please ensure instructions are read in full before attempting to assemble this product
Necessary Tools
Please check the pack contents before attempting to assemble this product.
A full checklist of components is given in this leaflet.
This product is heavy, it should be assembled as near as possible to the point of use.
TAKE CARE WHEN LIFTING to avoid personal injury and (or) damage to th product.
This product takes approximately 30 MINUTES to assemble with 2 PEOPLE
The fittings pack contains SMALL PARTS which should be KEPT AWAY FROM YOUNG CHILDREN
Read this leaflet in full before commencing assembly.
1/6
Advertisement
Table of Contents

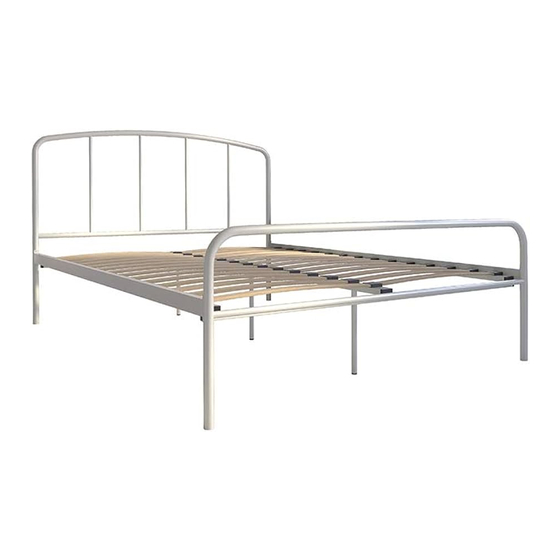
Summary of Contents for Mattressonline Hove Metal Bed Frame
- Page 1 Pre-assembly preparation Please ensure instructions are read in full before attempting to assemble this product Necessary Tools Please check the pack contents before attempting to assemble this product. A full checklist of components is given in this leaflet. This product is heavy, it should be assembled as near as possible to the point of use. TAKE CARE WHEN LIFTING to avoid personal injury and (or) damage to th product.
- Page 3 Step by step assembly instructions Step One Attach the Side Rails (3) to the Headboard (1) and Footboard (2) using Washer (A) and JCBC M6 x 25 mm Bolt (B). Tighten using Allen Key (H) as shown in the diagram below. Repeat this for all 4 corners.
- Page 4 Step Three Ensuring the holes along the centre rail(7) are facing upwards, attach to the underside of the Cross Bars (5) using JCBC M6 x 30mm screw(C). Step Four Screw the adjuster (E) in full in to the bottom of the Support Legs (6). Attach the Support Legs (6) to the underside of the centre rail (7) using M6x30mm screw (C) through the pre-drilled holes in the centre rail (7).
- Page 5 Step Five With the curved side facing upwards, insert 2 Slats (4) into a Centre Stopper (F) followed by a Side Stopper (G) onto the other end of both slats. Use your palms to push down the centre plastic caps into the centre rail followed by the side plastic caps into the side rail as shown in the diagram below.
- Page 6 Care and Maintenance Metal This bedstead should be cleaned using a soft damp cloth and dried immediately. Do not use a very wet cloth or allow any liquid contact for a long period of time as this can permanently damage the surface. Do not use abrasive cleaner or harsh detergents as this can damage the surface.
Need help?
Do you have a question about the Hove Metal Bed Frame and is the answer not in the manual?
Questions and answers