
Summary of Contents for RSX Engineering Ultra Sabers Diamond
- Page 1 DIAMOND CONTROLLER USER MANUAL Rev. 1.2 / 2017-12-29 P a g e By RSX Engineering...
-
Page 2: Table Of Contents
CONTENT 1. Overview ……………………………………………. 2. Getting started …………………………………….. Power On! ………………………………………………………………………………….. Basic moves ………………………………………………………………………………. Gestures ……………………………………………………………………………………. 3. Diamond control …………………………………... Adjusting the volume ……………………………………………………………………. Changing fonts …………………………………………………………………………… Learning gestures ……………………………………………………………………….. 4. The Launcher …………………………………..11 Installing and connecting ……………………………………………………………… Main settings ………………………………………………………………………………... -
Page 3: Overview
OVERVIEW Diamond Controller is the complete sound and light controller of your saber. It responds to motion by triggering sound and light effects. It is fully configurable through the USB port using the Ultrasabers Launcher software on PC and MAC. The Diamond Controller is a sound board combined with an LED driver. -
Page 4: Getting Started
GETTING STARTED Power On! The Diamond Controller comes already configured to drive a Red-Green-Blue-White LED and with preinstalled fonts. There’s no need to connect your saber to the computer unless you want to make some significant changes. It is ready to use and full of possibilities straight from the box. -
Page 5: Basic Moves
Basic moves The Diamond Controller detects 5 different types of basic moves and reacts to each one with a different effect: SWING The Swing effect is triggered by a swing motion of the saber in any direction. IMPACT The Impact (Clash) effect is triggered every time the blade encounters a rigid object, e.g. - Page 6 FORCE The Force effect is triggered by rotating the saber from your wrist, continuously, clockwise and counter clockwise at least ¼ of a full rotation on each direction. LOCKUP Although not triggered by a special move, the Lockup effect is closely associated with combat moves.
-
Page 7: Gestures
Gestures One of the most advanced features of the Diamond Controller is the ability to learn and recognize gestures. A gesture is a sequence of moves of any complexity that lasts up to 5 seconds. It is learned by the Diamond Controller from a single execution and can be detected any time while the saber is in active mode. -
Page 8: Diamond Control
DIAMOND CONTROL This chapter teaches you how to control your Diamond saber using just the saber itself. More advanced control capabilities are available through the Ultrasabers Launcher software, which is dealt with in the following chapter. Adjusting the volume 1. Initiate Trigger two clashes in less than 1 second while keeping the switch pressed. -
Page 9: Changing Fonts
Changing fonts Your saber can store up to 16 fonts in the internal memory and comes from factory with 9 preinstalled. You can select which is the active one using the on-board menu. 1. Initiate Execute a STAB motion with the switch pressed. Release the switch. -
Page 10: Learning Gestures
Learning gestures A gesture is a sequence of moves of any complexity that lasts up to 5 seconds. It is learned by the Diamond Controller from a single execution and can be detected any time while the saber is in active mode, triggering a special sound and light effect. Each font can have up to 5 gestures. - Page 11 Tips ♦ You can see an instructional video on Diamond on-board controlls, here. ♦ Execute the gesture a few times before recording it, to make sure you’ll reproduce it accurately. ♦ Take your time. The saber records the last 5 seconds of the gesture you’re executing, so you don’t have to start moving the saber the instant you pressed the switch to start recording.
-
Page 12: The Launcher
THE LAUNCHER Ultrasabers Launcher is the software that allows you to fully configure the Diamond Controller. This chapter teaches you how to use it. Installing and connecting Do not connect the Diamond Controller to the computer until Ultrasabers Launcher is installed. For Windows 7 and 8, the Diamond Controller USB driver will be installed together with the application;... - Page 13 To connect the Diamond Controller to the Launcher: ♦ Make sure the board is powered and the batteries are charged at least 50%. If the batteries discharge completely when you’re writing something on the board, you might end up with a corrupt memory. The built-in battery monitor can help you prevent that. ♦...
-
Page 14: Main Settings
Main settings The main settings are available on the “Diamond Controller” tab of the Launcher. Here you can: ♦ Adjust the detection sensitivity of the basic moves (Swing, Impact, …) and menu rotations, using the corresponding sliders. ♦ Change the current font. ♦... -
Page 15: Board Configuration
Board configuration You don’t need to change the board configuration unless you wired the board yourself. If you bought a Diamond saber, the board is already wired and configured so you can skip this chapter. The Diamond Controller can drive up to 8 LEDs. It has 4 power channels for blade illumination, able to drive a RGBW LED at up to 1 A/channel, and 4 accent channels for accessories such as an illuminated switch or a crystal chamber, able to drive independent low-power LEDs at up to 50 mA/channel. - Page 16 The Red channel of the LED has to be wired to Power1, Green to Power2 and Blue to Power3. The color of the LED wired to Power4 can be selected from the board configuration window and is used by the Effect Editor and Express Font Wizard to correctly display the color mixing, but other than that, it has no impact on the functionality of the Diamond Controller.
- Page 17 Tips ♦ The board configuration is not applied in real-time, you need to press the “Write” button. ♦ The “Read” button reads the configuration from the board. Normally you don’t need to use it, reading is done automatically when the board connects to the Launcher. ♦...
-
Page 18: The Express Font Wizard
The express font wizard The font wizard is the software module that allows you to change how your Diamond saber looks and sounds. You can activate it using the “Font wizard” button from the “Diamond Controller” tab. You can run the font wizard in express or advanced mode. The express wizard is faster but offers less choices, while the advanced wizard allows full customization but takes a little more effort to configure. - Page 19 1. Select slot The Diamond Controller can store up to 16 fonts in the internal memory, so there are 16 slots to choose from. If you select a slot that is already used by a font, it will be overwritten. 2.
- Page 20 The express font wizard provides a visual overview of the entire font, with the color of each effect displayed in a diamond-shaped control. Power On Power Off Swing Lockup Stab Impact Force Spin Idle Hum Blade color Clicking on any face of the diamond allows you to change the color, as well as to enable or disable the sound and light, for the corresponding effect.
- Page 21 If an effect has its light disabled, it will be displayed with transparent background. If an effect has its sound disabled, a mute symbol will be displayed next to the effect. Transparent background The mute symbol means means light is disabled the sound is disabled for for this effect this effect...
-
Page 22: The Advanced Font Wizard
The advanced font wizard The advanced font wizard is the software module that allows you full customization of how your saber looks and sounds. You can activate it using the “Font wizard” button on the “Diamond Controller” tab. Navigation The font wizard guides you through all the steps that you need in order to customize and write a font on the board. - Page 23 Font selection On the first page of the wizard you’ll find a list of all the 16 available slots. The slot that you select here is the one that you’ll edit and write. If you select a used slot, you’ll edit the font that is already in the Diamond Controller’s internal memory.
- Page 24 Effects The following pages of the font wizard, from “Tag Effect” to “Lockup Effect”, have all the same structure. They allow you to assign an effect to each event. See chapter 2 for details about all the events that you can assign effects to. An effect is a collection of sounds and lights, packed together as a single entity.
- Page 25 Gestures The “Gestures” page looks different than all the other effect pages of the wizard, because each font can store up to 5 gestures and here you can customize all of them. For details about how gestures are created, see chapter 3. Here you select a gesture.
- Page 26 Tips ♦ Any change you make to gestures or the effects assigned to gestures will only be applied when you write them to the board. You can write the entire font at once or see the next tip. ♦ button is a shortcut that instantly writes the selected gesture to the board (just the gesture, not the effect assigned to it!).
- Page 27 Tips ♦ You can’t have multiple fonts with the same name on the board, so please make sure you assigned an appropriate name. ♦ Save the font on your computer before writing it to the board. If something goes wrong, you don’t want to lose all your work! P a g e...
-
Page 28: The Effect Editor
The effect editor The building block of the light and sound of a Diamond saber is the effect, which packs together a light sequence and one or more sounds. Effects are triggered by events such as power on, swing, lockup… and organized into fonts. The effect editor is the software module of the Launcher which allows you to create and modify effects. - Page 29 The second way to start the editor is on an effect by pressing the “Edit Effect” button in the Font Wizard, on any effect page. If it starts this way, it will keep the association with the font and the event assigned to, so you can write it directly on the board without the need to save it on your computer.
- Page 30 The other two buttons on this bar are productivity shortcuts which you might find helpful in specific situations. They deserve some attention: If the Launcher is connected to your Diamond Controller, you can directly write to the board the effect you’re editing. You can NOT do this if the editor was started standalone, because the board wouldn’t know when to play this effect (on swing, clash, force…) “Write to board”...
- Page 31 If the battery monitor is enabled, the accent channel to which it is assigned is no longer available for editing and it will be marked with the battery symbol. Each light sequence is defined by points. Each point has a time value, which defines the horizontal position, and an...
- Page 32 ♦ The effect can run the light sequence multiple times (up to 100) and you can specify the number of repetitions using the controls located on the left of the zoom buttons. You can use the arrow buttons to increase/decrease the number or you can type it directly. Keep in mind that only the light sequence will be repeated, the sound will play a single time! ♦...
- Page 33 ♦ On the left side of each light box, there is an ON/OFF button for each channel. There’s a subtle yet important difference between setting a color OFF and setting it to 0 intensity. If it is ON then the effect will take control of that channel and drive it to the intensity defined by the light sequence.
- Page 34 Sounds The sounds of an effect are easier to handle than lights: all you need to do is to add one or more sound files to the effect, using the “Add Sound” button. You can use LSU or WAV files, which will have to be formatted as mono, 16 bit, 48kHz.
- Page 35 Tips ♦ Although not mandatory, it is good practice to end the sound and the light at the same time, because the Diamond Controller drives the sound and light continuously and independently. If they don’t end at the same time, you might desynchronize the effects. For instance if the light sequence of the Swing effect lasts longer than the sound, you’ll end up with your saber playing the sound of the Idle Hum and the light of the Swing.
-
Page 36: Updates
Updates The Diamond Controller is a living product and we’re constantly working to improve it, not only by solving known issues but also by adding new functionality. It is therefore in your best interest to keep your Diamond saber up to date. The way to do this is by updating the software and firmware. - Page 37 Firmware update The firmware is the program that runs on the Diamond Controller. When you connect your saber to the Launcher, you will be notified about the firmware version by a system message on the “Main” tab. If there’s a new firmware available there will be a red message informing you that you need to update and the Launcher will no longer automatically switch to the “Diamond Controller”...
-
Page 38: Technicalities
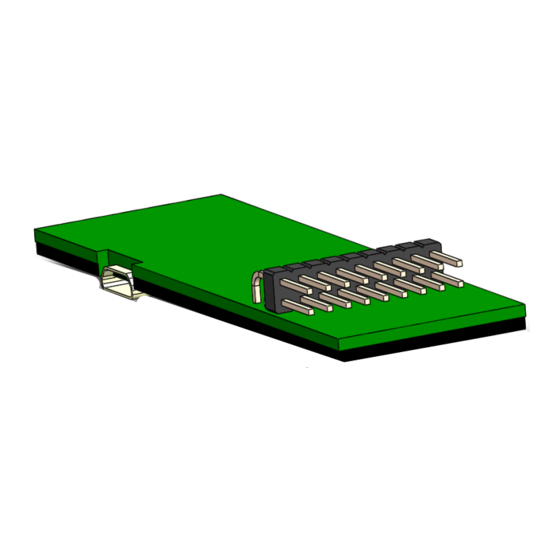
5. TECHNICALITIES Wiring The Diamond Controller is designed to be mounted on a 2 x 14500 battery pack fitted with a speaker. It has a micro USB socket for connecting the board to a computer and a double row, 0.1” pitch, 18 pin connector for wiring the batteries, speaker, switch and LEDs. You can find a suitable mating connector here or here. - Page 39 Below is the main wiring diagram of the Diamond Controller: The components that you’ll need to wire to a mating 18 pin connector are: ♦ Battery: the preferred setup is to use two 3.7V Li-Ion batteries, size 14500, mounted in a battery holder.
- Page 40 Onyx extension The Diamond’s accent channels are designed for low power LEDs, being able to drive up to 50 mA / channel. Their capability can be extended at up to 0.7A / channel or 1.0 A / channel by using the Onyx buck regulator, effectively turning any accent channel into a power channel. This is useful for special configurations such as double-blade or cross-guard sabers.
-
Page 41: Specifications
Specifications ELECTRICAL Operating voltage 5 – 9 Vdc Recommended battery setup 7.4V (2 x Li-Ion @3.7V) 1.25 W @ 8 speakers Audio power Audio quality 16 bit, 48 kHz Maximum Power LED current Adjustable: 0.1 – 1 A / channel Power LED voltage 2 –... -
Page 42: Troubleshooting
6. TROUBLESHOOTING Common issues When I turn on the saber I get an “Initialization error” message. This might be a configuration problem or a hardware failure. Connect it to the Launcher, run the diagnose tool and follow the recommendations from the report. When I turn on the saber I hear some beeps and then nothing else happens. - Page 43 I cannot find the master volume control in the Ultrasabers Launcher. Upgrade the firmware and software to the latest version. I cannot find the “Onyx LED buck” checkbox in the board configuration window of Ultrasabers Launcher. Upgrade the firmware and software to the latest version. The board does not connect to the computer or disconnects sporadically.
-
Page 44: Running A Diagnose
Running a diagnose When you turn on the Diamond Controller it will first check the internal configuration and memory content. If it finds a problem it will play an audio message reporting an initialization error. Such errors might not be critical, the Diamond Controller will try to disable the corrupted functionality so, after the error message, the board might seem to behave normally. - Page 45 The current status of the diagnose will be reported in a progress window. Let it work, do not disconnect the USB cable and do not remove the batteries. When the diagnose is complete it will open a text report, detailing the results of the checks. This is a human readable report and contains suggestions on how to fix the problems found.
-
Page 46: Restoring Factory Defaults
Restoring factory defaults If the Diamond Controller is reporting errors and you’re unable to fix them following the recommendations of the diagnose tool, the last resort is to try to restore the factory defaults. This procedure will rewrite the entire content of the internal memory, including fonts, gestures and settings, to the default state. -
Page 47: Reporting Errors
Reporting errors If you followed all the guidelines of the troubleshooting section of this manual and the problem persists, you should contact Ultrasabers customer support. You will probably be asked to provide the following files: ♦ If your problem is related to the behavior of the Diamond Controller: the diagnose report. - Page 48 Diamond Controller and Ultrasabers Launcher are developed and manufactured by RSX Engineering, exclusively for Ultrasabers RSX Engineering LLC Apateu St, Timisoara, 300543, Romania +40 771 279 017 ultrasabers@rsxengineering.com P a g e...
Need help?
Do you have a question about the Ultra Sabers Diamond and is the answer not in the manual?
Questions and answers