Advertisement
Quick Links
Advertisement

Summary of Contents for JCR Focus RS
- Page 1 V1.3...
-
Page 2: Introduc.on
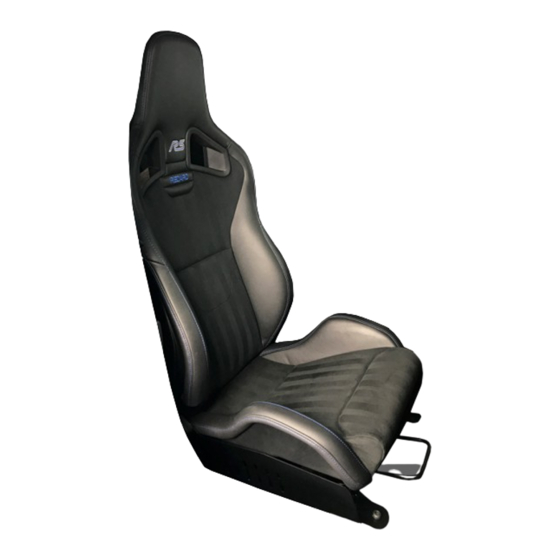
GENERAL INFORMATION Introduc.on Thank you for choosing to purchase the JCR Developments SuperLow Seat Frame. As you are well aware, the standard non-adjustable sea.ng posi.on greatly compromises an otherwise excellent car. It was our feeling that developing a solu.on for the op.onal RECARO shell seat would resolve this major flaw. ANer an extensive design, development and tes.ng programme, we are excited to be able to finally release the finished product. The final product has been extensively tested on road and track, comple.ng several thousand miles of durability tes.ng, including over 200 miles on the Nürburgring Nordschleife. We are confident that the new frames offer an excellent replacement to the standard Ford component mee.ng FIA safety standards, matching the OEM s.ffness and exceeding the adjustability using genuine RECARO seat runners. -
Page 3: Limited Warranty
GENERAL INFORMATION Limited Warranty You should be aware that the seat frames are manufactured to aNermarket standards, rather than those specified by the Original Equipment Manufacturer (OEM). Any specific defects in the JCR SuperLow Seat Frame will be covered by JCR. - Page 4 GENERAL INFORMATION Warnings Throughout these instruc.ons, you may see the following banner accompanied by this symbol WARNING Please take care to read, in detail, the informa.on related to this. It is safety cri.cal and may contain informa.on on correct torque values or important installa.on instruc.ons that, if not followed, may result in damage to your car the seat frames, or injury.
-
Page 5: Packing List
GENERAL INFORMATION Packing List The installa.on kit for one seat frame includes QTY Descrip.on JCR SuperLow Seat Frame base plate JCR SuperLow Seat Frame seat front bracket JCR SuperLow Seat Frame seat rear bracket RECARO adjustable slider set Adjuster bar Slider spacer M10 x 20mm bolt M8 x 25mm bolt M8 x 16mm bolt M6 x 16mm bolt M10 flanged locking nut M8 flanged locking nut M6 flanged locking nut Zip .e M8 spacer (OPTIONAL) M6 spacer (OPTIONAL) - Page 6 GENERAL INFORMATION Tool List To complete the installa.on you will need 7mm socket – T50 Torx drive – Ratchet extension – 10mm deep socket – 10mm ring spanner – 11mm ring spanner – 13mm socket – 13mm ring spanner – 15mm ring spanner – HW4 hex drive – HW5 hex drive – HW6 hex drive – Sidecueers – Torque wrench capable of at least 50Nm – (Recommended) Loc.te 241 or equivalent (11.5Nm break off torque) – ...
-
Page 7: Seat Removal
INSTALLATION Seat removal To begin the installa.on process, you must first remove the seats and OEM seat frames from the car as one unit. WARNING Please ensure the igni.on is OFF during the en.re installa.on. Failure to turn the igni.on off may result in fault codes being stored in the vehicle restraints system. Please begin by disconnec.ng the harness connector block. This can be found under the front edge of the seat bolster. – Unbolt the connector (7mm socket) (1) – Unclip the connector from the moun.ng bracket (2) – Separate the two sides of the connector... - Page 8 INSTALLATION Seat removal Remove and retain the bolts (1,2,3) (T50) that secure the seat runners to the floor of the car. The first 3 can be accessed from the front door. The final bolt (4) (T50) can be accessed through the rear door.
- Page 9 INSTALLATION Seat removal The seat should now be removed from the vehicle to con.nue installa.on WARNING Cau.on should be taken not to damage the interior trim or paint whilst removing the seat from the car. Suitable measures should be taken to protect the vehicle.
- Page 10 INSTALLATION Seat belt buckle removal Before removing the OEM runners, the seat belt buckle must be removed. – Unbolt the seat belt buckle bolt (1) (T50) – Remove retaining assembly washer and bolt from belt (may require pressing out) – Rest buckle on seat bolster...
- Page 11 INSTALLATION OEM runner removal Once away from the car, the OEM runners must be removed from the RECARO seat WARNING Care should be taken not to damage the M6 bueon head internal hex. These will be reused. Unbol.ng torque should be applied to the corresponding nut on the inside face Locate the 2 M6 bolts (1,2) (HW4 hex) and corresponding nuts which secure the RECARO seat base to the outer OEM runner. – Apply unbol.ng torque to the internal nut (10mm deep socket) – Remove nut from bolt and retain – Carefully remove the runner WARNING The OEM adjuster bar is connected to the runner with a spring. Care should be taken when removing the runners as this may come off...
- Page 12 INSTALLATION OEM runner removal Locate the 2 M6 bolts (3,4) (HW4 hex) and corresponding nuts which secure the RECARO seat base to the inner OEM runner. – Apply unbol.ng torque to the internal nut (10mm deep socket) – Remove nut from bolt and retain – Carefully remove the runner...
- Page 13 INSTALLATION Seatbelt harness reloca.on Installa.on of the SuperLow Seat Frame requires freeing up of the seatbelt harness to allow for movement of the runners. Before beginning with the assembly of the SuperLow Seat Frame – Remove trim clip (1) from the plas.c seat base – Feed the slack through the side clip (2)
- Page 14 INSTALLATION Seat runner and bracket assembly op.ons OPTION 1 – 55mm drop from standard – Assemble both brackets poin.ng downwards OPTION 2 – 20mm drop from standard – Assemble both brackets poin.ng upwards OPTION 3 – 55mm drop from standard with 7.5deg extra rake – Assemble the front bracket poin.ng upwards, and the rear downwards. WARNING Install the op.onal supplied spacers (3 per bolt) between the rear bracket and the runner for OPTION 3 (1,2). This it to provide suitable clearance to the base plate.
- Page 15 INSTALLATION Seat runner and bracket assembly WARNING During assembly, unless otherwise stated, all M6 bolts should be torqued to 18Nm and all M8 bolts to 24Nm. It is recommended that a thread lock compound of Loc.te 241 or equivalent is used on bolts during assembly. Assemble the upper brackets to the runners using 2 of the M6x16 and locking nuts (HW5 hex and 11mm ring spanner) and 2 of the M8x16 bolts and locking nuts (HW6 hex and 13mm ring spanner) supplied in the fastener bag for each bracket. Note the orienta.on of the direc.on arrows on the brackets (ensure they point towards the end of the runners where the adjuster bar mounts). Ensure the runners are square to each other before torqueing. For ease of assembly you may need to move the runners to access the bolt holes. To do so, press down on the adjuster mechanism on both runners (1) in the below loca.on.
- Page 16 INSTALLATION Seat runner and bracket assembly Before bol.ng the runners to the RECARO seat base – Insert the 4 M8x25 bolts into the lower part of the runner (1) – For ease of access, it may be necessary to slide the runner forward and back. If doing this, ensure that both runners are reset to their star.ng posi.on before bol.ng to the seat base...
- Page 17 INSTALLATION Seat runner and bracket assembly WARNING Cau.on should be taken when reassembling M6 bueon head bolts to avoid damaging the internal hex – Offer the assembled runners to the RECARO seat base and loosely bolt with the retained M6 nut and bolt (HW4 hex and 10mm ring spanner) – Once located, torque all 4 bolts to 10Nm...
- Page 18 INSTALLATION Wiring harness and adjuster bar fitment – Aeach the seat side connector block to the front bracket using the cable .es provided (1,2). Trim with side cueers. – Clip the adjuster bar (3) into the seat runners ensuring it is angled up towards the base of the seat.
- Page 19 INSTALLATION Base plate assembly Before aeaching the main base plate, locate the 4 spacers on the 4 M8 bolts. – Offer up the rear most (1) moun.ng holes on the base plate to the 4 M8 – bolts and torque (13mm socket). OPTION – If greater forward adjustment is required, mount the base plate using the forward most moun.ng holes (2).
- Page 20 INSTALLATION Base plate assembly Aeach the seat belt buckle to the seat frame with the supplied M10 nut and – bolt and torque to 47Nm (HW6 hex and 15mm ring spanner) WARNING Ensure the seat belt harness is free to move and is not pulled .ght at the extremes of adjustment. If necessary, free up more of the harness by removing an addi.onal harness clip from the base...
- Page 21 INSTALLATION Seat installa.on The seat should now be reinstalled to the vehicle. WARNING Cau.on should be taken not to damage the interior trim or paint whilst installing the seat to the car. Suitable measures should be taken to protect the vehicle. – Ensure the vehicle side of the seat harness is free to move and reaeach to seat side harness – Secure 8mm harness bolt to close seat harness connector – Using the retained bolts (1,2,3,4) (T50), bolt the base to the moun.ng points. Torque to 35Nm...
- Page 22 CARE POINTS Seat installa.on WARNING Check the installed seat is securely installed and free to move. Before driving, check the driver has sufficient visibility in the newly lowered posi.on. Adjust as required (see moun.ng OPTIONS p14) Please be aware that visibility will be different with the lowered posi.on. The driver should be reminded that care should be taken when driving with the modified sea.ng posi.on.
- Page 23 © Copyright 2017 JCR Cleveland House, Pease Court Hueon Lane, Guisborough Cleveland TS14 8PR Tel - 01287 619 500 Email - contact@jcr-gtr.com hep://www.jcr-gtr.com...
Need help?
Do you have a question about the Focus RS and is the answer not in the manual?
Questions and answers