Table of Contents
Advertisement
Quick Links
Advertisement
Table of Contents

Subscribe to Our Youtube Channel
Related Manuals for Luciol Instruments LOR-200

Summary of Contents for Luciol Instruments LOR-200
- Page 1 LOR-200/220 LOR-200/220 User’s Manual...
-
Page 3: Table Of Contents
OPTICAL POWER METER (OPTION) ....................31 WAVELENGTH TUNABLE OTDR ...................... 33 ........................33 ETTING THE WAVELENGTH SPECIFICATIONS ..........................34 A.1........................34 ENERAL SPECIFICATIONS A.2. LOR-200 ..................... 35 PTICAL SPECIFICATIONS A.3. LOR-220 ..................... 36 PTICAL SPECIFICATIONS A.4. )................36 PECIFICATIONS PTICAL... - Page 4 B.1........................... 37 IMITED WARRANTY B.2......................37 XTENDED WARRANTY OPTIONS B.3......................37 NSTALLATION AND TRAINING SAFETY............................38 C.1........................... 38 ASER SAFETY C.2........................39 XTERNAL POWER SUPPLY C.3..........................39 LECTRIC CABLES C.4........................39 AFETY INSTRUCTIONS COMPLIENCE SYMBOLS .........................
-
Page 5: Introduction
Here, the optical spans are typically in the tens to hundreds of meters range. But the LOR-200/220 can even analyze fiber spans up to 160 km. In addition, a high resolution “zoom” function allows identifying events which are invisible for standard OTDRs. -
Page 6: Quick Guide
Quick Guide This quick guide section is a simple step-by-step approach to optical fiber testing with the LOR- 200/220. You should read it if you need to learn how to operate the instrument quickly. You may then read the other sections as needed. Operating instructions The OTDR unit is integrated into a PC-based platform, operating under Windows... -
Page 7: Hardware Overview
The Optical Port Figure 2 shows the optical port of the LOR-200/220. It is located on the top of the instrument. Be- fore attaching a fiber you should clean it using an appropriate cleaning method. Contact Luciol In- struments if you need assistance. -
Page 8: The Communication Ports
Contact Luciol Instruments for more information on the available interface types. The Communication Ports Figure 3 shows the communication ports of the LOR-200/220. They are located on the left side of the instrument. The following interfaces are provided: ←... -
Page 9: The Power Connector
The Power Connector Figure 4 shows the DC power connector of the LOR-200/220. It is located on the right side of the in- strument. Connecting the power: Plug the round female connector from the external power adapter into the instruments power connector. -
Page 10: Charging The Battery
Changing the Battery The battery should be inserted in the slot at the foot of the LOR-200/220. Figure 6 shows the back of the LOR-200/220 with the battery slot opened. Use a screwdriver to unlock the two screws of the battery slot and remove the cover. -
Page 11: Software Tools
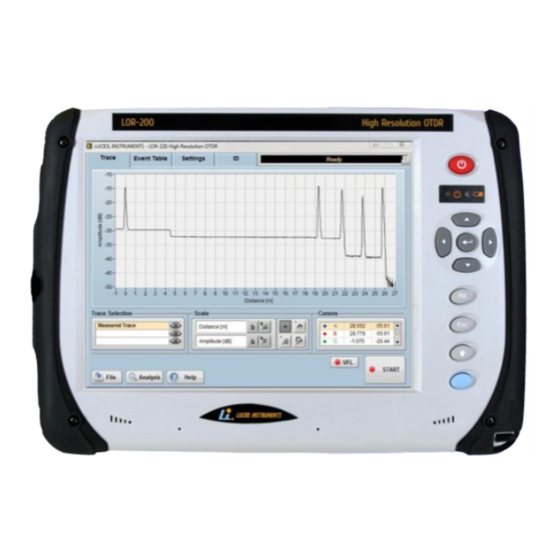
It will display Ready when the application is launched and a con- nected OTDR is found. Figure 8: The LOR-200/220 user interface after starting The LOR-200/220 software is written in Labview®. A detailed description of the software functions is given in the following sections. -
Page 12: The Menu Functions
Save the data as a text file (*.tor), this file can later be opened with any text editor or spreadsheet application. For LOR-200 systems the data can also be saved as a standard OTDR (*.sor) file (SR-4731 standard). ... - Page 13 The wavelength and pulse-width indicator for the active measure- ment. This indicator is replaced by the trace analysis bar when a manual analysis function is selected. The Trace Selection legend: The highlighted trace (orange) is the active trace e.g. for the trace analysis functions. Click on the trace name to change the active trace.
-
Page 14: The Event Table Tab
4.2.2 The Event Table Tab Event Table tab lists all manually or automatically found events. An example is shown in Figure Figure 9: The event table tab In order to edit the event table manually, click VENTS button allows showing or hiding the event markers on the trace. ARKERS Select to display the length and the losses of the fiber sections between the events. -
Page 15: The Settings Tab
4.2.3 The Settings Tab Settings tab as shown in Figure 11 is used to set the required parameters for a new trace (measured trace), or to display the settings of a loaded trace (the active trace selected in the trace selection window of the Trace tab is shown). - Page 16 Ethernet. When the check box EMOTE CTIVE is selected, the instrument will wait for a remote connection. Contact Luciol Instruments for details. Scan Settings group allows choosing the dis- tance unit (available options: are meter, kilome- ter, feet, miles, and nanosecond); the Start and Stop positions for the scan, the average and the resolution (step size).
- Page 17 4.2.3.1 Saving and loading user defined settings The user can save the current settings by clicking This will open a dialog window as on the right. Up to 10 different user-settings can be defined this way. To re-load one of the user-settings, click the ring control and select one of the settings from the list as on the right.
-
Page 18: The Id Tab
5.1.1 Setting pulse-width and resolution The LOR-200 allows 7 different pulse-width settings; a list with all available values opens after clicking on the cur- rently selected value as shown on the right. For the LOR- 220, the pulse-width is fixed to 1 ns. - Page 19 The resolution of the LOR-200/220 can be set in steps of 250 ps. The minimum value is 250 ps; corresponding to approximately 2.5 cm. The resolution should always be set to a value smaller than the pulse-width.
-
Page 20: Setting The Index Of Refraction
For other fiber types, please contact the fiber manufacturer. It is also possible to measure the index of refraction with the LOR-200/220. For a high accuracy measurement, a reference fiber whose length is precisely known is required. Measure the length of this fiber using the... -
Page 21: Setting The Rayleigh Backscatter Coefficient
1 ns (LOR-220). The correct setting in this example would be -64.4 dB. If the OTDR is operated with a pulse-width different from 1 ns (LOR-200) the measured value has to be modified accordingly. For a pulse width of 2 ns 3 dB have to be subtracted from this value; for a pulse-width of 10 ns, 10 dB have to be subtracted;... -
Page 22: Example Measurement Sessions
Example measurement sessions This section describes in detail some typical applications of the LOR-200/220 and gives a step by step description of the corresponding measurement sessions. 5.2.1 Fiber loss measurement In this example session the total loss and the loss/km of a fiber under test (10 km) is measured with a LOR-200. -
Page 23: Single Event Analysis - Insertion Loss And Reflectance
5.2.2 Single event analysis - Insertion loss and reflectance Due to the very high resolution and the short dead-zones the LOR-200/220 is capable of making in- sertion loss measurement on very short fiber samples. In this example session we show that even the insertion loss and the reflectance of the output connector of the instrument can be measured. -
Page 24: 2-Point Loss Measurement
5.2.4 Length measurements Due to the very high resolution, the LOR-200/220 enables precise length measurements on optical fibers. A semi-automatic software tool is supplied which simplifies this task. The positions of two user selected peaks are precisely localized by an automatic quadratic peak fitting algorithm and their distance is calculated automatically. - Page 25 o Set the distance unit to meter o Set Start to -1 and End to 6 o Set Average to 3 o Set Resolution to 0.25 If needed, go to the tab and enter the fiber identification parameters Start the measurement and wait until the scan has finished Select from the...
-
Page 26: Testing A Passive Optical Network (Pon)
5.2.5 Testing a passive optical network (PON) There are several applications where this type of high-resolution and high-sensitivity photon- counting OTDR can outperform conventional OTDRs. All conditions, where a high spatial resolution measurement on low backscattered signals is required are typical fields of application. One exam- ple is a passive optical network (PON). - Page 27 Figure 22: PON OTDR trace 300 ns pulsewidth Fiber loss measurements and an insertion loss test of the first coupler have been done as described in sections 5.2.1 and 5.2.2. The resolution of this first measurement is insufficient to resolve the location of the optical network terminals simulated by the open fiber ends.
-
Page 28: Comparing Traces
5.2.6 Comparing traces This example session demonstrates the use of the LOR-200/220 for trace comparison. The meas- ured trace is compared with one or more previously stored traces to monitor changes in fiber loss- es or peak locations. The first example monitors the length of an optical fiber of 7.8 km length as the ambient tempera- ture varies. - Page 29 Select the emitter o Set the distance range to 1.25 km o Set the pulse-width to 2 ns (LOR-200 only) o Enter the refractive index of your fiber according to the manufacturer o Set the distance unit to meter...
-
Page 30: Auto Event Detection And The Event Table
5.2.7 Auto event detection and the event table The recorded traces can be automatically analyzed using the function from the menu. The pop-up VENTS NALYSIS window shown on the right will open to select the analysis op- tions. For correct reflectance measurements the Backscatter Coeffi- cient needs to be set according to the fiber under test. - Page 31 When using the function all found events are automatically added to the event ta- VENTS ble. function requires at least 1m of a Note: In order to work correctly, the AUTO EVENTS fiber section before the first event. If you want to include the output connector of the OTDR to the event list, start the measurement at <...
-
Page 32: Creating Reports, Printing Results
Creating Reports, Printing Results With the LOR200/220 software you can automatically create a detailed report of your measure- ment results. – R Select in the tab. This will open the following list with the report options: EPORT RACE First select the items you want to include in your report. Next select the report format by clicking on the or the HTML... -
Page 33: Visual Fault Locator (Option)
Visual Fault Locator (Option) A visual fault locator (VFL) is available as an option. The VFL option provides a blinking intensive red laser source at the OTDR output. The VFL is used to visually detect fiber breaks. A second applica- tion is the identification of the fiber connected to the OTDR in a cable containing several fibers. - Page 34 The saved data is in a standard text (ASCII) format. It can easily be exported to other applications. The following is an example of a saved data-file: Luciol Instruments SA OPM Text File Format Version 1.0 [DateTime]...
-
Page 35: Wavelength Tunable Otdr
Wavelength tunable OTDR This section applies to wavelength tunable OTDRs only. Setting the wavelength When starting the OTDR the main OTDR application and the wavelength control application are launched automatically. If one of the applications is not running or has been closed double-click on the corresponding desktop short-cut. -
Page 36: Specifications
Appendices A. Specifications A.1. General specifications Operating system: ........Windows® Embedded POSReady 7 Processor: ..........AMD G T40E, 2x 1 GHz RAM: ............DDR3, 2 GB Storage: ............SSD, 60 GB Display: ............. Touchscreen TFT 10.4”; 800x600 pixels Interfaces: ..........1x Ethernet RG45; 2x USB Type 2; 1x VGA; 1x Serial port DC input power rating: ...... -
Page 37: Optical Specifications Lor-200
A.2. Optical specifications LOR-200 § Standard wavelengths : ......1310 nm; 1490 nm; 1550 nm; 1625 nm Fiber type:..........Single-mode (9/125), multi-mode (62.5/125, 50/125) Optical connector: ........Universal, APC or PC type Optical pulse width: ........2ns, 5ns, 10ns, 30ns, 100ns, 300ns, 1s Measurement range: ......... -
Page 38: Optical Specifications Lor-220
A.3. Optical specifications LOR-220 §§ Standard wavelengths :......670 nm, 850 nm Fiber type: ..........Multi-mode (62.5/125, 50/125), single-mode Optical connector: ........Universal, APC or PC type Optical pulse width: ........1 ns Measurement range: ......... 1.25, 2.5, 5, 10, 20, 40, 80, 160km Distance units: ........... -
Page 39: Warranty And Maintenance Policy
In particular, optical connectors and batteries are excluded from the warranty. The customer shall contact Luciol Instruments SA to obtain an authorization before shipping back a product to the manufacturer for service. The customer will be provided with a RMA number and instructions for shipment. - Page 40 C. Safety C.1. Laser safety The instrument complies with the optical safety standards in class 1M of the IEC 60825-1 (2001). Warning: Viewing the laser output with certain optical instruments (for example, eye loupes, magnifiers and microscopes) within a distance of 100 mm may pose an eye hazard. Depending on the operation wavelength(s), one of the following pair of labels is affixed to the instrument: For detailed wavelength information see the label attached to the instrument or refer to the test...
- Page 41 By ensuring this product is disposed of correctly, you will help protect the environment. For more detailed information about the recycling of this product, please contact your local authority, your household waste disposal service or contact your local Luciol Instruments distributer.
- Page 42 All spare batteries for the LOR must be individually packed and protected to prevent short-circuit. Manual LOR-200/220 rev.10 – Software version 2.32 Copyright © 2014 Luciol Instruments SA. All rights reserved. No part of this manual may be reproduced in any form or by any means without prior agreement...
Need help?
Do you have a question about the LOR-200 and is the answer not in the manual?
Questions and answers