Table of Contents
Advertisement
Quick Links
Advertisement
Table of Contents

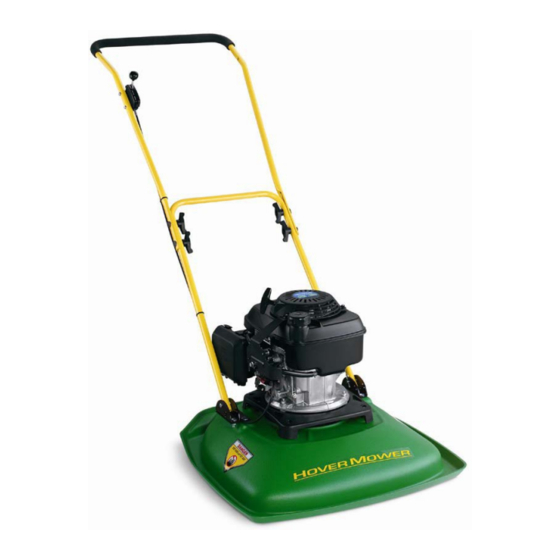
Summary of Contents for Eastern Industries Hover Mower HM19H-4
- Page 1 Model HM19H-4 Model HM19H-4-OP Operator’s Manual...
- Page 2 Read this Manual carefully to learn how to operate and maintain your product properly. The information in this Manual can help you and others avoid injury and product damage. Although Eastern Industries, Inc. designs and produces safe products, you are responsible for operating the product properly and safely.
-
Page 3: Table Of Contents
Contents Pages Safety Instructions General Operations Slope Operations Children Service Assembly Installing the Handle Filling the Crankcase with Oil Filling the Fuel Tank with Gasoline Operation Starting the Engine Stopping the Engine Adjusting the Cutting Height Operating Tips Maintenance Recommended Maintenance Schedule Checking the Engine Oil Level Cleaning the Underside of the Lawn Mower Servicing the Air Filter... -
Page 4: General Operations
This lawn mower is capable of amputating hands and feet and throwing objects. Failure to observe the following safety instructions could result in serious injury or death. General Operations 1. Read, understand and follow all instructions on the machine and in the Manual. -
Page 5: Slope Operations
Slope Operations Slopes are a major factor related to slip and fall accidents, which can result in severe injury. All slopes require extra caution. If you feel uneasy on a slope, do not mow it. Mow across the face of slopes; not up and down. Exercise extreme caution when changing directions on slopes. -
Page 6: Children
DO NOT: Do not mow near drop-offs, ditches or embankments. The operator could lose footing or balance. Do not push the mower up the slope. Do not mow slopes that are steeper than 45 ° incline. Do not mow on wet grass. Reduced footing could cause slipping. (Figure 2) Children Tragic accidents can occur if the operator is not alert to the presence of children. -
Page 7: Service
Service 1. Use extra care in handling gasoline and other fuels. Gasoline is highly f l a mmable and vapors are explosive. a) Use only approved containers. b) Never remove gas cap or add fuel with the engine running. Allow engine to cool before refueling. -
Page 8: Assembly
9. Cutter disc components are subject to wear, damage and deterioration, which could allow objects to be thrown. Frequently check components and, when necessary, replace with Eastman Industries’ recommended parts. 10. Mower blade is sharp and can cut. Wrap the blade or wear gloves, and use extra caution when servicing it. -
Page 9: Filling The Crankcase With Oil
2. Attach the upper handle to the lower handle, with four (4) 5/16”-18 x 1 ½” shoulder bolts and wing nuts (Fig 4) Figure 4 3. Secure the throttle cable neatly behind the handles using black tie wraps. Use one tie wrap for the upper handle and one tie wrap for the lower handle. -
Page 10: Filling The Fuel Tank With Gasoline
To add oil: 1. Move the lawn mower to a level surface. 2. Stop the engine and wait for the blade to stop. 3. Clean around the dipstick. 4. Remove the dipstick by rotating the cap. 5. Wipe the dipstick clean with a clean cloth. 6. -
Page 11: Starting The Engine
Never carry or tilt the mower with the carburetor leaning WARNING: toward the ground. This will cause gasoline and engine oil to f l o w through the carburetor and soak the air f i l ter. Replace the soaked air f i l ter before attempting to start the engine. - Page 12 **For Mowers equipped with Operator’s Presence Control (OPC), pull the OPC arm up toward the handle and hold it securely with left hand. (Fig. 9) Figure 9 Pull the starter handle lightly until you feel resistance, then pull it sharply .
-
Page 13: Stopping The Engine
6. The engine operates at a FIXED THROTTLE SPEED for optimum performance. Stopping the Engine 1. Push the throttle control to (stop) position to shut off the engine. (Fig 12) Figure 12 2. Disconnect the wire from the spark plug if you do not use the lawn mower or if you leave it unattended. - Page 14 4. To obtain a higher cut remove the height adjustment spacer (s) from the impeller hub. Remount the cutter disc to obtain the highest cut - do not use any spacers. Install the f l a t washer and the Impeller retaining bolt. Tighten the bolt securely. (Fig 14) a.
-
Page 15: Operating Tips
Operating Tips • Review the safety instructions and read this Manual carefully before operating the lawn mower. • Never mow on slopes with inclines exceeding 45 ° . • Never attempt to mow by pushing the lawn mower up the slope. •... -
Page 16: Recommended Maintenance Schedule
Recommended Maintenance Schedule Note: Determine the left and right sides of the machine from the normal operating position. Service Interval Maintenance Procedure Check the engine oil level. Check the blades and blade attachment bolts. Tighten if they are loose. Check the air cleaner. Each Use Remove grass clippings from the impeller f i n s. -
Page 17: Checking The Engine Oil Level
Checking the Engine Oil Level Before you use the lawn mower, make sure that the oil level is between the Upper and the Lower Limit marks as shown on the dipstick. If the oil level is below the Lower Limit mark, add oil. Cleaning the Underside of the Lawn Mower Housing To ensure the best performance, keep the underside of the lawn mower housing clean. -
Page 18: Changing The Engine Oil
4. Remove the air f i l ter. Tap the f i l ter several times on a hard surface to remove excess dirt, or blow compressed air not exceeding 30 PSI through the f i l ter from the clean side that faces the engine. -
Page 19: Maintaining The Cutter Disc
6. Recycle the used oil according to local codes 7. Fill the crankcase to the Upper Limit line on the dipstick with fresh oil. (See f i l ling instructions) 8. Wipe up any spilled oil. Maintaining the Cutter Disc Always mow with a balanced cutter disc making sure that the pem inserts, the blade attachment bolts and blades are securely fastened to the disc. -
Page 20: Draining The Fuel Tank And Carburetor
Draining the Fuel Tank and Carburetor Clean the fuel f i l ter element every 50 operating hours. 1. Stop the engine and wait for it to cool down. 2. Disconnect the wire from the spark plug. 3. Remove the carburetor bowl drain bolt with a 10-mm wrench and drain the fuel into an approved gasoline container (Fig 19). - Page 21 Preparing the Engine 1. While the engine is still warm, change the oil from the crankcase. 2. Remove the spark plug. 3. Using an oil can, add about one tablespoon of oil to the crankcase through the spark plug hole. 4.
-
Page 22: Troubleshooting
Troubleshooting Problem Possible Cause Corrective Action Engine does not start 1. The fuel tank is empty or 1. Drain and/or f i l l the fuel tank with fresh the fuel system contains gasoline. If the problem persists, contact stale fuel. an Authorized Service Dealer. - Page 23 Troubleshooting Problem Possible Cause Corrective Action Engine runs rough 1. The wire is not connected 1. Connect the wire to the spark plug. to the spark plug. 2. The spark plug is pitted, 2. Check the spark plug and adjust the gap fouled or the gap is if necessary.
- Page 24 MOWER PARTS HM19H-4...
- Page 25 PARTS LIST FOR MOWER # HM19H-4 SCM# PART # DESCRIPTION HM19GCV160 Honda 5.5 HP, 4 Cycle Engine--U.S & Euro Certif i e d HM 1550 Handle Bracket HM19S-21556A Height Adjustment Spacer 1/2" HM19S-21556B Height Adjustment Spacer 1/4" PX5541 Impeller Flat Washer (subs from HM19S-21557) HM19S-215581 Impeller Retaining Bolt 2 1/2"...
- Page 26 MOWER PARTS HM19H4-OP...
- Page 27 PARTS LIST FOR MOWER # HM19H4-OP SCM# PART # DESCRIPTION HM19GCV160-OP Honda 5.5 HP, 4 Cycle Engine--U.S & Euro Certif i e d HM 1550 Handle Bracket HM19S-21556A Height Adjustment Spacer 1/2" HM19S-21556B Height Adjustment Spacer 1/4" PX5541 Impeller Flat Washer (subs from HM19S-21557) HM19S-215581 Impeller Retaining Bolt 2 1/2"...
- Page 28 The owner shall demonstrate reasonable care and follow preventative maintenance, storage, fuel and oil usage as prescribed in the owner’s Manual. Should a product diff i c ulty occur, you must, at your expense, arrange to deliver or ship your Eastern Industries, Inc. unit for warranty repairs and arrange for pick-up or return of your unit after the repairs have been made.
Need help?
Do you have a question about the Hover Mower HM19H-4 and is the answer not in the manual?
Questions and answers