Table of Contents
Advertisement
Quick Links
Advertisement
Table of Contents

Summary of Contents for Safe Training Systems SMF4
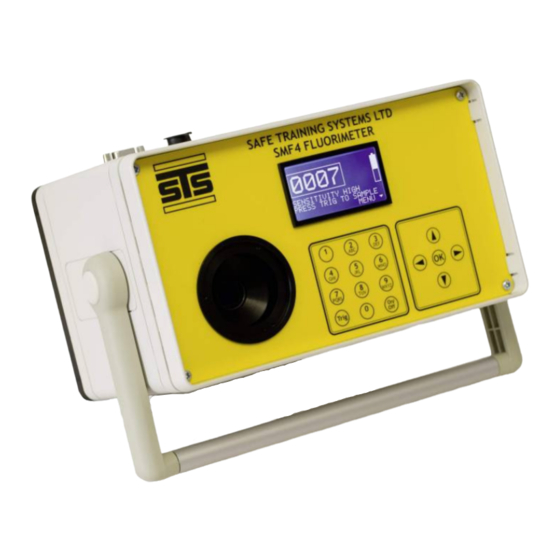
- Page 1 Safe Training Systems Ltd SMF4 Portable Fluorimeter Operating Guide V.2.03...
-
Page 2: Instrument Controls
Instrument Controls •The SMF4 has two control pads, an alphanumeric keypad and a navigation keypad •To select the required letter from the alphanumeric keypad press the key once for the first letter, twice for the 2 etc. Please note that the 0 key if pressed twice will display a space. -
Page 3: Instrument Information
• The SMF4 has built in battery saving software to facilitate the longest possible use between charges. The instrument will therefore power down after a period of 10 minutes of inactivity. If the instrument is in a logging mode this will continue unaffected. -
Page 4: Startup Screen
Start up Screen The start up screen is displayed briefly on power up and displays the following information: • Serial Number • Software version no. • Time • Date... -
Page 5: Home Screen
Home Screen After the start up screen is displayed the Home screen appears. This screen displays the following information: • Counts reading • Sensitivity setting • Battery status icon • Menu icon • Charging (if connected to the charger, note the battery icon is not displayed when charging) -
Page 6: Software Revision
Software Revision • If your instrument is version 2.03 or greater the instrument will have 2 additional items displayed on the Home screen. • 1) the temperature of the instrument is displayed in degrees Centigrade (this is also output in the data log against each record. •... -
Page 7: Menu Operations
Menu Operations There are 3 menu screens accessed from the Home screen by using the down arrow on the navigation key pad. The menus allow setting of the following options: • Set Sensitivity - High/Med/Low • Zero Calibration - On/Off •... -
Page 8: Setting Sensitivity
Setting Sensitivity • The SMF4 offers a range of 3 sensitivities, HIGH, MEDIUM & LOW. This enables monitoring to be carried out in a variety of different conditions where the amount of contamination present may vary considerably. • The Sensitivity level is selected from the main menu by pressing option 1. -
Page 9: Zero Calibration
Zero Calibration • The SMF4 has a zero calibration function to remove background from the count figure displayed. To use this function place a cell in the holder containing the background sample and press no.4 on the menu screen. • The screen will return to the home screen and the counts display will read 0000. - Page 10 6 again from the menu. The display will now show backlight timer off. • Please note that to preserve battery life the SMF4 will automatically turn off after 10 mins of inactivity when the backlight timer is on. Press the...
- Page 11 Logging • The auto sampling function allows the instrument to be used to record a set of readings over a specified time period using a flow cell provided by the user. • The instrument can capture up to 2000 records provided the memory has been cleared before sampling begins.
-
Page 12: Manual Logging
Manual Logging • To start logging immediately, complete the following actions. • From the 2 menu screen select no.3 LOGGING INTERVAL. • Enter the interval using the keypad and use the arrows to move the cursor to the next digit as required, press OK to save. - Page 13 Manual logging • To set a location use the down arrow from the menu screen to reach the final (3 ) menu page. Select no. 1 and use the keypad to enter the location, press OK to save. • To set a unique reference repeat as above selecting no.2 from the menu and press OK to save.
-
Page 14: Timed Logging
To stop logging select no.1 –STOP TIMED LOGGING from the 2 menu screen • Please note that the SMF4 will also write the data to its internal memory until such time as the available memory is used up, therefore after a data logging exercise it will be necessary to clear the memory ready for the next sampling procedure. - Page 15 Once downloaded the screen will revert to the Home screen. • To delete the data from the SMF4 select no.5 - DELETE DATA LOG. The number of files to be deleted will be displayed. Select OK to permanently delete the internal stored files. The screen will revert to the Home screen on completion.
-
Page 16: Set Time And Date
Set Time and Date • To set the internal clock select option 3 from the 3 menu screen. • Use the keypad to enter the time in 24 hour format, the > arrow on the navigation keypad moves the cursor between digits. •... - Page 17 Set Backlight intensity • To select the intensity of the backlight go to the 3 menu screen as shown opposite. • The desired backlight level can be selected by pressing 4 (low),5 (medium) or 6 (high) as light conditions dictate. (please note that the backlight has a significant drain on the battery so where possible the low (4) option...
Need help?
Do you have a question about the SMF4 and is the answer not in the manual?
Questions and answers