Table of Contents
Advertisement
Quick Links
Advertisement
Table of Contents

Summary of Contents for Ovizio Imaging Systems ILine F Pro
- Page 1 Ovizio Imaging Systems ILine F Pro User Manual...
- Page 2 Another compliancy upgrade (symbols and LED warning) 07/04/2020 Temporarily removed Ingress Protection claim 19/05/2020 4.6.1 Clarified non consistent language: System, Reader, iLine F Pro 14/07/2020 Update manual for OsOne Pro-7.2 27/07/2020 Update manual for OsOne Pro-7.2 (typos) Removed mentions of iLine-F 04/09/2020 Updated known issues, incl.
-
Page 3: Table Of Contents
Instructions for lifting and carrying ......................... 11 Noise ................................11 Operating conditions ............................11 Introduction ..............................12 System overview ............................13 Anatomy of your iLine F Pro ..........................14 Package contents ............................. 14 Description ..............................14 Front ................................14 Back ................................. 15 Cautions ................................15 Accessories .............................. - Page 4 Monitor ................................30 Cell density, Viability and Diameter......................... 30 Detailed views ..............................31 Live image ..............................31 Advanced results ............................32 Pause ................................33 Continue ................................34 How a data point is acquired ........................... 34 Pump Operations ............................35 Stop Pumping ..............................35 Flush ................................
- Page 5 High intensity light source ........................... 90 Replaceable parts ............................90 Battery ................................. 90 Known issues ..............................90 Specifications ..............................91 ILine F Pro ................................ 91 Integration capabilities ............................ 91 Physical data ..............................91 Environmental conditions..........................91 Power Supply ..............................92 BioConnect Device ............................92...
- Page 6 Specifications ..............................92 Material of construction ..........................92 Operating parameters ..........................92 Shelf-life ............................... 93 Recipient Interface ............................93 Sterilization ..............................93 Packaging ..............................93 Regulatory Compliance ..........................93 Quality Control ............................93 Disclaimer ..............................93...
-
Page 7: General Notice
Should you meet any issue with your BioConnect disposable system or with the iLine F Pro, please send an email to support@ovizio.com. An Ovizio team member will contact you to fix it. -
Page 8: Intended Use
The iLine F Pro is not classified as a medical device and as such ISO-13485 requirements do not apply. The iLine F Pro is intended to be used standalone, with the delivered power supply unit. Except for the power supply port which is used to power the device, the various external ports are reserved for debugging and maintenance purposes only, and shall not be used during nominal use of the system. -
Page 9: Serial Number
Power symbol printed on the main instrument switch. Use to turn the instrument on or off. Protective conductor terminal Earth terminal Compliance The iLine F Pro meets the requirements of the following Directives of the European Union: − Low Voltage Directive (LVD) 2014/35/EU −... -
Page 10: Safety Warnings
Risk of damaging the equipment − In most cases, a pump is installed with the iLine F Pro. The membrane part of the pump is disposable and may get damaged after sterilization, resulting in fluid leaking into the pump engine. Make sure that there are no visible damage to the pump membrane ( See part 15 in the Connect >... -
Page 11: Instructions For Lifting And Carrying
The use of the disposable bioconnect may lead to a higher oxygenation of the liquid due to oxygen diffusing through the tube walls into the liquid. Instructions for lifting and carrying Do not lift or carry the equipment by handling the integrated pump module. The device shall be held by its bottom plate only when being carried. -
Page 12: Introduction
Introduction... -
Page 13: System Overview
The BioConnect pumps cells in closed loop from the inside of the bioreactor. The pump creates a flow of cells through the fluidic system contained in the cartridge. The iLine F Pro uses the optical properties of your cells to count them, determine their viability and assess their morphological parameters. The cells are finally injected back into the bioreactor. -
Page 14: Anatomy Of Your Iline F Pro
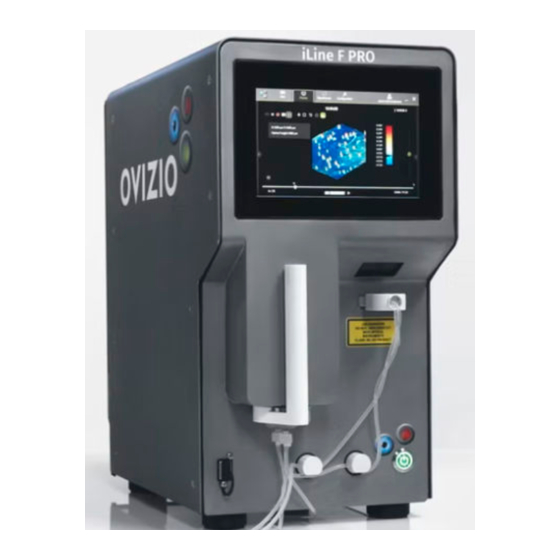
Anatomy of your iLine F Pro Package contents iLine F Pro 1 Power Adapter with Regional power plug Description Back Front Touch screen QR Code reader Cartridge holder Heat Sink BioConnect engine Power buAon Front USB Power Pinch valves HDMI... -
Page 15: Back
BioConnect engine: The BioConnect engine couples to the pump and creates the flow QR Code Reader: Reads the QR code label on the cartridge. This lets the system know the BioConnect version and serial number for traceability. Front USB plug: Can be used to copy data or proceed to software update during maintenance operations. Touch screen: Gives access to the user interface. -
Page 16: Connect
Connect... -
Page 17: Get Started
Get Started Description BioConnect drawing... -
Page 18: How To Connect
How to connect Make sure to attach the BioConnect correctly to your cell culture vessel, otherwise its sterility may be compromised. The way you connect the BioConnect to your cell culture vessel depends on your bioreactor type The BioConnect has been developed to be connected to all types of benchtop bioreactors, including disposables and rocking motion bioreactors. -
Page 19: Startup
Startup The first time you connect the adapter to the device it will startup automatically For optimal performance, always turn on the iLine F Pro 1h before starting a run. This allows the instrument to reach a stable internal temperature. - Page 20 A window pops up to Sign in as another user. Press sign in You can now connect your BioConnect to the iLine F Pro as indicated by the orange alarm window...
- Page 21 First connect the BioConnect pump to the iLine F Pro. For that, introduce the white plastic part (Upper Housing) into the microscope pump motor Insert the cartridge tube into the pinch valves. Any of the cartridge tubes can be inserted into any of the pinch valves.
- Page 22 Then insert the BioConnect cartridge into the iLine F Pro The QR code placed on the BioConnect cartridge will be read to identify its serial number for traceability purposes.
- Page 23 After successful QR code identification, the iLine F Pro will connect to the BioConnect pump. You may hear a click sound when done. During connection do not remove any part of the BioConnect from the iLine F Pro...
-
Page 24: Logout
Now the BioConnect connection is complete and you can startup a bioreactor monitoring session. Logout If you want to switch user that has a different role, quit OsOne or change the current user password, click on the user icon in the top right corner of the screen Press here to sign out. - Page 25 Press here to restart OsOne...
-
Page 26: Measure
Measure... -
Page 27: Get Started
Get Started The online suspension bioreactor monitoring application automates the online measurements of cell viability and cell density of any type of suspension cell culture. You must login prior to be able to start a monitoring session. Login as operator user by default. Starting your monitoring session is as easy as pressing the blue Start button. -
Page 28: Start The Monitoring Wizard
Start the monitoring wizard If it is the first time you are starting OsOne, start a new session. Give it a name and press Next. The system will start the priming step by pumping on the BioConnect line. Then, the system will automatically set the initial focus. To do so, the system will first stop the flow and wait for the cells to sediment. - Page 29 Before the recording of data, the system will also capture a so-called background image. This image will be used to compensate for permanent defects in the field of view. Right after this sequence of operations, the system will finally start monitoring.
-
Page 30: Monitor
Monitor Cell density, Viability and Diameter After launching a monitoring session, the Live image and the computed results (values and graphs) related to the investigated cell culture will be displayed on the Live screen. The computed results will be updated based on the cell line configuration (30 minutes - 2 hours). -
Page 31: Detailed Views
Detailed views Live image Click on the Live image to enlarge it. The following screen will be displayed. -
Page 32: Advanced Results
Advanced results Click on the three dots next to the measurement figures to access advanced results Click here to see Advanced results... -
Page 33: Pause
Pause Press the “Pause Monitoring” button in the lower right corner of the Measure tab to stop your monitoring session. The current monitoring session can then be resumed or a new monitoring session can be created. When a monitoring session is paused, it is also possible for the user to either flush the system, stop pumping or disconnect the BioConnect. -
Page 34: How A Data Point Is Acquired
Continue In the event you paused a monitoring session and want to resume it, press the “Continue monitoring” button to resume your last monitoring session. How a data point is acquired The pump hooked to the BioConnect has different modes of pumping over time that follow different sequences of operations. -
Page 35: Pump Operations
− Computation of measurement based on the 25 images acquired during the previous step − Wait sequence if there is enough time before the acquisition of the next data point (depends on data point acquisition frequency) − Flush sequence to avoid clogging The following drawing describes a typical sequence of operations: The actual sequence of operations may differ depending on your cell line, for example with different sedimentation times. -
Page 36: Flush
Flush In the event your fluidic circuit is clogged and you get an alarm related to fluidic issues, you may flush the BioConnect by running the pump continuously with higher flow rate. This process will last 30 minutes by default. You can stop it anytime by pressing the Stop button. -
Page 37: Pump Disconnection
Pump Disconnection When your monitoring session has ended you will need to disconnect it from the iLine F Pro. Select the Pump Disconnection menu item to proceed. The pump engine will now decouple from the BioConnect pump... - Page 38 You must wait a minute the time for the membrane to be fully in low position. You will hear a click sound when the engine is actually decoupled. Never try to remove the BioConnect pump before this operation has completed. If not complete the engine may still be hooked to the BioConnect.
- Page 39 Now you can disconnect the BioConnect pump from the Microscope pump motor...
- Page 40 The BioConnect pump does not require special force. Applying abnormal force to remove the BioConnect pump may compromise the integrity of the BioConnect and lead to biological hazard.
-
Page 41: Troubleshooting
Troubleshooting... -
Page 42: Introduction
Introduction Various events may occur during the setup of a bioreactor run or during the run itself such as bad quality images leading to measurement issues. In all cases the alarms or notifications are displayed with a banner on top of the live screen. - Page 43 Is it handled by OsOne? If this error occurs during a monitoring, a software component running in the background – called the “Restart tool” will: • Close OsOne • Restart OsOne • Restart the monitoring If the error is not automatically resolved after 3 consecutive tries of the “Restart tool”, monitoring is stopped. How to fix it? •...
- Page 44 Does it prevent from starting a monitoring? Does it interrupt the monitoring? Is it handled by OsOne? If this error occurs during a monitoring, the “Restart tool” will: • Close OsOne • Restart OsOne • Restart the monitoring If the error is not automatically resolved after 3 consecutive tries of the “Restart tool”, monitoring is stopped. How to fix it? •...
- Page 45 Type: ERROR Does it prevent from starting a monitoring? Does it interrupt the monitoring? Is it handled by OsOne? If this error occurs during a monitoring, the “Restart tool” will: • Close OsOne • Restart OsOne • Restart the monitoring If the error is not automatically resolved after 3 consecutive tries of the “Restart tool”, monitoring is stopped.
- Page 46 When? This alarm can be triggered anytime when OsOne uses the BioConnect Type: ERROR Does it prevent from starting a monitoring? Does it interrupt the monitoring? Is it handled by OsOne? If this error occurs during a monitoring, the “Restart tool” will: •...
- Page 47 Is it handled by OsOne? How to fix it? Insert the BioConnect cartridge back into the iLine F Pro and restart the monitoring. How to prevent it? By educating the OsOne users not to remove a BioConnect cartridge during a monitoring.
- Page 48 Type: WARNING Does it prevent from starting a monitoring? Does it interrupt the monitoring? Is it handled by OsOne? YES. OsOne will automatically reactivate the pumping 10 minutes after it has been deactivated. How to fix it? • Click the link in the alarm to reactivate the pumping. •...
- Page 49 Insert BioConnect cartridge Description: OsOne informs the user that in order to Start/Continue a monitoring, the BioConnect cartridge should be inserted inside the microscope. Cause(s): OsOne detected that no BioConnect cartridge is inserted inside the microscope. When? This alarm can be triggered anytime Type: WARNING Does it prevent from starting a monitoring?
-
Page 50: Calibration Alarms
Calibration Alarms Calibration file missing Description: OsOne informs the user that the calibration file is missing. Cause(s): OsOne find file named “CalibrationImage.h5” inside “C:\Users\<OsOne user>\AppData\Roaming\OsOne\Calibration” folder When? This alarm is triggered at the start of OsOne. Type: ERROR Does it prevent from starting a monitoring? Does it interrupt the monitoring? Is it handled by OsOne? YES, if the BioConnect cartridge is not inserted at the start of OsOne: in that case, OsOne will automatically take... - Page 51 Outdated calibration file Description: OsOne informs the user that the calibration image is outdated. Cause(s): The calibration image has been taken more than 30 days ago. When? This alarm is triggered at the start of OsOne when OsOne checks when the calibration image has been taken. Type: ERROR Does it prevent from starting a monitoring?
- Page 52 Error during calibration Description: OsOne informs the user that an error occurred while taking a new background image. Cause(s): • A hardware error occurred while OsOne tried to capture a background image. • The user inserted the BioConnect cartridge while OsOne was capturing a background image and a monitoring session is not active.
-
Page 53: Measures
Measures Fluidic issue – Cells in background images Description: OsOne informs the user that a potential fluidic issue could have occurred during the monitoring. Cause(s): Objects have been detected in the background images. The presence of objects in the background images indicates that these objects are stuck in the flow cell because normally, the flush performed by OsOne during the acquisition of the background images should have made them disappear. - Page 54 How to fix it? If the automatic flush wizard does not solve the issue, it is recommended to stop the monitoring and start a manual flush (duration = 30 minutes). How to prevent it? There is no way to prevent that kind of error. Fluidic issue –...
- Page 55 How to fix it? • If the cells move during acquisition, please check if the BioConnect tubes are properly inserted inside the pinch valves. • If large aggregates are visible in the “Live” image, and if the automatic flush wizard does not make them disappear, it is recommended to stop the monitoring and start a manual flush (duration = 30 minutes).
- Page 56 ERROR Does it prevent from starting a monitoring? Does it interrupt the monitoring? Is it handled by OsOne? YES. If a fluidic issue occurs during the monitoring, OsOne will automatically (automatic flush wizard): • Stop the monitoring • Start a flush sequence of 5 minutes •...
- Page 57 Type: ERROR Does it prevent from starting a monitoring? Does it interrupt the monitoring? Is it handled by OsOne? If OsOne detects out of focus cells in the images, it will try to correct the focus automatically without stopping the monitoring. If cells are still out of focus after this focus correction, OsOne will trigger the “Out of focus cells” alarm.
- Page 58 Does it prevent from starting a monitoring? Does it interrupt the monitoring? Is it handled by OsOne? YES. OsOne will automatically try to find cells 5 minutes later by performing a long range autofocus. (this operation is repeated until cells are detected) How to fix it? If cells are clearly visible on the Live image but OsOne keeps making the autofocus in order to find cells: •...
-
Page 59: Hardware
Hardware Camera error Description: OsOne informs the user that a Camera error has been detected. Cause(s): • OsOne could not connect with the camera • There was an error during the transfer of the images When? This alarm can be triggered anytime Type: ERROR Does it prevent from starting a monitoring? - Page 60 Hardware failure Description: OsOne informs the user that it could not connect with one (or many) of the hardware components at the start of OsOne. Cause(s): OsOne could not connect with one (or many) of the hardware components at startup. When? This alarm is triggered at the start of OsOne Type:...
- Page 61 Microscope initialization Description: OsOne informs the user that the microscope is being initialized. Cause(s): The microscope is initializing after powering the microscope on or restarting OsOne. When? This alarm is triggered after powering the microscope on or when restarting OsOne. Type: WARNING Does it prevent from starting a monitoring?
-
Page 62: Storage
Storage Low disk space Description: OsOne informs the user that there is not enough free disk space to start a monitoring session. Cause(s): The free disk space (in Gb.) is lower than the “Notify when free disk space is less than” value set in the “Storage” configuration screen. - Page 63 Limited monitoring duration Description: OsOne informs the user about the day(s)/hour(s) left before the computer will run out of disk space. Cause(s): The computer is almost out of free disk space. When? This alarm is triggered during the monitoring. Type: WARNING Does it prevent from starting a monitoring? Does it interrupt the monitoring?
- Page 64 Monitoring stopped because of not enough free disk space Description: OsOne informs the user that the monitoring was stopped because the computer was running out of free disk space. Cause(s): The free disk space (in Gb.) during the monitoring is lower than the “Notify when free disk space is less than” value set in the “Storage”...
- Page 65 Remote copy error Description: OsOne informs the user that there was an error during the copy of the data (hdf5 files, csv results files) to the remote location. Cause(s): • A connection error between the computer and the remote location •...
- Page 66 By verifying in the storage configuration under the “Secure Ftp copy” (if the “Enable copy to remote folder during monitoring” is checked) • A valid SFTP URL has been specified • OsOne can access this SFTP URL (by clicking the “Validate” button) How to prevent it? See above the “How to fix it?”...
- Page 67 Does it prevent from starting a monitoring? Does it interrupt the monitoring? Is it handled by OsOne? How to fix it?
-
Page 68: Configure
Configure... -
Page 69: Monitoring Session Configuration
Monitoring session configuration This section gives a description of all the configuration options related to the online monitoring of suspension cells. You must pause your monitoring session to enable the configuration menu The available configuration options associated with a user depend on the permissions granted to the user role. The following section assumes that the user is logged in with Administrator rights. -
Page 70: Start The Monitoring With Manual Focus
Start the monitoring with manual focus The manual focus can be enabled when the system cannot automatically adjust the focus. Check the related checkbox in the monitoring options. Then, press Done and click on the Live image of the main screen. -
Page 71: Frequency
Records images during sedimentation to help Ovizio support define the best sedimentation time. OsOne Server Enable OsOne Server if you want to access your iLine F Pro functionalities remotely with your SCADA system without the need to access the user interface. -
Page 72: Testing The Web Service
You can test the web service by opening a browser on another computer or locally by entering the following URL in the address bar: http://[IP]:9000/swagger, where [IP] is the IP address of the iLine F Pro where the Server runs. You should then get a web page that allows you to test the various services. -
Page 73: Testing Opc Ua
See OsOne Server User Manual for a comprehensive description of all possible commands. Testing OPC UA Open an OPC UA client (for example https://github.com/FreeOpcUa/opcua-client-gui) and type in the following command opc.tcp://[IP]:51210/UA/OvizioServer Storage Configuration Disk space Use this setting to get an alarm when the available local storage space is lower than a given size. -
Page 74: Remote Copy
Remote Copy The remote copy functionality allows you to copy all images captured during your session to a network shared folder. Enter the path of the remote copy folder and click on Validate. This will display a pop-up window asking you to enter your credentials to access that remote folder. -
Page 75: Secure Ftp Copy
“delay before cleaning up”. Information This screen displays hardware and software information about the iLine F Pro. Scroll down to see its serial number and the OsOne software version. The Use Custom Pump Profile checkbox is for maintenance purposes only. -
Page 78: Logs
Logs When the microscope and its software are in use, all the actions taken by the user and the software are stored into files called log files or audit trail. In case of problems with the microscope or its software these files give crucial information about the origin of the issues. -
Page 79: User Actions Recorded In The Audit Trail
User actions recorded in the audit trail Users actions recorded in the audit trail are the actions that can: • modify, create or reset the OsOne configuration (e.g., modifying the password expiration value in the "Users" configuration screen) • modify, create or delete OsOne records (record a capture) •... -
Page 80: Why
• Restrict access to OsOne features only to authorized and authenticated users (created by users with the Administrator role) • Control what users can do in OsOne • Trace users, modifications, alteration, addition of data /settings in the audit trail •... -
Page 81: Create A New User
Once his own Administrator account is created, he uses it to create OsOne users and give them different permissions according to the needs (see below the Login and the Users section for more detailed explanations about how to accomplish these tasks). Remark: It could be possible to use OsOne only with the 3 built-in user accounts. -
Page 82: Deleting An Existing User
Deleting an existing user Press the “- “button to delete an existing user. Deleted users will still be visible inside the “Name” combo box. They are identified by the word “Disabled” next to their user name. -
Page 83: Security Settings
Security settings Password minimum length The “Password minimum length” setting defines the minimum length required for the password of an OsOne user. Password maximum length The “Password maximum length” setting defines the maximum length allowed for the password of an OsOne user. - Page 84 The table below describes the settings related to remote user management Item Meaning example LDAP Server Configuration Enable LDAP Check the box Authentication to allow the use of external user management Server Url The address of ldap.mycompany.com:636 LDAP Server Use SSL Indicate whether server...
- Page 85 − Login Format Active Directory: %username% − OpenLDAP: uid=%username%,cn=users,dc=ldap,dc=mycompany,dc=com Group mapping Administrator CN=ovizio-admin,CN=Groups,DC=ldap,DC=mycompany,DC=com Maintenance CN=ovizio- maintenance,CN=Groups,DC=ldap,DC=mycompany,DC=com operator CN=ovizio-admin,CN=Groups,DC=ldap,DC=mycompany,DC=com...
-
Page 86: Remote Access
Remote Access... -
Page 87: Osone Files
OsOne Files On MacOs in Finder > Go > smb://<device ip address> On Windows in an explorer window \\<device ip address>\OsOne You will then get access to all OsOne folders − Cache − Calibration − Config − Experiments − Logs Remote access with VNC You can access the user interface remotely by using a VNC client that you can download here https://www.realvnc.com/en/connect/download/viewer/... -
Page 88: Maintenance And Servicing
Maintenance and Servicing... -
Page 89: Maintenance
Maintenance Cleaning The instrument can be cleaned with a soft cloth, wetted with IPA (iso propyl alcohol), if required The instrument does not contain user serviceable parts. Servicing can only be performed by a qualified technician (see chapter “Servicing”). A yearly maintenance is advised. -
Page 90: High Intensity Light Source
High intensity light source This instrument includes a high intensity red LED light source. There is no hazard for the operator’s eyes when the device housing is closed. Do not stare at the light source or at the light beam during maintenance when the housing is opened. -
Page 91: Specifications
Specifications ILine F Pro Type iLine-F Holographic transmission microscope Light source Partially coherent monochromatic LED 630nm (Red) Sensor CMOS camera – 5MPixels - 8 bits Microscope objective Olympus LUCPLFLN20X Microscope Objective 20x Total Magnification 22.2X Lateral resolution 1µm Field of view 318µm x 318µm... -
Page 92: Power Supply
Power Supply Brand/Model CUI Inc. SDI90-24-U Input Cable The system is delivered with a power input cable suitable for the country of delivery Input Voltage 100-240VAC ±10% ~50-60Hz ±5% Input Current 1.2A Output Voltage 24 V DC Output Power 90 W BioConnect Device Features Feature... - Page 93 Monitoring Duration From 4 to 30 days Total process volume From 0.3 to 10.0L total process volume Typical hold-up volume From 0.001 to 0.05 L Liquid hold-up duration < 5min Typical flow rate From 4 to 12 mL/min Shelf-life 6 months at storage temperature from 15 to 30 °C Recipient Interface To ensure a safe and sterile connection, the device features a PVC tubing (3,1x4,2mm IDxOD) for both inlet and outlet connection.
Need help?
Do you have a question about the ILine F Pro and is the answer not in the manual?
Questions and answers