Table of Contents
Advertisement
Quick Links
Advertisement
Table of Contents

Related Manuals for Primayer Eureka3

Summary of Contents for Primayer Eureka3
- Page 1 User Manual CXD-930-UM/044 Issue 1.3 13 August 2013 Primayer Ltd Primayer House Parklands Business Park Denmead Hampshire PO7 6XP Telephone +44 (0) 23 9225 2228 Fax +44 (0) 23 9225 2235 Website www.primayer.com Email sales@primayer.com Eureka3 Page 1...
- Page 2 Fax : +91 (0)22 3953 7200 Email: sales@primayer.in Primayer Limited provides a technical support service to assist on all matters relating to the configuration and use of Eureka3. Customers are encouraged to make use of this service, by contacting support@primayer.co.uk or using the contact details provided above.
-
Page 3: Table Of Contents
Eureka3 User Manual Table of Contents Introduction .......................... 6 System Overview ......................6 System Contents ......................6 1.2.1 Standard Package ....................6 1.2.2 Optional Items ......................6 Principles of Leak Noise Correlation ................. 7 Methods of location ....................... 7 Sensor Position ......................7 2.2.1... - Page 4 Eureka3 User Manual 5.1.3 Battery Charge Indicator ..................19 5.1.4 Settings Button .......................20 5.1.5 Correlation Button ....................20 Settings Screen ......................20 5.2.1 Volume Slider ......................20 5.2.2 Brightness Slider ....................21 5.2.3 Units Button ......................21 5.2.4 Date/Time Display ....................21 5.2.5 Language Button ....................21 5.2.6 Velocities Table Button ...................21...
- Page 5 Eureka3 User Manual 5.11 Controls Screen ......................37 5.11.1 Listen to Red/Blue Channel ................37 5.11.2 Volume Control Slider ..................37 5.11.3 Screen Brightness Slider ..................37 Appendix 1 – Eureka3 Technical Specification ..............38 Index ...........................40 Eureka3 Page 5...
-
Page 6: Introduction
1 Introduction System Overview Eureka3 is a high performance leak noise correlator used for the location of leaks in buried water pipes. The system combines sophisticated technology with flexible operation to locate leaks in difficult conditions, e.g. where there is substantial background noise, where only the quietest of leak noise is present, or with a variety of pipe materials. -
Page 7: Principles Of Leak Noise Correlation
Eureka3 User Manual 2 Principles of Leak Noise Correlation Leak noise correlation is used to detect leaks in pipelines where there is a positive internal pressure, such that a leak causes a loss of fluid to the outside. The movement of fluid through the leak causes rapid pressure changes around the site of the leak such that there is a randomly varying noise source located at the leak. -
Page 8: Leak Beyond Sensors
Eureka3 User Manual 2.2.1 Leak Beyond Sensors If the leak is located outside the length of pipe between the sensors, then the correlator will ignore the transit time from the leak to the nearest sensor, as this transit time will be the same for both sensors. -
Page 9: System Components
3 System Components Transmitters Eureka3 has two transmitters, one red and one blue. They both listen to noise which is transmitted to PrimeTouch via an internal radio transmitter. The transmission frequency of each transmitter is different to distinguish the different noise signals. -
Page 10: Led Level Indicator
PrimeTouch. A metal plate can be attached to the bottom of the transmitter to provide stability to the unit. External accelerometers from previous Eureka correlation units are compatible with Eureka3 transmitters. -
Page 11: Internal Accelerometer
The over temperature state may occur when charging in high temperatures. The transmitter electronics will manage this state and continue to charge when possible. The fault state indicates a problem and the transmitter should be returned to a Primayer Service Centre for further investigation. -
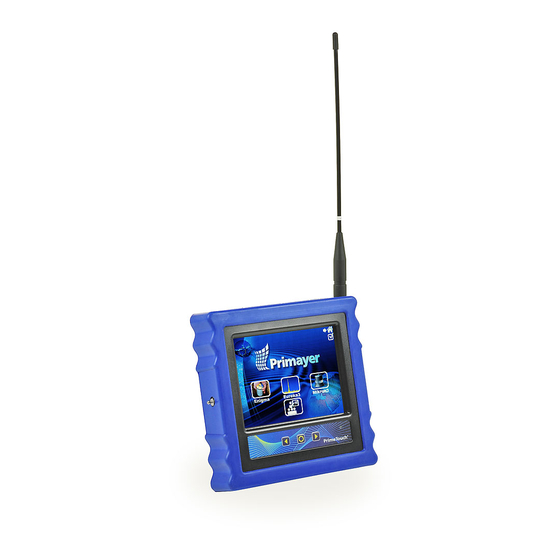
Page 12: Primetouch
Eureka3 User Manual PrimeTouch PrimeTouch runs the Eureka3 software which receives and processes the noise data from the radio transmitters to produce a leak noise correlation. 3.2.1 Switch/LED Panel The Switch/LED Panel has:- Pushbuttons • • Description Charging LED Scroll Right Button... -
Page 13: Primetouch Rear View
Eureka3 User Manual 3.2.2 PrimeTouch Rear View Antenna Socket External Sensor/Charge Socket Headphone Socket Hand Strap USB Connector On/Off Switch (Yellow) 3.2.2.1 On/Off Switch The on/off button has several functions:- Function Operation A long press of the button when the unit is off will turn the unit on... -
Page 14: Antenna Socket
PrimeTouch. Connect the mains adaptor to the main electrical supply or the vehicle charge lead to the vehicle supply (12Vdc). Only Eureka3 charge leads should be used to charge the PrimeTouch. DO NOT attempt to use Eureka2 or Eureka Digital charge leads, as damage may occur which will not be covered by warranty. -
Page 15: Charge Time
Eureka3 User Manual 3.2.9.1 Charge Time Charge time from flat to full is between 3 hours 45 minutes and 4 hours 30 minutes. The charge time will be longer in higher temperatures; there is automatic monitoring in the electronics to prevent the batteries overheating. -
Page 16: Deployment
Eureka3 User Manual 4 Deployment 4.1 Choosing the Transducer Type In most cases, accelerometers will be adequate (either built in or external). The accelerometers provide ease and flexibility of deployment. Consider the (optional) hydrophones for: Large diameter pipes (typically >300mm) •... -
Page 17: Setup Transmitters
Eureka3 User Manual 1. Open the hydrant carefully to ensure there is no debris in the outlet, and clean water flows (the pressure can be assessed at this point). 2. Ensure the hydrant valve is shut. 3. Ensure the seal in the hydrophone is clean. -
Page 18: Velocity
Eureka3 User Manual 4.8 Velocity An accurate sound velocity is necessary to obtain accurate leak location from the correlation result. In most cases the sound velocity that is automatically used when entering the pipe diameter and material will be adequate. However, it is always highly recommended to check and correct the sound velocity in the pipe to reduce leak position error. -
Page 19: Eureka3 Application
Eureka3 User Manual 5 Eureka3 Application Switch on PrimeTouch; the Eureka3 software will load and after a short time the introduction screen will display. Introduction Screen Description Red transmitter power icon Blue transmitter power icon Battery charge indicator Settings button Correlation button 5.1.1 Red Transmitter Power Icon... -
Page 20: Settings Button
A lightning symbol is shown in the battery icon when PrimeTouch is charging. If this symbol is flashing when the charger is attached there is a charging issue. This could be due to high temperature. Unplug the charger for at least an hour. If this problem persists then please contact Primayer Customer Support. -
Page 21: Brightness Slider
Screen will now be updated to the new language. 5.2.6 Velocities Table Button The Eureka3 software allows customisation of the velocity values used for correlation. The tables programmed into the unit have been formulated after many years’ experience, and should not be changed without proper thought. -
Page 22: Velocities Table Screen
Eureka3 User Manual Velocities Table Screen Description Pipe Material Velocity Value Restore Factory Default Button Cross Button Tick Button 5.3.1 Pipe Material This is the current pipe material (whose velocity data for various pipe diameters is shown). To change this, tap the pipe material and a list of available pipe materials will be shown. Select the required pipe material and the current velocities for that material will be shown. -
Page 23: Restore Factory Default Button
Eureka3 User Manual 5.3.3 Restore Factory Default Button Tap this button to restore all values in the table to the factory defaults. To save these settings tap the tick key. 5.3.4 Cross Button Tap this button to abandon any changes to the velocities table and return to the previous screen. -
Page 24: Correlation Screen
Eureka3 User Manual Correlation Screen The correlation screen is where the main correlation functionality is controlled and viewed. Two other screens are available; these are accessed by swiping the screen, to the left is the Controls Screen and to the right the Frequency Spectrum. -
Page 25: Information Display
Eureka3 User Manual 5.4.2 Information Display At the top of the correlation display is an information display; some of the icons on the display also show at the top of other screens. Description Save data icon Correlation elapsed time indicator Current Velocity. -
Page 26: Zoom Button
Eureka3 User Manual 5.4.6 Zoom Button The zoom function can be used to more accurately view the peak position. Tapping the zoom button will display zoom in + and zoom out – buttons at the bottom left of the display; the zoom button will show in yellow to indicate zoom mode is active. -
Page 27: Pipe Details
Eureka3 User Manual Pipe Details It is recommended that a measuring wheel is used to accurately measure the length of each section of pipe. Initially default values for the length, diameter and pipe material are displayed. Description Pipe Section Length... -
Page 28: Pipe Length
Eureka3 User Manual 5.5.1 Pipe Length Tap the value above the pipe section to edit the pipe section length; this will display a numeric keyboard on the screen. Enter the length and tap the return key; the cursor will move to the Pipe Diameter field.
Need help?
Do you have a question about the Eureka3 and is the answer not in the manual?
Questions and answers
Prime Touch not charging. Not turning on when not plugged in the charger. when plugged in the charger it is turning on but only for the last 5-10 seconds.
The Primayer Eureka3 PrimeTouch may not be charging properly due to the use of an incorrect charge lead. Only Eureka3 charge leads should be used, as using Eureka2 or Eureka Digital charge leads can cause damage that is not covered by warranty. Additionally, if the device is exposed to high temperatures, it may enter an over-temperature state, delaying charging. If the issue persists, it may indicate a fault, and the unit should be returned to a Primayer Service Centre for further investigation.
This answer is automatically generated