
Summary of Contents for Popcake PC-10R
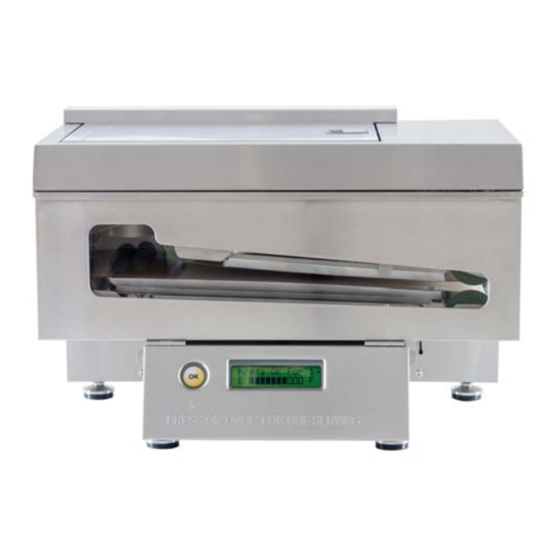
- Page 1 Pancake Machine Operating Manual Model Series: PC-10R/PC-11 CAUTION: Read the instructions before using the machine Original Instructions...
-
Page 3: Table Of Contents
INTRODUCTION VERVIEW Popcake® – 97% fat free pancakes The world’s first fully automatic pancake maker Belt technology AFETY PRECAUTIONS AFETY HAZARD STATEMENT UICK REFERENCE GUIDE INSTALLATION ACHINE COMMISSIONING AND OPERATOR TRAINING MIX AND BATTER YGIENE AND SAFETY RULES ATTER PREPARATION RULES... - Page 4 PERATING MODES Power up mode Ready mode (making the pancakes) Make mode Cancel mode Power down mode ENU ITEMS Change size Change mix type Change bag Change color Cake stack size Mini stack size Counter-Large Counter-Medium Counter-Minis Input belt code RROR REPORTING CLEANING AND MAINTENANCE INSTRUCTIONS AFETY RULES...
- Page 5 APPENDIX – FORMS GLOSSARY INDEX...
-
Page 6: Introduction
Popcake® – 97% fat free pancakes Popcake®, pancakes are the world’s first truly 97% FAT FREE pancakes. Popcake® pancakes are made from non-genetically modified natural ingredients. Popcake® pancakes can be served with a variety of delicious sweet and savory toppings and fillings as well as a variety of complementary food items. -
Page 7: Belt Technology
Small “foot print” for commercial kitchens where space is a premium Conventional pancake cooking requires dedicated hot plates whereas the Popcake® machine does not, even if change of mix flavors is required Very efficient power management From an Occupational Health and Safety aspect, the machine... - Page 8 Following are the safety measures when operating the machine: This appliance can be used by children aged from 8 years and above or by persons with reduced physical, sensory or mental capabilities or lack of experience and knowledge if they have been given supervision or instruction concerning the use of the appliance in a safe way and understand the hazards involved.
- Page 9 Use extreme caution when moving the machine. [Symbol 5021 of IEC 60417-1] Equipotentiality. Popcake pancakes are very hot when they come out of the machine. To prevent injury, do not use your hand to handle the Popcake pancakes as they exit the machine as they are very hot.
- Page 10 operators or other persons who may have cause to be in contact with the machine, provided that; The machine is correctly commissioned into the location where it is used. Operators report, through the management structure of their organization, any and all malfunctions, injuries and injury near misses together with details of the circumstances leading to and surrounding the malfunction or incident.
- Page 11 For more detailed instructions on making pancakes, see: “Batter preparation procedures” on page 10, then “Change bag procedures” on page 13, and finally “Ready mode (making the pancakes)” on page 19 For the very latest in training procedures, visit www.popcake.com...
-
Page 12: Installation
Operator Training Record provided by the manufacturer. The form is available in the Appendix to this Manual. Alternatively, online training videos can be viewed at http://www.popcake.com/training.php Commissioning and training involves: assessing the range of temperatures in which the machine will operate... - Page 13 leveling the machine ensuring the machine is plugged directly into the power outlet “without” the use of extension cords explaining of the layout and content of this manual identification of the machine’s working parts explanation of how the machine works, including the function of the operating computer software...
-
Page 14: Mix And Batter
Hygiene is a vital part of ensuring the quality of the pancakes served. When preparing the batter the following simple rules should be followed: Wash your hands thoroughly before commencing preparation. Rinse the water bottle in hot water before use. Avoid direct handling of premix and batter Wear correct attire (including gloves) to undertake the preparation. -
Page 15: Water Volume
Bagged premix Popcake® premix has been specially developed and blended exclusively for use in Popcake® machines. Using any other premix or batter, other than manufacturer branded premix, will result in inferior tasting and inferior quality pancakes and will void the manufacturer’s warranty of the machine. -
Page 16: Inspecting The Bag
Inspecting the bag Take a bag of premix from its storage place and inspect it for any obvious signs of damage or rupture. Ensure that the cap is correctly screwed to the bag nozzle. If it is damaged or ruptured or the cap is not correctly screwed on, do not use it, instead select another bag and repeat the inspection. -
Page 17: Letting The Bag Stand
Slap the bag down onto a flat surface, making sure that the nozzle is facing upwards twice or three times to infuse air bubbles into the batter. As the contents of the bag are mixed, the bag fills with the raising agent’s natural gasses. -
Page 18: Changing A Bag
Load the bag into the machine following the instructions on the control panel. Change bag procedures You may only use the manufacturers mix that has been prepared in accordance with the Mix Preparation Procedures. No other bagged batters or premixes of any kind should be used in this machine. - Page 19 hole of the splash guard which is located in the floor of the bag chamber. Let the body of the bag lie on the floor of the bag chamber. Slowly feed the batter away from the tail end of the bag by gently squeezing the batter up toward the middle of the bag and insert the tail of the bag between the two rods located in the bag chamber.
-
Page 20: Dry Powder - Premix
Dry Powder - premix Storage Boxes and individual bags of premix should be stored in a cool and dry place out of direct sunlight for a maximum period of 12 months from the manufacturing date. Although the bags are sealed with caps, moisture could enter the premix through the caps if it is not correctly stored. -
Page 21: Cooked Pancakes
Cooked pancakes Serving and storage Pancakes should be served as soon as possible after cooking, while still hot. Unserved pancakes can be refrigerated in an airtight plastic container and reheated in a microwave for 20 to 30 seconds before serving, depending upon the power of the microwave oven. -
Page 22: Using The Machine
The machine functions using a combination of operating modes that are contained in a menu system, accessed through the control panel keypad located on the bottom front panel of the machine’s case. Function Makes pancakes, accepts changes Cancels making orders, exits some modes and routines ANCEL without making changes Moves through the menu items available to the operator... -
Page 23: Emergency Stop
To turn off the machine at any time; Action / Detail Display Press and hold the P key for 3 Emergency Stop OWER seconds. In 3,…2,...1 Seconds The machine turns off all functions. However, the cooking plates remain hot for some time before they can be touched. -
Page 24: Operating Modes
Power up mode The machine is starting up. Action / Detail Display Press the P key to turn the machine Popcake OWER International The warming up process takes about 6 minutes. Warming Up The bar graph fills as the temperature increases. -
Page 25: Make Mode
You can continue entering orders while the machine is in Make Mode. You do not have to wait until the previous order has been cooked. Make mode The machine is making orders. Action / Detail Display Each make order is added to the total number of Making ## of ## pancakes on order progressively. -
Page 26: Menu Items
Action / Detail Display Press the P key at any time, except when OWER the lid is open, to enter the Power Down Mode. After all the pancakes are cooked the machine Please Wait will proceed to unwind the bag. Unwinding Bag The bag will be unwound and a message is Unload Bag Now... -
Page 27: Change Size
Change size Pancakes may be made in three standard sizes, minis, medium and large. Change Size is accessed from the Ready Mode using the menu. The size change made applies even after the machine is turned off and on again. Action / Detail Display Press Menu. -
Page 28: Change Bag
Action / Detail Display Press Menu as many times as necessary until Change Mix Type? Change Mix Type is displayed: <OK or Cancel> Press OK to accept. A message is displayed. Now Sweet Mix 1=Sweet 2=Savory Press C to return to your original display. ANCEL Press 1 for sweet or 2 for savory. -
Page 29: Change Color
Action / Detail Display Press OK. You will be returned to the original display. Change color The factory setting for the default color is Medium, however if you would like to change the color you are able to do so via this setting. -
Page 30: Mini Stack Size
Ready Mode for either the medium or large size, 2 pancakes will be produced. You can change the setting from 1 to 99 pancakes using this menu item. Cake stack size is accessed from the Ready Mode using the menu. The re-set cake stack size change stays until the machine is turned off at the power point. -
Page 31: Counter-Large
Action / Detail Display Press Menu as many times as necessary until Mini Stack Size? the Mini Stack Size menu is displayed: If you wish to retain the factory setting, press . You will be returned to your original ANCEL display. -
Page 32: Counter-Medium
Counter-Medium This item displays the number of medium sized pancakes produced, since the last time the counter was reset. You can either view the number or reset the counter to zero. Counter-Medium is accessed from the Ready Mode using the menu. -
Page 33: Input Belt Code
Input belt code The belts must be changed every 60 bags of mix. Each set of new belts is supplied with a 12-digit belt code number. The machine will indicate on the display when the belts must be changed. Follow the procedure on the screen to correctly install the new belts. -
Page 34: Safety Rules
Always follow the steps detailed in this procedure. Wash your hands thoroughly before commencing the procedure. Wear correct attire to undertake the preparation Ensure that hair is adequately groomed and secured under a hair net or cap. Ensure that items of jewelry are secure and unable to fall into the machine. -
Page 35: Cleaning External Surfaces
The external surfaces, including the floor of the bag chamber and the inside of the lid and door should be wiped clean at least once each day and more often if required using a clean, soft and slightly dampened cloth. Cleaning the external surfaces should only be undertaken after the machine has been turned off and has cooled down. -
Page 36: Splash Guard Cleaning
Take the damp clean, soft, cloth in one hand and while holding it, place it in the machine, lightly touching the top cooking belt, at the end of the machine where the small white rollers are located. With the other hand, turn the rear top roller located at the other end of the machine in a clockwise direction. -
Page 37: Cleaning Of The Crumb Tray
To remove the Crumb Tray, simply push the lip of the Crumb Tray (left hand side) upward slightly and over the top of the control box, while at the same time gently pull the Crumb Tray assembly forward and right until it is completely out from the machine. -
Page 38: Cleaning The Intake Fan Filter
To remove the fan filter, open the front door. The filter is located at the far left hand side and directly below the splash guard. It is white in color and has a handle for easy removal. Pull firmly towards you until the filter is completely removed. Wash under hot water to remove any fat or dust build-up. -
Page 39: Belt Changing Procedure
“ONLY” REPLACE BELTS WHEN PROMPTED BY THE MACHINE. Visit http://popcake.com/training.php for video tutorials on cleaning and changing belts. Removing a belt Before carrying out this procedure, ensure the machine is turned off, the cooking plates are cold and the machine has been unplugged from the power source. -
Page 40: Installing A Belt
Figure 4 6 Remove the belt by evenly sliding it over the rollers and out of the machine. Rotating the belts clockwise as you pull the belts out towards you makes the process easier (Fig. 5). Figure 5 Installing a belt Remove the Belt Set (large &... - Page 41 Figure 7 Figure 8 Figure 8a Slide the bottom belt evenly towards the rear of the machine. Ensure that the bottom of the belt is located between the fingers of the belt sensor (bottom belt only as shown circled in Fig.9). A close-up of the belt sensor can be seen in Fig. 9a without the belt inserted.
-
Page 42: Hot Plate Assembly Removal Procedure
Popcake service agent. Removing the hot plate assembly Before carrying out this procedure, ensure the machine is turned off, the cooking plates have cooled down completely and the machine has been unplugged from the power source. -
Page 43: Reinstalling The Hot Plate Assembly
hot plate assemblies should slide out along the supporting rods. Once removed, be careful to gently rest the hot plate assembly on a dry, clean, flat work-surface, taking care not to damage the heater element pins protruding from the rear of the hot plate assembly. - Page 44 Q: WHAT IS THE SHELF LIFE OF THE MIX IN DRY-POWDER FORM A: The shelf life of the mix is twelve (12) months from the manufacturers date code printed on the Popcake box. Q: WHAT IS THE SHELF LIFE OF THE MIX AFTER WATER IS ADDED TO MAKE THE BATTER?
- Page 45 Q: WHAT HAPPENS IF I USED WATER THAT IS TOO HOT OR TOO COLD? A: If the water is too cold, the Popcake batter will be more viscous (thicker) and as a result, the pancake may be larger in diameter than normal and also lighter in color as it may be undercooked.
- Page 46 4. Cold air is blowing directly into the outlet where pancakes exit. Q: WHY DID THE MACHINE MAKE A VERY LARGE POPCAKE (12”) A: The Following reason may have caused a large Popcake to be made 1. The cap was not screwed back onto the bag properly.
- Page 47 BY USING THE POWER ON/OFF BUTTON? A: If the Power cord is removed from the outlet socket the cooling fans will not receive power to continue cooling the Popcake machine. If the power cord is unplugged before allowing the “cool- down cycle”...
- Page 48 Visit www.popcake.com for details of your local authorized distributor.
- Page 51 Serial No Location of machine: Date of purchaser Tick Below representative training: Received explanation of: The purpose of the machine The machine’s working parts Maintenance servicing of the machine Commissioning the machine in a new location Safety Precautions General hygiene Control Panel Layout and Functions Special Messages Error Messages...
- Page 52 Serial No Location of machine: Date of operator training: Tick Below Received explanation of: The purpose of the machine The machine’s working parts Maintenance servicing of the machine Commissioning the machine in a new location Safety Precautions General hygiene Control Panel Layout and Functions Special Messages Error Messages Batter storage, care and use...
- Page 53 Serial No: Manufacturers Customer Date Location Count Representative Representative...
- Page 54 Water temperature temperature. Water added to the premix bags Machine commissioning must be at room temperature. The proper installation of the Popcake™ machine and sign off by the manufacturer authorized distributor and the customer.
- Page 55 · 39 Operator Training Record · 47 Specification Model: PC-10R Weight: 27.1Kg (ref.) Authorized representative: Popcake Foodservice Rating: Products 120V 60Hz 1700W /120VAC 60Hz 1700W 220-240V 50H z 2200W Address: 13/F, Hong Kong & Macau Building 240V 50Hz 2400W...
Need help?
Do you have a question about the PC-10R and is the answer not in the manual?
Questions and answers