
Summary of Contents for Graphcore IPU-POD64 reference design
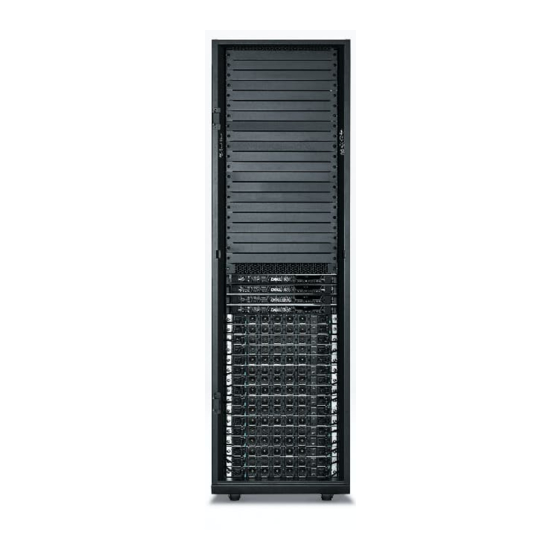
- Page 1 IPU-POD reference design | build and test guide IPU-POD REFERENCE DESIGN Build and test guide...
-
Page 2: Table Of Contents
IPU-POD reference design | build and test guide Table of contents Overview ..................... 5 Acronyms and abbreviations ..............5 IPU-POD reference design components ..........6 IPU-M2000 ....................6 Overview QR code label Server ......................7 Switches ....................7 100GbE RoCE/RDMA switch (ToR switch) 1GbE management switch Power distribution units ................ - Page 3 IPU-POD reference design | build and test guide Dell R6525 server(s) wiring ToR switch to Dell server(s) Management switch to Dell server(s) - iDRAC Management switch to Dell server(s) – network connector 3.4.9.1. Management switch to Dell server(s) – switch management Management switch to PDUs Power cabling ..................
- Page 4 IPU-POD reference design | build and test guide V-IPU built in self tests Automatic IPU-POD configuration ........... 71 Devices and preparation ................71 Scanning and test ..................71 Description of each QR code step Scan troubleshooting Installation troubleshooting Example output for Sync-Link or Traffic test failure Other useful commands Document revisions ................
-
Page 5: Overview
IPU-POD Warning: Only qualified personnel should install, service, or replace IPU-POD equipment. If you have any questions then please contact your Graphcore representative or use the resources on the Graphcore support portal: https://www.graphcore.ai/support. 1.1 Acronyms and abbreviations This is a short list that describes some of the most commonly used terms in this document. -
Page 6: Ipu-Pod 64 Reference Design Components
IPU-POD reference design | build and test guide IPU-POD reference design components This section describes the components in the IPU-POD . Each IPU-POD contains: • 16 IPU-M2000s • 1 server (default configuration is 1 host server, up to 4 can be supported) •... -
Page 7: Qr Code Label
The default configuration of the IPU-POD uses a single PowerEdge R6525 server but up to four servers can be connected. Contact Graphcore sales for details of other supported server types. This document describes the default server (PowerEdge R6525) installation only – other servers may have different installation requirements. -
Page 8: Rack
IPU-POD reference design | build and test guide 2.5 Rack The IPU-M2000s, servers, switches, and PDUs are installed in an APC AR3300SP rack. This rack has a packing system designed to safely transport and unload the rack. It is important to follow the instructions carefully when packing or unpacking the rack. -
Page 9: Rack Assembly
IPU-POD reference design | build and test guide Rack assembly Please note the correct orientation of the IPU-M2000, server and switch units in the rack to ensure correct airflow. The front interface of the IPU-M2000 units (connectivity ports) should be matched with the front door of the rack (cold aisle). - Page 10 IPU-POD reference design | build and test guide Completed rack – hot aisle (four server version) Note that this photo shows 3x blue RJ45 cables in each R6525 server. In the default build, servers 2 - 4 only have 2x blue RJ45 cables. See later sections for more information about server cabling.
-
Page 11: Equipment Checklist
(delivered in packs of 10) in packs of 10) AP8886 PDU Hardware mounting kit (APC AR8100) PDU bracket kit APC (AR7711) Graphcore IPU-M2000 IPU-M2000 slider kits Dell R6525 server Arista DCS-7010T-48-F switch Arista DCS-7060CX-32S-F switch 2m purple Ethernet 1.5m blue Ethernet... -
Page 12: Preparing The Rack
IPU-POD reference design | build and test guide 1m blue C13 to C14 1.5m blue C13 to C14 Velcro 3.2 Preparing the rack Rail distance The IPU-M2000 mounting system requires a rail-to-rail distance of 720mm. This document describes the adjustments required for an AR3300SP rack. If using a different rack this rail distance must be observed. -
Page 13: Removing The Side Panels And Doors
IPU-POD reference design | build and test guide Removing the side panels and doors Remove the front and rear doors from the rack. Ensure the earth straps are disconnected before the doors are removed. Remove the top and bottom side panels:... -
Page 14: Removing The Vertical Accessory Channels
IPU-POD reference design | build and test guide Removing the vertical accessory channels Using a Torx TX30 screwdriver, remove two accessory channels from the rack. Accessory channel removal Adjusting the rear accessory channels Set the rear accessory channel to the furthest position in the rack. Tighten up the screws ensuring the teeth engage into the slots in the rail:... -
Page 15: Adjusting The Rear Vertical Rails
IPU-POD reference design | build and test guide Adjusting the rear vertical rails Using a Torx TX30 screwdriver, make both rear vertical rack rails loose and freely movable. Position the rear vertical rack rails such that there is 20mm of distance between the rear face of the vertical rack rail and the racks rear frame. -
Page 16: Installing The Rack Rails
IPU-POD reference design | build and test guide Secure the rail into position by moving the TX30 screws back upwards such that the teeth engage with both the supporting rails. This must be done at the top and bottom of the bracket. - Page 17 IPU-POD reference design | build and test guide Mate the inner rails (the thinner of the two separated rails which has a captive thumb screw at one end) to the body of the IPU-M2000. Please note that the inner rails are mirrored and are not handed.
-
Page 18: Installing Pdu Brackets
IPU-POD reference design | build and test guide 5) Using the above screws, affix the inner rail to the body of the M2000: The inner rails are now securely affixed to the IPU-M2000 body. Place the outer rails to one side for later use: IPU- M2000 outer rails Installing PDU brackets... - Page 19 IPU-POD reference design | build and test guide Screw the PDU support brackets to the inside of the cabinet. The PDU brackets should be installed at the rear of the rack - one bracket on top with 9cm distance from the top of rack and one bracket on the bottom with 12cm distance from the bottom of rack.
-
Page 20: Installing The Equipment
IPU-POD reference design | build and test guide 3.3 Installing the equipment The following sections describe the installation of the IPU-M2000s, PDUs, servers, ToR and management switches into the rack. Installing the IPU-M2000s Earlier in the guide we affixed the inner rack rails to the IPU-M2000 body. We now need to install the outer rack rails into the rack. - Page 21 IPU-POD reference design | build and test guide 3) Locate the rear end of the outer rail and slightly open the large metal latch, then press the upper and lower locating pins into the square holes. Release the large metal latch and the outer rail will now be secured to the vertical rack rail: 4) Included in the rack rail accessory bag are two screws and two washers.
- Page 22 IPU-POD reference design | build and test guide 2) Place the IPU-M2000 onto an appropriately suited server lift and adjust the height such that it is suitable for the sliders. If a lift is not available, this is a two person operation. 3) Slide the protruding inner rails into the receiving channel of the extended outer rails 4) Whilst the server lift is supporting the full weight of the IPU-M2000, slide the IPU-M2000 into the extended outer rails until you feel both sides engage a stopping mechanism...
-
Page 23: Installing The Management Switch
IPU-POD reference design | build and test guide 6) Screw the captive thumb screw into the inner rack rail: Installing the management switch Insert 2 cage nuts, inside the rack, on either side of the rack into the top and bottom positions of location 17. -
Page 24: Installing The Pdus
IPU-POD reference design | build and test guide Installing the PDUs Install the two PDUs vertically – at the rear of the rack, one on the left side and one on the right side. Push the mains cable through the roof of the rack and then clip the PDUs onto the PDU bracket as shown below: Installing the Dell R6525 server(s) Remove and discard the cable management arm brackets from the rear of each tool-less... - Page 25 IPU-POD reference design | build and test guide Use an appropriate server lift or have two people installing the servers to Note ensure correct fitting Push the server gently from the front to lock it into the slides then press the tab on the side of the slides and push the server fully home in the rack.
-
Page 26: Wiring The Rack
IPU-POD reference design | build and test guide 3.4 Wiring the rack The following sections detail the wiring of the rack and the dressing of the cables within the rack. For reference, the IPU-M2000s and server(s) are numbered, as shown below: Server 4 (opt) Server 3 (opt) Server 2 (opt) -
Page 27: Ipu-M2000 To Ipu-M2000 Ipu-Link Connectivity (Osfp)
IPU-POD reference design | build and test guide IPU-M2000 to IPU-M2000 IPU-Link connectivity (OSFP) There are 8 OSFP IPU-Link ports on the right side of each IPU-M2000. Using the supplied 60x 0.3M OSFP cables, and starting at IPU-M2000 #1 (bottom-most IPU-M2000 in the rack), link the top row of four ports (5-8) to the bottom row of four ports (1-4) in the IPU-M2000 that is installed directly above (see figure and table below). - Page 28 IPU-POD reference design | build and test guide IPU-M2000 to IPU-M2000 IPU-Links Cables IPU-M2000 # 15 IPU-Link ports 5,6,7,8 IPU-M2000 # 16 IPU-Link ports 1,2,3,4 OSFP 0.3m IPU-M2000 # 14 IPU-Link ports 5,6,7,8 IPU-M2000 # 15 IPU-Link ports 1,2,3,4 OSFP 0.3m IPU-M2000 # 13 IPU-Link ports 5,6,7,8 IPU-M2000 # 14 IPU-Link ports 1,2,3,4 OSFP 0.3m...
-
Page 29: Ipu-M2000 To Ipu-M2000 Sync-Link Cabling
IPU-POD reference design | build and test guide IPU-M2000 to IPU-M2000 Sync-Link cabling Using the 0.15 M Red Ethernet RJ45 cable, wire the 16 IPU-M2000s as follows: Starting from IPU-M2000 #1 at the bottom of the rack, insert one side of a cable into port 6 and one side of another cable into port 7. - Page 30 IPU-POD reference design | build and test guide IPU-M2000 to IPU-M2000 Sync-Link connections Cables IPU-M2000 # 15 IPU-Sync ports 6-7 IPU-M2000 # 16 IPU-Sync ports 2-3 RJ45 0.15 red IPU-M2000 # 14 IPU-Sync ports 6-7 IPU-M2000 # 15 IPU-Sync ports 2-3 RJ45 0.15 red IPU-M2000 # 13 IPU-Sync ports 6-7 IPU-M2000 # 14 IPU-Sync ports 2-3...
-
Page 31: Ipu-M2000 To Management Switch Cabling (Rj45)
IPU-POD reference design | build and test guide IPU-M2000 to management switch cabling (RJ45) There are 2 Ethernet ports in the middle of each IPU-M2000 (see figure below). One of them is a BMC + GW SoC port (upper port) and the other is a BMC port (lower port). These are connected from each IPU-M2000 to the management switch with RJ45 cables. -
Page 32: Management Switch - Bmc Wiring
IPU-POD reference design | build and test guide Management switch – BMC wiring Start wiring using a 1.0M yellow cable and insert one end into port 48 of the management switch. Run the cable through the loop in the OSFP connector as show below and connect it to the BMC port on IPU-M2000 #16 (top IPU-M2000 in the rack). - Page 33 IPU-POD reference design | build and test guide The port mapping between the management switch and the IPU-M2000 BMC sockets is shown in the following table. IPU-M2000 management GW-only mapping Cables IPU-M2000 # 16 BMC port Management switch port # 48 RJ45 1.0m yellow IPU-M2000 # 15 BMC port Management switch port # 47...
-
Page 34: Management Switch - Bmc + Gw Soc Wiring
IPU-POD reference design | build and test guide 3.4.4.1. Management switch – BMC + GW SoC wiring Start wiring using a 1.0m blue RJ45 cable and insert one end into port 32 of the management switch. Run the cable through the loop in the OSFP connector as show below and connect it to the BMC+GW port on IPU-M2000 #16. - Page 35 IPU-POD reference design | build and test guide With the IPU-M2000s numbered from bottom to top, the BMC + GW SoC ports should be connected to the management switch as shown below: IPU-M2000 management BMC + GW port mapping Cables IPU-M2000 # 16 BMC + GW Soc port Management switch port # 32 RJ45 1.0m blue...
-
Page 36: Ipu-M2000 To Tor Switch Cabling (Qsfp)
IPU-POD reference design | build and test guide IPU-M2000 to ToR switch cabling (QSFP) The next step is to connect the IPU-M2000s to the ToR switch. There are 2 RNIC ports on the left side of each IPU-M2000 (see figure below). Only one of them should be connected from each IPU-M2000 to the ToR switch with either the 1m or 1.5m QSFP cables supplied. - Page 37 IPU-POD reference design | build and test guide The IPU-M2000s should be connected to the ToR switch as shown below, note that the IPU- M2000s are numbered from bottom to top #1 - #16: IPU-M2000 RNIC port mapping Cables IPU-M2000 # 16 port 2 ToR switch port # 9 QSFP 1.0m IPU-M2000 # 15 port 2...
- Page 38 IPU-POD reference design | build and test guide The figure below shows the final IPU-M2000 to ToR cabling...
-
Page 39: Dell R6525 Server(S) Wiring
IPU-POD reference design | build and test guide Dell R6525 server(s) wiring All cables should be routed from the rear of the server to the right-hand side (when viewed from the rear), then along the side of the rack using the cable management holes in the vertical rack rails. -
Page 40: Tor Switch To Dell Server(S)
IPU-POD reference design | build and test guide ToR switch to Dell server(s) Using 4 of the 1.5m QSFP cables, connect the ToR switch to the server(s) as follows. 1) Feed the cables through the cut-outs in the side of the rack first. 2) Connect the cables to the ToR switch and server: ToR switch ports 8,6,4,2 to each Dell server. -
Page 41: Management Switch To Dell Server(S) - Idrac
IPU-POD reference design | build and test guide Management switch to Dell server(s) - iDRAC Using 4 of the 1.5m blue RJ45 cables connect the management switch to the Dell server(s) as follows: Ports 9 to 12 on the management switch connect to the iDRAC connector on the server(s). Port 9 is connected to the bottom server (server 1). -
Page 42: Management Switch To Dell Server(S) - Switch Management
IPU-POD reference design | build and test guide 3.4.9.1. Management switch to Dell server(s) – switch management Using 1 of the 1.5m blue RJ45 cables connect the management switch to the Dell server(s) as follows: Port 8 from the management server is connected to the lowest server (server 1). This is used for control of the PDUs in the case where server 1 is used as the management server. -
Page 43: Power Cabling
IPU-POD reference design | build and test guide 3.5 Power cabling The designated sockets on the PDUs for servers and IPU-M2000s are shown below. Power cabling... -
Page 44: Ipu-M2000 Power Cabling
IPU-POD reference design | build and test guide IPU-M2000 power cabling Start by wiring IPU-M2000 #1 using 0.5m power cables. Ensure that only three IPU-M2000s are connected to the same bank on the PDU. Red cables to the left PDU and blue cables to the right PDU (as seen looking at the rear of the rack). -
Page 45: Server Power Cabling - Dell R6525
IPU-POD reference design | build and test guide Server power cabling – Dell R6525 Using 1m C13 to C14 power cables (selecting the correct coloured cable to match the PDU colour), follow the wiring table below to connect the server(s) to the PDUs. Server power wiring Note: The photo above shows the four-server version. -
Page 46: Completing The Rack
IPU-POD reference design | build and test guide 3.6 Completing the rack The following steps describe completing the rack: fitting blanking panels and re-installing the doors and side panels. Blanking panels Install the supplied APC 1U blanking panels in every unoccupied rack slot at the front of the rack. -
Page 47: Ipu-Pod 64 Server And Switch Configuration
The IPU-POD reference design uses a single PowerEdge R6525 server but up to four servers can be connected. Contact Graphcore sales for details of other supported server types. This document describes the default server (PowerEdge R6525) installation only – other servers may have different installation requirements. -
Page 48: Operating System Recommendations
IPU-POD reference design | build and test guide Operating system recommendations Please contact your Graphcore representative or use the support portal support.graphcore.ai for information about operating system support. This document describes the following operating systems: • Ubuntu 18.04.4 LTS (bionic) •... -
Page 49: Ubuntu Os Installation And Packages
IPU-POD reference design | build and test guide Note that users need to have unique user IDs and group IDs. Ubuntu OS Installation and packages The Ubuntu OS should be installed from the following default public Ubuntu 18.04.4 repositories: deb http://archive.ubuntu.com/ubuntu/ bionic main restricted deb http://archive.ubuntu.com/ubuntu/ bionic-updates main restricted deb http://archive.ubuntu.com/ubuntu/ bionic universe deb http://archive.ubuntu.com/ubuntu/ bionic-updates universe... -
Page 50: Centos Os Installation And Packages
IPU-POD reference design | build and test guide CentOS OS installation and packages In order to have a stable system where IPU related software can run, several packages need to be installed on the system via yum configuration manager: libaio-devel python2-numpy centos-release-scl libboost-devel... -
Page 51: Network Configuration
BMC network. This separates the BMC and GW traffic inside the IPU-M2000 onto the two ports, BMC on lower port, GW on upper port. With this option enabled, VLAN 13 becomes a GW only VLAN. Please contact Graphcore Sales for more information. -
Page 52: Ipu-Pod 64 Network Interfaces
IPU-POD reference design | build and test guide IPU-POD network interfaces Port Role Speed IP address Config from VLAN* IPU-M2000 - BMC BMC only 1GbE 10.1.1.1-16/22 Static DHCP management (future) IPU-M2000 - GW BMC+GW 1GbE 10.1.2.1-16/22 Static DHCP management Server - Port1 Mgmt IPU-M2000 1GbE 10.1.3.101/22... -
Page 53: Management Switch Configuration
Device management is intended for switch management, PDU remote management and any other device in the system with remote management interfaces. A switch configuration file can be provided – please contact Graphcore support for details. ToR switch configuration The default ToR switch is an Arista DCS-7060CX-32S-F. -
Page 54: Ipu-Pod
VLAN 11 – 100Gb RNIC facing IPU-M2000s • VLAN 12 – 100GbE RNIC facing customer network (optional: in case of uplink to NAS) A switch configuration file can be provided – please contact Graphcore support for details. IPU-POD VLAN assignments... - Page 55 IPU-POD reference design | build and test guide The following figure shows the VLAN assignments for the IPU-M2000s connecting to the switches. VLAN 13 VLAN 14 1GbE management switch IPU-M2000 VLAN 11 100GbE RDMA switch IPU-M2000 VLAN connectivity...
-
Page 56: Server Network Configuration
IPU-POD reference design | build and test guide Server network configuration • It is recommended to use the Netplan network manager to configure the server using netplan configuration files • Two 1GbE baseT connections are required to the 1GbE management switch for Server 1. -
Page 57: Services: Dhcp (Dynamic Host Configuration Protocol)
IPU-POD reference design | build and test guide Services: DHCP (Dynamic Host Configuration Protocol) An ISC-DHCP-Server service is recommended to provide DHCP network configuration to IPU- M2000s. It can be installed from the Ubuntu or CentOS public repositories. File structure: o /etc/default/isc-dhcp-server (file) ▪... - Page 58 IPU-POD reference design | build and test guide • Specific file related to IPU-M2000 100Gb RNIC interfaces. Will contain a relation between desired IPs and IPU-M2000 100GbE RNIC (Mellanox) interfaces MAC addresses. • root:dhcpd 0660 host lr1_ipum1rnic { hardware ethernet 1c:34:da:67:17:91; fixed-address 10.1.5.1; } host lr1_ipum2rnic { hardware ethernet 1c:34:da:67:1d:19;...
-
Page 59: Services: Ntp (Network Time Protocol)
IPU-POD reference design | build and test guide Services: NTP (Network Time Protocol) NTP service is recommended to provide network time configuration to IPU-M2000s. It can be installed from the Ubuntu or CentOS public repositories. File structure: • /etc/ntp.conf (file) o NTP tool configuration file. -
Page 60: Services: Syslog
IPU-POD reference design | build and test guide Services: syslog This is a software utility for forwarding log messages in an IP network. File structure: • /etc/rsyslog.d (folder) o Rsyslog tool configuration folder. o root:root 0755 • /etc/rsyslog.conf (file) o Rsyslog tool configuration file. o root:root 0444 module(load="imuxsock") module(load="imudp") -
Page 61: Ipu-Pod
One server in the IPU-POD is nominated as the management server – by default this is server 1. The following Graphcore software packages need to be installed on the management server: a) V-IPU software – contains management and control software for IPU resource control, Built In Self Test (BIST) and monitoring of the IPU-M2000s and IPUs. -
Page 62: Ipu-M2000 Software Installation And Configuration
| build and test guide 5.3 IPU-M2000 software installation and configuration Please read carefully the release notes for the IPU-M2000 software release before any software upgrade takes place. The release notes are available from the Graphcore download portal https://downloads.graphcore.ai as a separate downloadable entity from the same web page where the software release itself is found. -
Page 63: Download Ipu-M2000 Software Update Bundle
The management server needs to be loaded with the correct IPU-M2000 software update bundle before the software update of the IPU-M2000s can be performed. To perform the download, please follow these steps: 1. Login as “ipuuser” 2. Go to the Graphcore download portal https://downloads.graphcore.ai and download the latest release into the... -
Page 64: Ipu-M2000 Gw's Root File System Config Files
IPU-POD reference design | build and test guide IPU-M2000 GW’s root file system config files The IPU-POD and IPU-M2000 support a simple concept where a set of IPU-M2000 Gateway OS config files residing on the management server will be copied to the IPU-M2000 Gateway after an update. -
Page 65: Rack_Tool
IPU-POD reference design | build and test guide 5.4 rack_tool rack_tool is a utility that is supplied with the IPU-M2000 release bundle when installed onto a management server. It is always found under the account that is performing IPU resource management (the default is the ipuuser account), as... -
Page 66: Ipu-Pod 64 Manual Installation Tests
$ ./rack_tool.py bist This test will generate a very low level hardware verification report/log that will need to be analyzed by Graphcore support in case any errors are reported. The logs are located at “./logs ” relative to current directory from which the command is executed. - Page 67 IPU-POD reference design | build and test guide any partitions are created. It is strongly recommended to run all the test types provided by the cluster testing suite before deploying any applications in a cluster. Assume we have created a cluster named “cluster1” formed by four IPU-M2000s (IPU-POD using the command: vipu-admin create cluster cl0 --agents ipum1, ipum2, ipum3, ipum4 -- mesh.
- Page 68 IPU-POD reference design | build and test guide • Only one cluster test can be running at any given time on a V-IPU server, even if the V- IPU server controls more than one cluster. • There is no persistence to the cluster test results. Only the results of the last test can be retrieved with the --status command, as long as the V-IPU server has not been restarted.
- Page 69 IPU-POD reference design | build and test guide Sync-Link test: The Sync-Link test verifies the external Sync-Link cabling between IPU-M2000s. You can run a Sync-Link test by passing the --sync option to the test cluster command. A failing Sync-Link test reports the cables which failed to satisfy the cluster topology that is being tested by pointing to the IPU-M2000s and Sync-Link port numbers of the failing Sync- Link.
- Page 70 This example shows a situation where the IPU-link traffic test has failed due to too many correctable errors being detected. Should this occur please try reseating the IPU-Link cables associated with the referenced IPU-M2000 units. If that does not resolve the issue, please contact Graphcore support.
-
Page 71: Automatic Ipu-Pod Configuration
1 Sandisk USB memory stick (pre-configured by Graphcore) • 1 barcode scanner • 1 document containing configuration QR codes (available from Graphcore support) 7.2 Scanning and test Follow the instructions below: 1. Make sure the laptop used for scanning has the USB stick connected 2. - Page 72 IPU-POD reference design | build and test guide 5. Run the command “./rack_production.py scan -s 0” 6. Scan each of the 16 IPU-M2000s starting from the bottom-most IPU-M2000 (#1) up to IPU-M2000 #16. If you encounter problems while scanning the IPU-M2000s then check the troubleshooting section 7.2.2.
- Page 73 10. Reboot the machine by scanning the reboot QR code given in the IPU-POD QR codes and passwords for build and test document. This document is available from Graphcore support. 11. The monitor should look like the picture below after the server has finished the reboot: 12.
- Page 74 IPU-POD reference design | build and test guide A description of what is happening in each of the steps is given at the end of this section – see section 7.2.1. Note Make sure each step has completed before scanning the next QR label. If nothing fails, then something similar to the output below will be seen: Rack installation and test is now complete.
-
Page 75: Description Of Each Qr Code Step
| build and test guide Description of each QR code step QR #1: Login to the server as itadmin QR #2: Enter password. Passwords are available from Graphcore support QR #3: Reboot: sudo reboot QR #4: Login to the server as itadmin again QR #5: Enter password. -
Page 76: Scan Troubleshooting
3) If you start scanning the wrong QR code: Abort the scanning with “Ctrl+c” and restart the scanning process from the beginning. If you are still experiencing problems please contact Graphcore support or your Graphcore representative. Installation troubleshooting • If the upgrade fails, try to restart the rack_production.py... -
Page 77: Example Output For Sync-Link Or Traffic Test Failure
Link '1C' in Agent ag1, IPU '0' is 55066 -------------------------------------------------------------- Other useful commands The QR codes for these commands are given in the IPU-POD QR codes and passwords for build and test document (available from Graphcore support). Run only upgrade: Run only BIST: Run only vipu-test: ./rack_tool.py ./rack_tool.py... -
Page 78: Document Revisions
IPU-POD reference design | build and test guide Document revisions 8.1 Revision history This document’s revision history is as follows: Version Date Notes 4th of December 2020 First release... -
Page 79: Legal Notices
Certain products are subject to the terms and conditions of Graphcore’s limited warranty. Graphcore products are not designed or intended to be fail-safe or for use in any application requiring fail-safe performance; you assume sole risk and liability for use of Graphcore products in such critical applications.
Need help?
Do you have a question about the IPU-POD64 reference design and is the answer not in the manual?
Questions and answers