Table of Contents
Advertisement
Quick Links
Advertisement
Table of Contents

Summary of Contents for X-Oven X-OVEN.2
- Page 1 MODEL X-OVEN.2 NÁVOD PRO INSTALACI, POUŽITÍ A ÚDRŽBU Pouze pro potøebu zákazníkù...
-
Page 2: Table Of Contents
Image 13 - Installation with exhaust pipe connector and stainless steel pipe ....Outdoor installation ..................Image 14 - Outdoor installation ............................................Test: first ignition ................... Charcoal ......................Chart 5 - X-Oven Canutillo charcoal characteristics ............Igniters ......................Ignition ......................X-Oven.2 / January 2017... - Page 3 Image 24 - Grease drainer plate and tray removal ............32 DANGERS ........................CUSTOMER CARE AND WARRANTY ................CE CERTIFICATION ......................EXHIBITS ........................Exhibit 1 - Cleaning guidelines ................ Exhibit 2 - Declaration of performance CE ............Exhibit 3 - Gaseous emission temperatures test report ........X-Oven.2 / January 2017...
-
Page 4: Introduction
Introduction Dear Customer, Thank you for choosing the X-Oven.2 model, we hope you will use it for many years with maximum satisfaction. The Installation, Use and Maintenance Manual is a fundamental part of the product and should always be made available to the operator. -
Page 5: Manufacturer Identification Data
Manufacturer identification data X-Oven International Sagl Via Cantonale 11 - 6900 Lugano (CH) Tel.: +41 91 921 2882 - Fax: +41 91 921 2883 mail: info@x-oven.com www.x-oven.com. VAT number: CHE-304.402.623 IVA Business registry: CH-501.4.017.734-2 X-OVEN.2 MODEL X-Oven.2 / January 2017... -
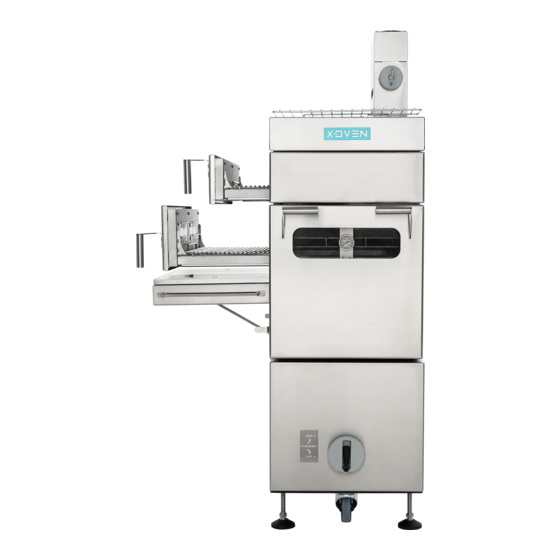
Page 6: X-Oven.2 Model
Dimensions of stainless steel grill 1/1 370 x 540 mm * The performances declared are obtainable with the use of X-Oven’s Canutillo charcoal, see Charcoal. The Customer may choose to utilize charcoal of his choice, but the Manufacturer does not guarantee the same results. -
Page 7: Preliminary Check
Manufacturer and/or the Authorized sales channel, see Customer Care and Warranty. The Customer must remove any protective plastic material present on the ex- ternal and internal surface of the product before completing the installation and beginning to use it. X-Oven.2 / January 2017... -
Page 8: Image 1 - Packing List
Grease drainer plate Grease drainer tray Grease drainer support Grease drainer support holder Brazier tray Ash pan Brazier tray load splitter Telescopic guides (spare pair) X-Oven.2 / January 2017... -
Page 9: Product Assembly
Product assembly The X-Oven.2 model is delivered with its main components pre-assembled (Cooking chamber, Grill drawers and Brazier lifting cart). The Customer, be- fore installing and using the product, is responsible for completing the assem- bly of the following parts: Insert the Smoke outlet valve into the smoke outflow opening on top of the product, see Image 2. -
Page 10: Image 4 - Warmer Grill Assembly
Secure the Grease drainer on the lower lateral cover panel on the side the Grill drawers open, utilizing the screw caps and the Grease drainer support holder, see Image 5. Image 5 - Grease drainer assembly X-Oven.2 / January 2017... -
Page 11: Image 6 - Completed Assembly
Check that the assembly of the X-Oven.2 model is performed correctly, see Image 6. Image 6 - Completed assembly X-Oven.2 / January 2017... -
Page 12: Installation
Installation The X-Oven.2 model has been designed to be installed and utilized in indoor professional kitchens with aeration as by law enacted or outdoor. There are two alternative types of installations possible indoor: • Installation under extractor hood • Installation under extractor hood with exhaust pipe connector In both types of installations it is mandatory to place the product under an extractor hood. -
Page 13: Extractor Hood
EXTRACTOR HOOD The X-Oven.2, in order to be used safely and to guarantee optimal perfor- mances indoor, needs to be installed under an extractor hood, see Chart 4. Chart 4 - Extractor hood requirements Minimum capacity: 1.500 m Extractor hood aspiration speed: >... -
Page 14: Image 8 - Centering The Bubble
INSTALLATION UNDER EXTRACTOR HOOD It is mandatory to install the X-Oven.2 under an extractor hood. The com- bustion fumes can be discharged directly into the extractor hood if safety distances, see Chart 3 and the extractor hood requirements, see Chart 4, are satisfied. -
Page 15: Image 10 - Correct Positioning Example (Side View)
Exhibit 3. To assure a correct and safe use of the product it is important to daily clean the Fire breaker’s net filter, see Exhibit 1. Image 11 - Fire breaker and Fire breaker net filter X-Oven.2 / January 2017... -
Page 16: Installation Under Extractor Hood With Exhaust Pipe Connector
INSTALLATION UNDER EXTRACTOR HOOD WITH EXHAUST PIPE CONNECTOR The installation of the X-Oven.2 under an extractor hood, see Chart 4 and connected directly to an exhaust pipe is possible with the use of the Exhaust pipe connector. The device is optionally supplied, visit www.x-oven.com and substitutes the Fire breaker’s net filter, see Image 12. -
Page 17: Image 13 - Installation With Exhaust Pipe Connector And Stainless Steel Pipe
Customer is not observant of the laws and regulations of the country where the product is installed and used. OUTDOOR INSTALLATION The installation of the X-Oven.2 outdoor is possible with the use of the optional accessories Exhaust pipe connector and Outdoor pipe, visit www.x-oven.com and see Image 14. -
Page 18: Image 14 - Outdoor Installation
The product should be positioned in a wind protected location in order not to compromise the draft of the chimney pipe. Image 14 - Outdoor installation X-Oven.2 / January 2017... -
Page 19: Use
For a proper and safe use of the X-Oven.2, it is forbidden to use any combustible material other than charcoal, see Charcoal. The use of other combustibles alters and compromises the proper functioning of the product, the safety of the operator and relieves the Manufacturer from its warranty obligations. -
Page 20: Igniters
The Manufacturer recommends the use of X-Oven certified charcoal, to obtain the correct heat intensity, avoid excessive residue and limit sparks de- velopment. X-Oven charcoal guarantees temperature stability without generating high temperature peaks during the ignition phase and sudden drops during service. -
Page 21: Ignition
IGNITION Find below the illustrated and described instructions for properly igniting the X-Oven.2: • Open the Air inlet valve • Open the Smoke outlet valve • Turn on the extractor hood X-Oven.2 / January 2017... - Page 22 Brazier tray 8 Kg. The operator must load the Brazier tray with the sug- gested amount of charcoal, see Chart 1. For particularly intensive and extended services it is possible to increase the load by max- imum 2 Kg. X-Oven.2 / January 2017...
- Page 23 Once the Brazier tray is loaded, the operator can continue the ignition proce- dure: • Use 5/6 X-Oven igniters, see Igniters, position them in the center of the brazier tray and ignite them • Close the Front hatch • Open the lower Grill drawer to...
-
Page 24: Service
• Close the lower Grill drawer left open during ignition procedures • Close the Air inlet valve • Wait at least 10 minutes to allow the grills to reach operating temperature X-Oven.2 / January 2017... -
Page 25: Image 15 - Brazier Tray Height Adjustment Knob
Brazier tray closer to the Grill drawers to maintain a stable heat level. During service it is possible to adjust the Smoke outlet valve: opening or clos- ing it to obtain a more or less intense charcoal aroma, see Image 16. Image 16 - Smoke outlet valve adjustment X-Oven.2 / January 2017... -
Page 26: Recommended Use
The recommended load of X-Oven’s charcoal for the X-Oven.2 model is 6 kg for approximately 5/7 hours of use depending on the expected workload, see Chart 1. For a service exceeding 6 hours, the Manufacturer suggests to re-load the Brazier tray after about 4 hours from ignition. We advise to wait about 30 minutes from re-load before starting to cook again. -
Page 27: Image 17 - Brazier Tray Load Splitter
The Grill drawer 2 is suggested for cooking at high temperature but with less heat intensity, suitable for vegetables, fish, pork, hamburger, etc…, see Chart 6. Chart 6 - Grill drawers’ use suggestions Vegetables, fish, Grill drawer 2 hamburger, poultry Steak, Grill drawer 1 shellfish, tuna X-Oven.2 / January 2017... -
Page 28: Shutdown
Brazier lifting cart without employing any particular protection. SHUTDOWN Once the service is finished, follow the product’s shutdown procedure: • Close the Smoke outlet valve • Check that the Air inlet valve is closed X-Oven.2 / January 2017... -
Page 29: Image 18 - Ash Pan
The ashes must be removed before igniting the product for the next service. This operation must be done when the product is shut down and cold using the removable Ash pan, see Image 18. Image 18 - Ash pan X-Oven.2 / January 2017... -
Page 30: Cleaning And Maintenance
Cleaning and maintenance The X-Oven.2 model is made to last. Nonetheless, some parts are subject to wear and tear over time. In particular, those parts which are in contact with food and those that are subject to high temperatures. The Customer is responsible to follow the cleaning and maintenance procedures regularly. -
Page 31: Grill Drawers
Image 21 - Fire breaker’s net filter removal GRILL DRAWER’S TELESCOPIC GUIDES The Grill drawer’s telescopic guides are easily removable for cleaning. Move the telescopic guide sideways to free it from in- terlocking buttonhole, see Image 22. Image 22 - Telescopic guides release X-Oven.2 / January 2017... -
Page 32: Image 23 - Telescopic Guides Snap-Fit
Image 23 - Telescopic guides snap-fit GREASE DRAINER PLATE AND TRAY REMOVAL The plate and tray of the Grease drainer can be removed for cleaning, see Image 24. Image 24 - Grease drainer plate + tray removal X-Oven.2 / January 2017... -
Page 33: Dangers
The Customer must install and use only original Accessories and Spare parts supplied by the Manufacturer or Authorized sales channel, see Customer care and Warranty and visit www.x-oven.com. In the case the Customer discovers worn out or damaged components that... -
Page 34: Customer Care And Warranty
Customer care and warranty The X-Oven.2 model is covered by a two-year warranty starting from the delivery date. Once the product is received, the Customer must verify that all parts are present, see Image 1 and Chart 2, that there are no defects of compliancy and that no damages occurred during transportation. -
Page 35: Ce Certification
Upon the receipt of the certificate of approval, and as required by the applicable laws, the Declaration of Performance (DoP) was written, confirming that all the performances and features of the X-Oven.2 model comply with the regulations, see Exhibit 2. -
Page 36: Exhibits
All the cleaning, sanitizing and maintenance operations must be done when the product is shutdown and cold. After a long period of inactivity, it’s necessary to check for possible obstructions or deposits that might alter the correct functioning of the product. X-Oven.2 / January 2017... -
Page 37: Exhibit 2 - Declaration Of Performance Ce
9. The performance of the product referred in points 1 and 2 are comply with the declared performances in point 8. This declaration of performance is issued under the manufacturer’s sole responsibility referred to in point 7. X-OVEN INTERNATIONAL SAGL Signed for and on behalf of the manufacturer: ................... LUGANO (Switzerland), 12/12/2016 (sign) X-Oven.2 / January 2017... -
Page 38: Exhibit 3 - Gaseous Emission Temperatures Test Report
35 cm 68°C 40 cm 63°C 45 cm 55°C 50 cm 55°C 55 cm 55°C Moreover, it is made known that the gas flue temperature measured at the outlet of the charcoal supplied oven is 220°C. X-Oven.2 / January 2017...