Table of Contents
Advertisement
Quick Links
Advertisement
Table of Contents

Summary of Contents for Odo Kiteboarding K1 - YO Kite
- Page 1 2019 K1 - YO KITE USER MANUAL...
- Page 2 SHOULD NOT IN ANY CASE USE THIS PRODUCT UNLESS YOU ARE UNDER THE PROPER GUIDANCE AND SUPERVISION OF YOUR PARENT OR GUARDIAN. THE FOLLOWING USER MANUAL IS NOT INTENDED TO TEACH HOW TO PRACTICE KITESURF K1 - YO Kite User Manual...
-
Page 3: Table Of Contents
CONTENTS 1. Release of liability……………………………………………………...1 2. Safety precautions and recommendations…………………………..….1 2.1. Kiteboarding safety recommendations……..........2 2.2. Precautions and dangers from the kite…………………………..2 2.3. Recommendations to minimize the dangers from the kite lines……………...…………………………………………………...……2 2.4. Recommendations to minimize the dangers from your kiteboard surfboard…………...…..……………….......….3 2.5. -
Page 4: Release Of Liability
Odo Kiteboarding product may suffer, or that your next of kin may suffer, as a result of the use of the Odo Kiteboarding product, due to any cause whatsoever, including negligence or breach of contract on the part of Top Surf S.r.l. -
Page 5: Kiteboarding Safety Recommendations
- Ensure that a semi-circle extending 100 meters downwind and to each side of your flying position is clear of people and or obstacles. - Use the Odo Kiteboarding kite leash that allows you to keep the kite under control or if necessary to disconnect it from your body. -
Page 6: Recommendations To Minimize The Dangers From Your
(you might be struck by lightning). - Consider always to practice kitesurf only with appropriate weather conditions and with a correct kite size in relation to your weight, skill level and wind speed. K1 - YO Kite User Manual... - Page 7 K1 - YO Kite User Manual...
-
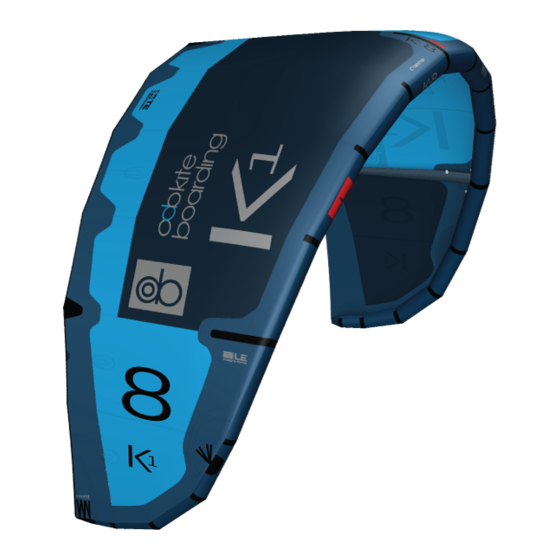
Page 8: How To Set Up Your Kite
3. How to set up your kite 3.1Kite description 1 Leading edge 2 Trailing edge 3 Strut 4 Canopy 5 Deflate valve 6 Back line pigtail 7 Front line pigtail K1 - YO Kite User Manual... -
Page 9: Bar Force Settings
-Softer bar load -Intermediate bar -Heavier bar load feeling load feeling feeling -Less responsive -Intermediate -More responsive kite responsiveness kite -Less power -Intermediate power -More power delivery delivery delivery -Smooth kite -Powerful kite loops loops K1 - YO Kite User Manual... -
Page 10: Inflating The Kite
7 PSI. 6. Disconnect the pump and close the inflating valve. 7. Squeeze the one pump system cleat on each strut to isolate the inflated struts (Click noise). K1 - YO Kite User Manual... -
Page 11: Securing The Kite
6. Close the valve with the cap. 4.2. When you need to deflate your kite 1 Odo Kiteboarding strongly suggests you to deflate the kite using uniquely the deflate valve placed closed to the tip of the kite. 2. Deflate the kite opening the deflate valve. -
Page 12: How To Connect The Bar Lines To Your Kite
5. How to connect the bar lines to your kite Odo Kiteboarding Kites have been designed to perform at the very best when using exclusively Odo Kiteboarding Quick Vario Bar, please refer to Odo Kiteboarding Quick Vario Bar manual 1.Attach the knot of the back line to the head loop at the end of the pigtail tip. -
Page 13: Kite Suggested Care And Maintenance
- Fold the kite correctly and pack it up into the Odo Kiteboarding kite bag to avoid any damage to the kite cloth. - Should you need to move on the beach an inflated kite, turn it upside down so that the leading edge is upwind and the underside faces upward grabbing the center of the leading edge tube. -
Page 14: How To Remove The Strut Bladders
14. To reinstall please follow the above procedure backwards. 8.3. Bladder Repair For repairing small bladder holes we recommend to use the repair kit from Odo Kiteboarding or should you note able to manage this repair refer to a professional kite repair center 1. -
Page 15: Wind Speed And Kite Size
Riders who are significantly heavier or lighter should use, for a given wind speed range, kites that are one size bigger or smaller respectively. This table is a rough guide only. YO KITE WIND RANGE K1 KITE WIND RANGE K1 - YO Kite User Manual... -
Page 16: Warranty Policy
4) Odo Kiteboarding will not be responsible for any costs, losses or damages incurred as a result of loss of use of this product. The warranty does not cover damage caused by misuse, abuse, neglect or normal wear and tear including but... - Page 17 Copyright © 2018 ODO KITEBOARDING, All rights reserved K1 - YO Kite User Manual...
Need help?
Do you have a question about the K1 - YO Kite and is the answer not in the manual?
Questions and answers