Table of Contents
Advertisement
Quick Links
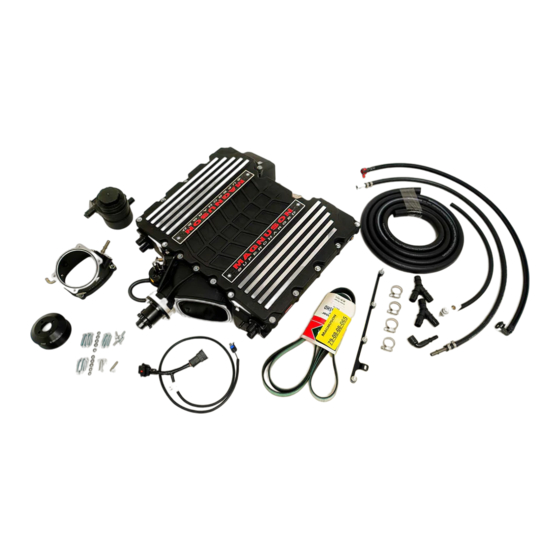
2016-2020 LT1 Chevrolet Camaro
Magnum DI Supercharger System
Step-by-step instructions for installing the best in
* PREMIUM GASOLINE FUEL REQUIRED *
* PREMIUM GASOLINE FUEL REQUIRED *
ATTENTION!
Your MAGNUSON SUPERCHARGER kit
is sensitive to corrosion!
Use only the vehicle manufacturer
recommended coolant for your engine in
the intercooler system as well.
89-89-60-052 Rev F
Installation Instructions for:
supercharger systems.
Magnuson Superchargers
1990 Knoll Drive, Bldg A, Ventura, CA. 93003
magnusonsuperchargers.com
(805) 642-8833
Advertisement
Table of Contents

Summary of Contents for Magnuson Superchargers Magnum DI
- Page 1 Installation Instructions for: 2016-2020 LT1 Chevrolet Camaro Magnum DI Supercharger System Step-by-step instructions for installing the best in supercharger systems. * PREMIUM GASOLINE FUEL REQUIRED * * PREMIUM GASOLINE FUEL REQUIRED * ATTENTION! Your MAGNUSON SUPERCHARGER kit is sensitive to corrosion!
- Page 2 Magnuson Superchargers is NOT responsible and will way can result in engine damage or failure for which Magnuson Superchargers is NOT responsible and will void Magnuson Superchargers warranty and CARB certifi...
-
Page 3: Table Of Contents
Table of Contents Section 1: Tuning Your Vehicle Computer and Initial Steps Section 2: Front Fascia Removal Section 3: Coolant Drainage, and Airbox Removal Section 4: Electrical and Hose Line Disconnect Section 5: Fuel Line and Manifold Removal Section 6: PCV Re-routing, Belt and Fan Removal Section 7: Crank Pulley Replacement, and Idler Installation Section 8: Coil Pack Removal, and Stud Installation Section 9: Supercharger Preparation and Installation... - Page 4 NOTE TO CUSTOMERS WITH MODIFIED VEHICLES: NOTE TO CUSTOMERS WITH MODIFIED VEHICLES: The Magnuson calibration included with this kit is intended to work The Magnuson calibration included with this kit is intended to work on stock vehicle confi gurations, including stock trim levels and stock on stock vehicle confi...
-
Page 5: Section 1: Tuning Your Vehicle Computer And Initial Steps
2016-2020 LT1 Chevrolet Camaro * PLEASE PAY ATTENTION TO THE STEPS IN THIS INSTRUCTION MANUAL. * PLEASE PAY ATTENTION TO THE STEPS IN THIS INSTRUCTION MANUAL. ENGINE DAMAGE CAN OCCUR IF YOU DO NOT FOLLOW THE INSTRUCTIONS. * ENGINE DAMAGE CAN OCCUR IF YOU DO NOT FOLLOW THE INSTRUCTIONS. * NOTE: For the purpose of these instructions all references to left or right side are assumed to be as NOTE: For the purpose of these instructions all references to left or right side are assumed to be as indicated from the seated position in the driver seat of the vehicle. - Page 6 2016-2020 LT1 Chevrolet Camaro 4. Open the trunk and look to your right. Grab the handle shown with the arrow, and pull the panel cover off . Behind this you will fi nd the battery. 5. Loosen the nut shown with an arrow to disconnect the negative battery terminal.
-
Page 7: Section 2: Front Fascia Removal
2016-2020 LT1 Chevrolet Camaro Section 2: Front Fascia Removal 8. Remove the 5 bolts holding the air defl ectors in place on each side with a 7mm socket. The defl ectors are located in front of the front wheels on both sides. This photo was taken from below the vehicle. - Page 8 2016-2020 LT1 Chevrolet Camaro 12. Use a 7mm wrench to remove the two fasteners shown with yellow arrows. 13. Remove the three push rivets from the locations shown with yellow arrows. Use a T15 Torx wrench to remove the 7 bolts shown with red arrows.
- Page 9 2016-2020 LT1 Chevrolet Camaro 16. Remove the plastic trim from both sides by gently pulling straight up. 17. Use a 7mm socket to remove the three bolts in each fender well shown with yellow arrows. 18. Remove the plastic bracket from the last step by pushing it slightly forward and pulling down then disengage the hook that is shown with an arrow.
- Page 10 2016-2020 LT1 Chevrolet Camaro 20. Disconnect the electrical plug shown with an arrow that is located in the right fender well. 21. Remove the retaining clip shown at the arrow location with a small pry bar. 22. Apply painters tape to the fender, and fascia, near the seam on both sides as shown in the photo.
- Page 11 2016-2020 LT1 Chevrolet Camaro 24. Use a 10 mm wrench to remove the 4 bolts shown with yellow arrows. Do Not Do Not remove the two bolts shown with red remove the two bolts shown with red arrows. The two bolts with red arrows are for arrows.
-
Page 12: Section 3: Coolant Drainage, And Airbox Removal
2016-2020 LT1 Chevrolet Camaro 28. Pull the white release clip and unplug the connection shown. 29. Use pliers to compress the plastic fi tting holding the cable housing to the latch bracket. This will allow you to push the housing away from the bracket. - Page 13 2016-2020 LT1 Chevrolet Camaro 32. Place a clean drain pan under the radiator drain spigot located on the front right side of the vehicle. Loosen the valve shown with an arrow until the fl uid begins to drain. Once the fl...
- Page 14 2016-2020 LT1 Chevrolet Camaro 36. Unplug the connection from the MAF sensor by fi rst pulling back on the red release lock located on the underside of the connector. 37. Open the plastic hose clamp attached to the airbox shown with the arrow. 38.
-
Page 15: Section 4: Electrical And Hose Line Disconnect
2016-2020 LT1 Chevrolet Camaro Section 4: Electrical and Hose Line Disconnect 40. Disconnect the clamp holding the air hose to the air conditioning line. 41. Disconnect the air hose at the location shown by fi rst squeezing the two sides shown with arrows and then pulling it apart. - Page 16 2016-2020 LT1 Chevrolet Camaro 44. Install the provided plug into resonator hose connection shown. 45. Rotate the resonator hose behind the brace. 46. Open the two retainer clamps shown with the yellow arrows. 47. Pull up at the side closer to the middle of the engine on the “Camaro”...
- Page 17 2016-2020 LT1 Chevrolet Camaro 48. Unplug the Manifold Absolute Pressure (MAP) connection shown. 49. Clip the connections holding the coil wiring harness to the center cover. There are 4 of these cable ties on each side. 50. Use a 10 mm deep-well socket to remove the four mounting studs shown with arrows.
- Page 18 2016-2020 LT1 Chevrolet Camaro 52. Release the white locking tap by pulling it out and then unplug the electrical connection to the EVAP solenoid. 53. Release the white locking tap by pulling it out and then unplug the electronic throttle control connection.
-
Page 19: Section 5: Fuel Line And Manifold Removal
2016-2020 LT1 Chevrolet Camaro 56. Use a T30 Torx driver to remove the two bolts shown with yellow arrows. Remove the oil fi ller cap shown with a red arrow. Ensure Ensure that nothing gets down inside the oil fi ller that nothing gets down inside the oil fi... - Page 20 2016-2020 LT1 Chevrolet Camaro 60. Place rags around the fuel line shown at the left side of the engine. Remove the metal locking clip from the fuel line. 61. Eye protection is necessary for the next few Eye protection is necessary for the next few steps involving fuel steps involving fuel.
- Page 21 2016-2020 LT1 Chevrolet Camaro 64. Press the release button on the brake booster hose shown and disconnect it. 65. Use a 10 mm wrench to remove the 10 bolts shown with arrows. Remove the intake manifold. 66. Press the release button on the PCV valve hose and disconnect it.
- Page 22 2016-2020 LT1 Chevrolet Camaro 68. Clean the sealing surfaces of the intake ports with Simple Green followed by denatured alcohol. . Inspect the intake ports once Inspect the intake ports once again for any debris that may have fallen again for any debris that may have fallen in in.
- Page 23 2016-2020 LT1 Chevrolet Camaro 72. Gather the provided fuel line shown. This will replace the fuel line just removed. 73. Leave the black plastic release inserts from both ends of the provided fuel line. These can be used to remove the fuel line in the future if needed.
-
Page 24: Section 6: Pcv Re-Routing, Belt And Fan Removal
2016-2020 LT1 Chevrolet Camaro Section 6: PCV Re-routing, Belt and Fan Removal 76. Remove the PCV valve using a 24 mm deep well socket and ratchet wrench. 77. Gather the following provided parts. Install the nut with the fl anged end facing away from the bolt head. - Page 25 2016-2020 LT1 Chevrolet Camaro 80. Once the Loctite has softened you can tighten the nut with a 9/16” wrench. This will pull the plug from the bore. 81. Here is a close-up of the extracted plug. 82. Clean the bore area where the plug was with a cotton swab.
- Page 26 2016-2020 LT1 Chevrolet Camaro 84. Use a 6 mm Allen wrench to install the provided threaded plug from the last step in the location where the PCV valve was. 85. Apply a thin bead of the supplied green Apply a thin bead of the supplied green Loctite 680 to the outside of the supplied air Loctite 680 to the outside of the supplied air tube shown.
- Page 27 2016-2020 LT1 Chevrolet Camaro 88. Use a 24 mm socket and a ratchet wrench to rotate the crank pulley clockwise. While you rotate the pulley apply outward force to pull the A/C belt off . It will take several turns of the belt to get it to jump all the grooves and come off...
- Page 28 2016-2020 LT1 Chevrolet Camaro 92. Remove the three plastic rivets shown with arrows holding the cover above the radiator. Now remove the cover. 93. Disconnect the electrical connection for the fan shroud. 94. Mark the orientation of the radiator hose so it will get re-installed properly later.
- Page 29 2016-2020 LT1 Chevrolet Camaro 96. Disconnect the lower auxiliary coolant hose by removing the spring clamp. Double-X (or long reach) needle nose pliers are shown being used for this clamp. You will have to squeeze the clamp and pull the hose off at the same time.
- Page 30 2016-2020 LT1 Chevrolet Camaro 100. Remove the two bolts at the top of the radiator that secure the fan shroud with a 10 mm socket wrench. 101. Here is the second location of the fan shroud mount located under the radiator spigot on the right side of the engine bay.
-
Page 31: Section 7: Crank Pulley Replacement, And Idler Installation
2016-2020 LT1 Chevrolet Camaro 104. Remove the fan shroud. This may require two people and some fi nesse. There are protrusions on the sides. These will have to be steered through the obstructions on the vehicle as it is removed from the engine compartment. - Page 32 2016-2020 LT1 Chevrolet Camaro 108. Install a three jaw puller to the pulley for removal. It is recommended to use a GM specifi c puller for this operation. 109. After the pulley is removed check the seal for any damage. 110.
- Page 33 2016-2020 LT1 Chevrolet Camaro 112. Install the provided pulley. Take note of the key way position on the crank, and line the provided pulley up with it. 113. Use a pulley installer tool to tighten the provided pulley in place. Do Not Do Not use the use the provided bolt to install the pulley...
- Page 34 2016-2020 LT1 Chevrolet Camaro 116. Disconnect the two harness clips shown with arrows in this photo using a small pry bar. 117. Remove the bolt shown with a 13 mm socket wrench. The ground wire that is secured with this bolt will be re-located in a later step.
- Page 35 2016-2020 LT1 Chevrolet Camaro 120. Unplug the wire connection shown, and re-route the wire around the back of the larger set of wires as shown with the yellow arrow. 121. Place the provided tensioner in the location shown on the new bracket and install the ground wire that was removed earlier to the location shown with a red arrow.
- Page 36 2016-2020 LT1 Chevrolet Camaro 124. Install the fan shroud in the reverse order of removal. Make sure all lower tabs engage. Install the 2 upper bolts with 10 mm heads and the three bolts with 7 mm heads. Plug the electrical connection back in place at the top of the fan shroud and clip it back to the shroud.
-
Page 37: Section 8: Coil Pack Removal, And Stud Installation
2016-2020 LT1 Chevrolet Camaro 128. Apply a thin fi lm of Lubriplate grease to the inner lip of the upper and lower radiator hoses. 129. Re-install the upper and lower radiator hoses. Use the mark you made earlier on the upper radiator hose to allow for proper orientation. - Page 38 2016-2020 LT1 Chevrolet Camaro 132. Remove the gaskets from the two valve covers. There is a tab at the corner that allows you to easily pull this gasket out. 133. Apply masking tape to all the inlets of the valve covers prior to cutting. 134.
- Page 39 2016-2020 LT1 Chevrolet Camaro 136. Place the wedges on the bottom using the bolt holes to secure them in place. 137. Ensure that the wedges sit fl at against the bottom of the valve covers, and that they contact the band saw table and guide fence as shown here.
- Page 40 2016-2020 LT1 Chevrolet Camaro 140. Remove the masking tape. Clean out the debris using a solvent cleaning tank. Ensure that the covers are thoroughly clean and dry before installing them on the heads. Re-install the gaskets on both valve covers. 141.
-
Page 41: Section 9: Supercharger Preparation And Installation
2016-2020 LT1 Chevrolet Camaro 144. Use the OEM bolts at the red arrow locations to install the coils back on the valve covers that were just modifi ed. This will shift the coil packs lower in the engine to give clearance for the supercharger. - Page 42 2016-2020 LT1 Chevrolet Camaro 148. Remove the 6 bolts holding the charge air coolers inside the supercharger housing and pull the charge air coolers out. Carefully pull out the charge air coolers by hand. Pull evenly around the perimeter to disengage the seal. 149.
- Page 43 2016-2020 LT1 Chevrolet Camaro 152. Have someone help you locate the supercharger into the manifold valley location. Install the bolts from the last step into the locations listed on the diagram at the back of this book. First fi nger tighten all bolts. Gradually work your way up to the torque specifi...
- Page 44 2016-2020 LT1 Chevrolet Camaro 156. Install the opposite side of the wire from the last step onto the MAP sensor at the left rear of the supercharger. 157. Gather the provided EVAP wire assembly shown. 158. Plug in the connector from the EVAP wire assembly (highlighted in green) to the OEM connector shown with the arrow here.
- Page 45 2016-2020 LT1 Chevrolet Camaro 160. Gather the provided Mass Air Flow (MAF) breakout IAT harness shown. This will be installed in the next steps. 161. Remove the 90 degree strain relief cover from the OEM MAF connector and install it over the connection shown on the provided MAF breakout IAT harness.
-
Page 46: Section 10: Ltr Installation, And Horn Relocation
2016-2020 LT1 Chevrolet Camaro 164. Secure the excess IAT wire with a provided cable tie in the location shown with an arrow. The MAF connection will be made later. 165. Connect the provided PCV hose assembly shown here to the PCV barb location that was modifi... - Page 47 2016-2020 LT1 Chevrolet Camaro 168. Remove the two plastic rivets shown with yellow arrows from both sides of the vehicle. These will not be re-used. Remove the breakaway tab cover shown with the red arrow. On the left side only, temporarily remove the rivet shown with green arrow.
- Page 48 2016-2020 LT1 Chevrolet Camaro 172. Remove the bolt holding the grounding wire shown with a green arrow. Also remove the retainer for the wiring harness shown with a yellow arrow. 173. Remove the plastic rivet shown with the yellow arrow. 174.
- Page 49 2016-2020 LT1 Chevrolet Camaro 176. From the top side use a screwdriver to push down on the center of the rivets that are behind the pump (shown with red arrows). These were shown in the last step with red arrows as well. 177.
- Page 50 2016-2020 LT1 Chevrolet Camaro 180. Remove the plastic rivet shown with an arrow. The brake air duct should now pivot down out of the way. 181. Remove the two plastic rivets shown with arrows. 182. Remove the wire harness retainer clip from the stud that holds the horns in place.
- Page 51 2016-2020 LT1 Chevrolet Camaro 184. Place cardboard in front of the radiator to protect it while drilling in the next step. 185. Drill a 1.5” hole in the upper forward most portion of the plastic side panel shown. This is located near the left side of the radiator.
- Page 52 2016-2020 LT1 Chevrolet Camaro 188. Secure the provided bracket shown with 3 pop rivets to the upper left side of the LTR near the upper spigot. Repeat this process to the other side of the LTR with the right bracket. 189.
- Page 53 2016-2020 LT1 Chevrolet Camaro 192. Locate the cross braces over the upper LTR brackets, and reinstall them using the OEM hardware. Do not fully tighten these yet. 193. With everything in place, make sure the LTR sits level and square. Then tighten the Then tighten the lower bracket nuts and torque the upper bolts lower bracket nuts and torque the upper bolts...
- Page 54 2016-2020 LT1 Chevrolet Camaro 196. Cover the wire that you just removed the retainer from with the provided 1/4” plastic slit loom and tape the ends in place with electrical tape. Repeat on the right side. 197. Place the provided cable tie with stud mount on the wire near the stud location for the horn.
-
Page 55: Section 11: Intercooler Pump Plumbing, And Electrical Connection
2016-2020 LT1 Chevrolet Camaro 200. Press the cable tie connector that was installed earlier over the stud just installed. 201. Plug the electrical connection back into the horn assembly. Section 11: Intercooler Pump Plumbing, and Electrical Connection 202. Remove the two OEM bolts located at the frame rail. - Page 56 2016-2020 LT1 Chevrolet Camaro 204. Gather the intercooler pump shown along with the rubber isolator. Slide the rubber isolator over the back of the intercooler pump and align it with the mounting slots (shown with arrows) on the opposite side of the pump discharge.
- Page 57 2016-2020 LT1 Chevrolet Camaro 208. Slide the straight piece of rubber hose through the gap between the vertical radiator support and the radiator, and rotate the end shown in hand down towards the lower LTR connection. Have a helper pull the top left corner of the radiator to the right.
- Page 58 2016-2020 LT1 Chevrolet Camaro 212. Connect the supplied intercooler reservoir to the provided bracket using the three provided bolts (shown with yellow arrows). Torque the Torque the three bolts shown with the yellow arrows to 7 three bolts shown with the yellow arrows to 7 ft-lbs ft-lbs.
- Page 59 2016-2020 LT1 Chevrolet Camaro 216. Connect the 90° hose assembly from the last step to the upper LTR spigot with a provided spring clamp (shown with an arrow). This will go through the 1.5” hole that was drilled earlier. 217. Replace the OEM bolt on the EVAP solenoid with the provided M6 x 25 mm bolt shown with the green washer in this image.
- Page 60 2016-2020 LT1 Chevrolet Camaro 220. Install the EVAP line shown. One side connects to the metal hose line behind the supercharger (shown with a yellow arrow). 221. The other side of the EVAP line with the white clip connects to the EVAP solenoid. 222.
- Page 61 2016-2020 LT1 Chevrolet Camaro 224. Here is the cover from the previous step being removed. 225. Loosen the two nuts holding the fuse box in place. These are shown with arrows in the image. They do not need to be removed. 226.
- Page 62 2016-2020 LT1 Chevrolet Camaro 228. Retighten the two nuts that hold the fuse box in place. . 229. Gather the provided relay wiring assembly. Trigger Trigger The connections have been labeled. Positive Positive Fuse Holder Fuse Holder Negative Negative Relay Relay Intercooler Intercooler...
- Page 63 2016-2020 LT1 Chevrolet Camaro 232. Here a socket wrench is being used to tighten the provided nut to secure the relay from the previous step in place. 233. Route the fuse holder from the relay wiring assembly to the opposite side of the bracket mounted behind the fuse box.
- Page 64 2016-2020 LT1 Chevrolet Camaro 236. Route the positive lead of the relay wiring assembly to the back of the fuse box and attach it to the terminal shown with an arrow using a provided nut. 237. Route the trigger wire under the fuse box until it reaches the location shown with an arrow.
- Page 65 2016-2020 LT1 Chevrolet Camaro 240. Reinstall the terminal cover on the fuse box. 241. Install the ground wire lead to the OEM location shown. Do not move the existing Do not move the existing ground. ground. Place the ground lead of the relay wiring assembly on top of the OEM terminal and tighten the OEM nut.
-
Page 66: Section 12: Cac Installation
2016-2020 LT1 Chevrolet Camaro 244. Plug the connector from the power wire you routed in the last steps into the intercooler pump electrical terminal on the underside of the pump. Section 12: CAC Installation 245. Remove the rags that were installed over the intake ports earlier. - Page 67 2016-2020 LT1 Chevrolet Camaro 248. Gather the coolant manifolds shown that were removed earlier. Relube all the O-rings Relube all the O-rings with the provided Lubriplate grease prior to with the provided Lubriplate grease prior to reinstalling the coolant manifolds reinstalling the coolant manifolds.
- Page 68 2016-2020 LT1 Chevrolet Camaro 252. Connect the other two provided spring clamps at the arrow locations. The hoses are highlighted in green. 253. Gather the provided hose assembly highlighted here in green. Install the hose assembly from the last step and secure it at the two yellow arrow locations with two provided spring clamps.
- Page 69 2016-2020 LT1 Chevrolet Camaro 256. Place the lid on the supercharger and reinstall the hardware with Loctite 242 that were prepped in the last photo. Leave out one M6x20mm bolt in the location shown with the arrow. This location will incorporate an Adel hose clamp.
- Page 70 2016-2020 LT1 Chevrolet Camaro 260. Torque these 23 lid bolts to 106in-lbs Torque these 23 lid bolts to 106in-lbs following the order for the lid given at the back following the order for the lid given at the back of this manual of this manual.
- Page 71 2016-2020 LT1 Chevrolet Camaro 264. Install the throttle body to the supercharger inlet using the OEM bolts. Torque these four Torque these four bolts to 106 in-lbs bolts to 106 in-lbs. 265. Then plug in the electrical connection to the throttle body.
- Page 72 2016-2020 LT1 Chevrolet Camaro 268. Connect the right side OEM vent hose shown at the two arrow locations. 269. Install the provided vent hose to the arrow location. The opposite end will be connected in the next step. 270. Connect the opposite end of the hose from the last step to the rubber air duct.
-
Page 73: Section 13: Final Assembly And Testing
2016-2020 LT1 Chevrolet Camaro 272. Connect the opposite end of the hose from the last step at the original arrow location. 273. Here is the routing of the hose from the last two steps highlighted in green. 274. Install the Adel clamp at the location shown to secure the OEM vent hose using a provided Adel Clamp and M6x8mm bolt. - Page 74 2016-2020 LT1 Chevrolet Camaro 276. Cut the cover shown at the dashed line location. This is the narrowest area. Only the section to the right of the dashed line will be used. 277. Install the cut section from the last step back into its original location.
- Page 75 2016-2020 LT1 Chevrolet Camaro 280. Connect the battery and tighten with 10 mm wrench. Make sure that you have followed step #1 in Make sure that you have followed step #1 in this manual to load the proper supercharger this manual to load the proper supercharger calibration to your vehicle’s ECM.
- Page 76 2016-2020 LT1 Chevrolet Camaro 284. Start the vehicle for 5 seconds and shut it off . Check for fuel leaks and supercharger belt alignment. Check the intercooler reservoir level. Now start your engine and let it run for a few minutes to let it get to operating conditions.
- Page 77 2016-2020 LT1 Chevrolet Camaro Appendix Supercharger Belt Routing Diagram 9/17 www.magnusonsuperchargers.com...
- Page 78 2016-2020 LT1 Chevrolet Camaro Torque Specifi cations Supercharger to Cylinder Heads: 106in-lbs 9/17 www.magnusonsuperchargers.com...
- Page 79 2016-2020 LT1 Chevrolet Camaro Torque Specifi cations Lid to Supercharger Housing: 106in-lbs 9/17 www.magnusonsuperchargers.com...
- Page 80 Please enjoy your Magnuson Super Charged performance responsibly. Use only premium gasoline fuel, 91 octane or better. Use only premium gasoline fuel, 91 octane or better.
Need help?
Do you have a question about the Magnum DI and is the answer not in the manual?
Questions and answers