
Subscribe to Our Youtube Channel
Related Manuals for MUSIC STORE professional WERSI SONIC OAX Series

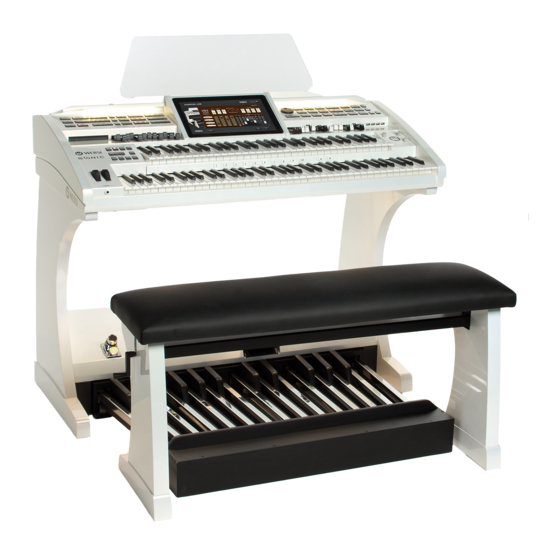
Summary of Contents for MUSIC STORE professional WERSI SONIC OAX Series
- Page 1 Brand Owner and Development OAX1 - OAX500 - OAX600 - OAX700 OAX800 - PERGAMON OAX1000 Programming Manual...
-
Page 2: User Content Imprint & User Content
Imprint & User Content Programming Manual WERSI SONIC OAX1, OAX500, OAX600, OAX700, OAX800, PERGAMON OAX1000 Software version on release: V2.80 Date: 4. November 2020 Copyright © 2020 by MUSIC STORE professional GmbH Istanbulstraße 22-26 51103 Cologne Germany E-Mail: info@wersi.net Website: www.wersi.net... -
Page 3: Table Of Contents
User Content Imprint & User Content ........................ 2 Input Mixer ....................... 6 Setting options in the area of organ ..................6 Setting options for the inputs area ..................9 Information for the microphone and line input ................10 Set microphone effects ........................10 Set effects for Microphone, Line In and Wave ................ - Page 4 Imprint & User Content Footswitches ........................41 Occupying foot switches with other functions ................42 Glide-Effect (Hawaii) ........................44 Save footswitch preset ........................45 Load preset for footswitches ......................46 Set a foot switch preset as standard or global ................47 Rename or delete your own footswitch preset ................
- Page 5 WERSI OAX Music Workstation ................101 10.1 Update of the WERSI OAX operating software ..............101 Download the latest software ...................... 101 Reinstall or update the software ....................102 10.2 Read the operating instructions on the display ..............106 10.3 Changes in the different software versions .................
-
Page 6: Input Mixer
Input Mixer 1 Input Mixer Your instrument has extensive possibilities in the input and output mixing console. There you can change the volume or change the sound via the different equalizers. The entrance mixing console is divided into the Organ and Inputs. 1.1 Setting options in the area of organ Organ area The organ area is once again divided into manuals and accompaniment. - Page 7 Manuals handles all signals generated by the keyboard. And Accompaniment all signals generated by styles and MIDI sequences. A 5-band equalizer is available for each input in the organ section. The slider allows you to adjust the volume of the channel. The stereo control indicator always shows you the actual volume.
- Page 8 Input Mixer Once you have pressed the EDIT display buttons under the desired input, you can set the sound for the corresponding input on the right. The 5-fold equalizer has the areas bass, middle 1, 2 and 3 and a treble channel. The ranges can be changed +/- 12 dB.
-
Page 9: Setting Options For The Inputs Area
1.2 Setting options for the inputs area As soon as you have selected the area inputs, you will see the following audio inputs: Line -> Stereo input on the back Wave -> Software audio input for Waves and MP3 files. Micro ->... -
Page 10: Information For The Microphone And Line Input
Input Mixer Information for the microphone and line input These connectors can be found behind a flap on the back of the instrument. For more information, refer to the OAX user instructions. Special features Microphone input: Microphones must be adjusted with the microphone preamplifier. To do this, you can set the pre-reinforcement from 0 to 60 dB. -
Page 11: Set Effects For Microphone, Line In And Wave
Talk Button The microphone input also has the TALK function, which allows you to switch off all effects at the touch of a button. The setting is also saved with in the mixer preset. Set effects for Microphone, Line In and Wave To adjust the effects, select Edit Effects and the following display will open: The Insert, Effect 1 and Effect 2 display switches allow you to switch between the three effect areas. -
Page 12: Explanations Of Insert And Send Effects
Input Mixer 1.3 Explanations of insert and send effects Insert effect: The whole signal goes through the INSERT effect and from there directly to the outputs. The effect is thus inserted into the signal flow. That's why we're talking about an insert effect. Insert effects are usually filter, compressor, limiter or chorus. -
Page 13: Load Preset For The Input Mixer
1.4 Load preset for the input mixer Now let's look at the "Preset for the input mixer" area. Here you can select factory presets or your own presets. Own presets can be saved under USER. 1. To load an "input mixer preset," simply press the area where the name of the current preset is displayed. -
Page 14: Save Preset For The Input Mixer
Input Mixer 1.5 Save preset for the input mixer After you re-set the input mixer, you can save your settings to your own presets. 1. Press the "SAVE" surface on the main display of the output mixer. The following display opens: 2. -
Page 15: Set A Preset As Default Or Global
1.6 Set a preset as default or global Set a preset as a "Standard preset" You can set a preset as its standard preset. Whenever you do not include a special input mixer preset in a Total Preset, the Total Preset automatically selects your standard preset. -
Page 16: Output Mixer
Output Mixer 2 Output Mixer In the output mixer, you can adjust the respective channels right and left separately in the volume for both outputs and the headphones. And there is a separate 5-band equalizer available for each output. 2.1 The adjustment options in the output mixing console You can use the slider to adjust the volume of the desired channel. - Page 17 For each channel, the SOLO and MUTE functions are available in addition to the volume. SOLO causes all other channels to be muted. Only one channel can be switched to SOLO. SOLO is not saved into a preset. MUTE allows you to mute one or more channels. The setting is saved to the preset. A separate 5-fold equalizer is available for each output.
-
Page 18: Load Preset For Output Mixer
Output Mixer 2.2 Load preset for output mixer Now let's look at the "Preset for the output mixer" area. Here you can select factory presets or your own presets. Own presets are saved under USER. 1. To load an "output mixer preset," simply press the area where the name of the current preset is displayed. -
Page 19: Save Preset For The Output Mixer
2.3 Save preset for the output mixer After you have set the output mixer according to your wishes, you can save your settings in your own presets. Press the "SAVE" surface on the main display of the output mixer. The following display opens: Select a space in the list. -
Page 20: Set A Preset As Default Or Global
Output Mixer 2.4 Set a preset as default or global Set a preset as a "Standard preset" You can set a preset as its standard preset. Whenever you do not include a special input mixer preset in a Total Preset, the Total Preset automatically selects your standard preset. ... -
Page 21: Sequencer
3 Sequencer 3.1 Editing MIDI-sequences To access the settings page, you have two options. Select a MIDI sequence and press the SETTINGS in the main display, and then press MIDI-Seq EDIT. You can also call the MIDI sequence editing under MIXER and there with SEQ EDIT. - Page 22 Sequencer Transpose whole sequence With Transpose, all tracks are transposed at the same time. Drum tracks are excluded. Quickly change a sound Press the sound displayed above the corresponding track and the list of sounds that you already know will open.
- Page 23 After you press the Adjust Drums display button, a display opens on which the changes can be made. In this example sequence, a total of twelve drum sounds are used. You can see them on the left. Before each drum sound, you will see the corresponding MIDI note number. After you select a drum sound in the left list, the display appears in the middle of the display whether this sound has been adjusted in the volume.
- Page 24 Sequencer If an instrument was exchanged using the display key Change, the Undo display key appears, which can be used to undo the exchange. Exchange options are available in the areas of bass drum, snare, ride-cymbal, crash cymbal, conga-bongo, shakers and percussion. With Back, you can close the Customize Drums window.
-
Page 25: Style-Sequences
3.2 Style-Sequences With a style sequence, you can create a virtual sequence that controls the accompaniment and the selection of total presets. So you can concentrate on playing and everything else is set automatically. You can start creating a style sequence with a sheet of music or from memory. You do not need to import anything for this process. -
Page 26: Load Or Save Style Sequence
Sequencer Load or save style sequence 3.2.2.1 Load style sequence To load an existing "style sequence", simply press on the area in which the name of the current style sequence is displayed. The "Load Style Sequence" window opens. Now select the desired style-sequence and confirm with LOAD. 3.2.2.2 Save style-sequence The corresponding display is opened with the "Save"... -
Page 27: Create A Style-Sequence
Create a style-sequence Before you create a music title as a style-sequence, you should be well informed about its process. What harmonies are used. Which style do you want to use and which total presets. Start the programming process by pressing the NEW display key to select an empty style-sequence anlegen. 3.2.4.1 The clock bar At the bottom of the display you can see the sequence of measures. -
Page 28: The Display Style
Sequencer 3.2.4.2 The display style You can set three functions under Style: Style: You can use the gray area with the style name to select another style from the style list. ACC tracks On/Off: You can switch ACC tracks on or off per measure. Style Part: Here you select which style part should play at the previously selected measure. -
Page 29: Enter The Chords
Total Presets: Here you can enter a total preset change per measure. You can freely determine the bar quarter in which the total preset change should be triggered. Chord change: A new chord can be entered here for every quarter of a bar. As described in chapter 3.2.4.4 “Enter the chords”. - Page 30 Sequencer Select the basic harmony and then one of the 12 specified chord types. The result is shown below. With ACCEPT the chord is transferred to the previously selected quarters and in the time bar. Further setting options in the chord selection: As with all other values, you can delete the current chord change with the arrow.
- Page 31 Note: All chords ever used in the style sequence are collected. So you always have an overview of which chords have already been entered. Copy in the bar Already finished sections of a music title can be copied and pasted again. Repeating sections such as verse and refrain can be copied and do not need to be entered multiple times.
-
Page 32: Delete In The Clock Bar
Sequencer 3.2.4.5 Delete in the clock bar If you want to delete several bars, proceed as follows. 1. Press Mark. The button turns red. 2. Now press all the bars you want to delete one after the other. 3. Then press Delete and the previously selected measures are deleted. 3.2.4.6 Move the stop point The end of a style sequence is marked with the red stop. -
Page 33: Settings
4 Settings 4.1 The Effect Sounds The "Effect Sounds" panel buttons can be used with many different effect sounds such as crash cymbals and applause and many other sound effects and stored in effect sounds presets. The instruments OAX1, OAX500, OAX600 and OAX700 have six control panel buttons and the instruments OAX800 and the PERGAMAON OAX1000 have ten display buttons. -
Page 34: Use Effect Sound Buttons With Other Effects
Settings Use effect sound buttons with other effects The effect sound buttons can be applied to many different effect sounds. A list of factory sounds is available for this purpose. 1. First, choose which button you want to assign to a different effect sound. This is done either by pressing the corresponding control panel buttons or by using the display buttons. -
Page 35: Edit Effect Sound
5. The new effect sound is loaded and displayed. 6. You can assign different effect sounds to all keys one after the other. Save the assignment of the effect sound buttons After you have assigned new effects to the desired buttons, you can save your settings in two different ways: A. - Page 36 Settings Transpose/Envelope Transpose lets you change the pitch effect by +/- 36 semitones. Keep in mind that with positive values, the sound becomes higher and shorter, and with negative values the sound becomes deeper and longer. Attack, Sustain, and Release affect the envelope of the effect sound. A higher attack makes the sound slowly louder.
-
Page 37: Load Preset For Effect Sound Buttons
Load preset for effect sound buttons Now let's look at the "Preset for Effect Sound Buttons" section. Here you can load a factory presets or own presets and save your own presets. A preset for the effect sound buttons stores the assignment of the effect sound buttons. -
Page 38: Save Effect Sound Preset
Settings Save Effect Sound Preset After re-occupying the effect sound buttons (see chapter 4.1.1 “Use effect sound buttons with other effects”), you can save your settings to an effect sound preset. 1. Press the Display button „SAVE“. 2. Select free space from the list or overwrite an existing preset. 3. -
Page 39: Set An Effect Sound Preset As Default Or Global
Set an effect sound preset as default or global Set a preset as a "default preset" You can set an effect sound preset as the default preset. Whenever you don't include a special effect sound preset in a Total Preset, the Total Preset automatically selects your default preset. 1. -
Page 40: Rename Or Delete Your Own Preset For Effect Sound Buttons
Settings Rename or delete your own preset for effect sound buttons If you have saved your own effect sound presets, you can rename or delete them. To do this, do the following: 1. Press the area where the name of the current preset appears. The "Load Effect Sound Preset" window opens and the current preset is selected. -
Page 41: Footswitches
4.2 Footswitches Your OAX instrument is equipped with several foot switches, which you can assign with a wide variety of functions and store in footswitch presets. 1. The OAX500 has two footswitches on the expression pedal. 2. The OAX600 has two footswitches on the expression pedal, five Pistons and a classic piano pedal. This is located to the right of the sill and is connected to the Piston 5. -
Page 42: Occupying Foot Switches With Other Functions
Settings What does the "Not Saved or Set from Total Preset" note mean? There are two situations where you see this message: 1. As long as an unmodified footswitch preset is active, the name of the footswitch preset is in the name field. - Page 43 3. The "Addable Functions" window opens. 4. Now select the function you want from the list, and then press LOAD. 5. The new function is loaded and displayed. This allows you to re-occupy foot switches one after the other. OAX-System...
-
Page 44: Glide-Effect (Hawaii)
Settings Glide-Effect (Hawaii) The three new entries Glide Effect Upper, Lower and Solo Manual are also found under the foot switch functions. When the corresponding foot switch is pressed (On), the pitch changes up or down depending on the set interval. -
Page 45: Save Footswitch Preset
Save footswitch preset After you have reassigned the foot switches (see chapter 4.2.1 “Occupying foot switches with other functions”), you can save your settings in a foot switch preset. 1. Press the "SAVE" button. 2. Select a location number from the list. 3. -
Page 46: Load Preset For Footswitches
Settings Load preset for footswitches Here you can load factory or your own presets. 1. To load a “foot switch preset”, simply press on the area in which the name of the current preset is displayed. In this case "F01 Wersi Standard". The "Load footswitch preset" window opens and the current preset is highlighted. -
Page 47: Set A Foot Switch Preset As Standard Or Global
Set a foot switch preset as standard or global Set a preset as a "default preset" You can set an effect sound preset as the default preset. Whenever you don't include a special effect sound preset in a Total Preset, the Total Preset automatically selects your default preset. 3. -
Page 48: Rename Or Delete Your Own Footswitch Preset
Settings Rename or delete your own footswitch preset If you have saved your own effect sound presets, you can rename or delete them. To do this, do the following: 1. Press the area where the name of the current preset appears. The "Load Footswitch Preset" window opens and the current preset is selected. -
Page 49: Show Sheets On The Display
4.3 Show sheets on the display Your OAX system can show sheets and texts on the display. To access the page for the sheets, press on the SETTINGS field in the main display and then on Sheet Music. The following display appears: As you already know from the Accompaniment area, the notes are assigned to different musical styles. -
Page 50: Load Your Own Sheets
Settings Load your own sheets Of course, you can also add your own sheets to the OAX system. To do this, you need the individual pages of a title in an image format such as PNG, JPG or TIF. When loading, the individual sheet pages are connected to a long sheet of music, which you can then move on the display using the wiping technique. - Page 51 6. Then press and Explorer will appear. 7. Select USB stick / hard disk and the existing image files are displayed in the file list. 8. Select the MARK button and then select pages 1 to 4 one after the other. You can change the order of the pages later.
- Page 52 Settings If you want to check the result in the main display now, load the title via LOAD. Exit the sheet management with BACK and you are back in the main display. The SHEET button can now be seen there. Press this and the currently imported notes appear in the display.
-
Page 53: Edit Your Own Sheets
Edit your own sheets You can use the EDIT NOTES function to change the order of the note pages or text pages later. You can also leave a short information text for each title. 1. Once you have loaded the files for sheet music and text, select the title in the list and press EDIT NOTES. - Page 54 Settings 3. As soon as you switch to INFO, the display keyboard appears, via which you can enter a text with up to 255 characters. 4. Enter the text and confirm with SAVE: 5. You can use the PREVIEW button to view the result of your work. 6.
-
Page 55: Assignment Of Cc And Drawbars With Other Functions
4.4 Assignment of CC and drawbars with other functions With this extension, new functions can be assigned to the CC controller on the left and the drawbars on the right. Examples: Assign functions such as "WERSI Chord Volume" to the drawbar CC on the left or control the effects for the microphone with this drawbar. -
Page 56: Factory Presets
Settings Factory presets CC WersiChord Volume Here the CC drawbar is assigned with the volume for the WERSI Chord sound. CC Send Effects Here the CC drawbar is assigned with the send effects for the Microphone microphone input. Volumes Sequencer The upper and lower manual drawbars are placed on the sixteen tracks of the sequencer. -
Page 57: Using The Drawbars While Editing
The display jumps back to the previous page and the selected function is shown. In our example we have set the volume of the real drums to the CC drawbar. You can find a detailed list of which functions are available in the "Data list"... -
Page 58: Vst-Settings
Settings 4.5 VST-Settings The center of the system is the VST host, which manages all sound generators and AUDIO inputs and outputs. Here the modules are connected to the outputs or the headphones. This offers a maximum of flexibility. Factory modules are included in the delivery to ensure the functionality of the instrument. In chapter 4.5.2 “The factory VST modules”... -
Page 59: General Overview Of The Vst Host
General overview of the VST host In the VST host, you can invite VST plug-ins to add more tones or effects to the OAX system. You also have access to the factory plugins. So to the WERSI sound generation, which you can "rewire" according to your own wishes. To give you a better overview, we have divided the plugins into four areas that can be switched on or off by pressing the following display keys. -
Page 60: The Factory Vst Modules
Settings The factory VST modules The standard configuration already contains the VST modules that are necessary for the “normal” operation of your instrument. This includes: VST-Module Description Sounds Sound generation for the manuals and the pedal Drums Sound generation for drum sounds that are played on the manuals or the pedal. -
Page 61: Load And Save Preset For Vst Settings
Load and save preset for VST settings An overall configuration stores all current modules and connections. Standard configurations are supplied from the factory. As a user, you can also save your own overall configurations. No. Overall configuration Description Standard 1 Complete factory configuration with all settings Standard 1 with Complete factory configuration and the sacred organ module... -
Page 62: Integrate New Plug-In Into The System
Settings Save your own VST preset You can save your own VST configurations using the SAVE display key. 1. Press the "SAVE" button. 2. Select a location from the list. 3. If you want to give the preset a new name, press the surface of the preset name. 4. - Page 63 2. If you haven't already done so, press Load. The following display appears: In our example, our own plug-ins have already been integrated. We will now add a plugin. 3. Press the Import button and the file manager appears. 4. Change to the folder where the VST DLL file was saved. 5.
- Page 64 Settings 8. While saving, you will be asked whether you want to create a sound list for the plug-in. This is required for sound plug-ins so that you can call up the sounds via the selectors, in the MIDI sequencer or in the style editor. The system offers you the following options: Select the desired number of tones and confirm with FORWARD.
-
Page 65: Load And Connect The Vst Plug-In
Load and connect the VST plug-in After you press Load PlugIn, the list of all existing plug-ins appears. The factory modules cannot be reloaded. You may have already added your own plug-ins to the system. If not, go to the chapter 4.5.4 „Integrate new plug-in into the system “. -
Page 66: Edit Vst Plug-In
Settings CAUTION! Don't forget to save the new overall configuration. See “Save your own VST preset“ . Edit VST Plug-In Almost every plug-in has its own user interface. Select the desired plug-in and then select "Edit plug-in". The user interface belonging to the plug-in opens. Tip: The interface can also be opened by double-clicking on the plug-in. -
Page 67: Set The Basic Volume And Eq For A Vst Plug-In
Set the basic volume and EQ for a VST plug-in A volume control and an equalizer are available to integrate the plug-in into the OAX system. Select your own plug-in and then press the MIXER / EQ display button. The following display appears: Adjust the basic volume and the equalizer here to suit your taste. -
Page 68: Place And Edit The Sounds Of The Plug-Ins On The
Settings Remove audio connection To remove an audio connection, press the desired connection on the display, which will then turn red. Now press Delete. Place and edit the sounds of the plug-ins on the By loading the plug-ins, you have also created associated sounds with the name of the plug-in. In this example, we saved the velbet plug-in with one sounds. - Page 69 You already know most of the settings such as dynamics or expression pedal from the factory sounds. The Routing, Manual Controller, Sound Controller and Edit Sound areas are new. Manual Controller and Sound Controller The volume (CC 7) and the panorama (CC10) are preset here. The volume is regulated by the corresponding volume control on the instrument.
- Page 70 Settings Edit Sound You can change the VST sound using the EDIT SOUND function. You can freely define up to 14 controllers and save the value in the sound. You can find out which controller your plug-in can receive from the associated operating instructions.
- Page 71 8. Now set the desired reverb volume that should be set as the standard. You can also set a different value later in the total preset. 9. Now you can add more controllers to this VST sound. 10. As soon as you press EDIT again, the tone can be saved in the identical memory location or as a new VST sound.
- Page 72 Settings We change the PRG change of the VST sound 1. Select the desired VST sound on the upper manual 1. 2. Double-click the selector to open the selector settings. 3. Now press EDIT. 4. Go to the area ROUTING. 5.
-
Page 73: Sacral Organ Module Hauptwerk (Optional)
Sacral organ module HAUPTWERK (Optional) We offer the HAUPTWERK program for all friends of sacred organ music. The highly specialized sampler is aimed at the perfect simulation of the sound of a pipe organ. The software not only simply reproduces the recorded samples, but also simulates the complex acoustic behavior of pipe organs in various parameters (e.g. -
Page 74: Backup Your Own Data
Settings 4.6 Backup your own data Your self-created data can be easily backed up to the internal hard drive or a USB stick / USB hard drive and then loaded again. To access the settings page for the backup, press the SETTINGS field in the main display and then go to the second page. -
Page 75: Reload Data Backup
4. If you want to give your backup a name of its own, tap on the suggested name and the virtuel keyboard will open. 5. Now start the backup with the display button Create. 6. The display shown above disappears. Now wait until the display confirms that the data backup was successfully completed. - Page 76 Settings 6. Now wait until the reload is complete. The following message then appears: 7. After confirming with OK, the instrument must be shut down and restarted. 8. Confirm the following message with YES. Wait until the instrument has been switched off. After a restart, the new data are available. Programming Manual SONIC...
-
Page 77: Edit Sounds
5 Edit sounds The "Easy Sound Editor" is available for editing sounds. With this editor you can adjust the factory sounds and the sounds loaded via the Sound Import to your requirements. Remember that the sounds of the two live drawbars OAX7 and VB3 cannot be edited. Opening the Easy Sound Editor: Select the desired tone color for a selector and open the Profi Manual Controls with a double click. - Page 78 Edit sounds The sound controllers are assigned different functions for each sound. Often you will find an equalizer on the first two controllers with which you can change the bass and treble. Additional controllers with a filter or WaveStart, Attack and Release or other values that are important for the currently selected sound. As soon as you have changed one of the values, the two display keys Original and...
-
Page 79: Edit Styles
6 Edit styles You can change styles on your instrument very quickly and easily. The spectrum ranges from simply changing sounds, volumes or effects settings to complex changes in styles. You can use the MIDI import and export function to edit styles with sequencer programs such as CUBASE. There are two ways to open the Style Editor. -
Page 80: The Structure Of A Style
Edit styles 6.1 The structure of a style A style consists of a different number of style parts. This is a maximum of 16 parts when all possibilities are fully exhausted. So three intros, four variations with four associated fills, two breaks and three endings. Each part can have a maximum of nine tracks. -
Page 81: Overview Functions
6.2 Overview functions The main parameters of the style can be set on the main page of the style editing. Let's go through the areas one by one: Basic functions Which style is being edited This display shows the currently selected style that is currently loaded for editing in the StyleEditor. This is always the style that is currently active in normal play mode. - Page 82 Edit styles Volumes and sounds For the currently selected part, the sound and volumes belonging to the tracks are displayed here. Since not every part uses all tracks, these appeared a little paler and cannot be selected. With SOLO and MUTE a track is switched to SOLO and with MUTE one or more tracks can be muted. General: The volume of the entire style is adjusted using the GENERAL control.
-
Page 83: Displaybutton Edit Per Track
Displaybutton EDIT per track The EDIT button can be used to set additional values for the selected track. This includes: 1. Volume (identical to the main page) 2. Panorama 3. Reverb 1 4. Reverb 2 5. Chorus 6. Delay 7. Octave position -> Please note that the octave position does not take effect immediately, but during the next part run. - Page 84 Edit styles After you press the Adjust Drums display button, a display opens on which the changes can be made. In this example sequence, a total of twelve drum sounds are used. You can see them on the left. Before each drum sound, you will see the corresponding MIDI note number.
- Page 85 Attention 2: Many of the drum sounds also change the sound with the velocity value (dynamics). This means that a different sample is played at low velocity than a higher velocity value. So not only the volume changes, but also the sound. On the right side you can see if there is a possibility to exchange for the drum sound selected on the left.
-
Page 86: Professional Functions In Style Edit
Edit styles 6.3 Professional functions in Style Edit Part Edit Under Part Edit you can copy, paste and delete individual Style Parts. Examples of use: 1. You would also like to copy the Part VAR C to VAR D in order to change the instruments and volume there. - Page 87 The settings for each pattern can be changed using the SETTINGS button. The conditions under which the pattern is played are defined here. Pattern Information In the upper left area you can see the pattern information: Which Style and which Part 16 Beat 1 Var D or Samba 3 Break 1 Which Track Acc1 or Drums1...
- Page 88 Edit styles Keyboard Range The key Range determines the lowest and highest note for the sounds. With a suitable setting, you can ensure that no notes sound outside the natural range (e.g. bass note too high or notes of a piccolo too low). To change the play area, press the corresponding display area and then enter the lowest and highest tone for the play area on the sub-manual.
- Page 89 Retrigger-Rules Bypass No change (e.g. for drums and percussion) Stop Running notes are stopped when the chord is changed and no longer started in the new harmony. Particularly suitable for short notes, e.g. on a rhythm guitar. Pitch KeyPitch-Transpose Pitch Root KeyPitch to the new root note Retrigger Running notes are stopped when the chord changes and immediately restarted in the...
-
Page 90: Edit Or Create Styles On The Computer
Edit styles 6.4 Edit or create styles on the computer One word in advance: The creation of styles is a very complex matter and can no longer be compared to programming rhythms on older instruments. In addition to deep musical knowledge, experience in the computer area and in operating a sequencer such as Cubase is required. -
Page 91: Import Individual Parts, Tracks Or Patterns From A Complete Midi File
Import individual parts, tracks or patterns from a complete MIDI file You can also import individual parts from a completely exported style later. You only want to import a part (Var A or Break 1) from a complete MIDI export. 1. -
Page 92: Format Of An Exported Style In Midi Format
Edit styles Format of an exported style in MIDI format Important note: The exported style contains header information and the actual notes. Of course, you can also change the header information in the MIDI file. However, we recommend that you change this data within SONIC using the corresponding display fields. - Page 93 View tracks and patterns As already mentioned, a track can contain up to 16 patterns. The individual pattern can e.g. different chords can be assigned so that e.g. the bass track on one pattern can contain the bass notes for a major chord and on the next pattern a special bass run for the minor chords.
-
Page 94: Globale Einstellungen
Globale Einstellungen 7 Globale Einstellungen Programming Manual SONIC... -
Page 95: Global Settings
8 Global Settings Unter den „Globalen Einstellungen“ können Sie einige Standard Parameter verändern. 8.1 Set the display language Here you can choose between the display languages German, English, French and Dutch. 8.2 Tuning The standard tuning is set to 440Hz. To change, press the currently set tuning and then use the wheel to set the new tuning you want. -
Page 96: Remote Diagnosis Via Teamviewer
Global Settings 8.4 Remote diagnosis via TeamViewer Using the TeamViewer software program, our service staff can connect to your instrument over the Internet. In this way, settings, errors in the OAX operating system or operating errors can be quickly remedied. The TeamViewer program is free of charge. - Page 97 5. Give the service hotline only your ID and password. In our example that would be Your ID 387 669 000 and the Password waf598. ATTENTION: Your ID remains the same every time you start TeamViewer. However, the password is different each time it is started. So you don't have to worry about someone using the remote control without permission.
-
Page 98: Operation Of The Virtual Typewriter
Operation of the virtual typewriter 9 Operation of the virtual typewriter The operation of the virtual typewriter is based on WINDOWS 10 and corresponds (with small differences) to a normal computer / laptop keyboard. Depending on the type of input, a distinction is made between two keyboards. - Page 99 Tap once Switch to upper case or alternate characters. Tapping this button only affects the next letterD Moving the write marker (cursor) = vertical line in the text line. Alternatively, you can also place the input cursor (vertical line) on the desired position of the text by tapping in the text field Deletes all text.
-
Page 100: Entering Quantities Of Text
Operation of the virtual typewriter 9.2 Entering quantities of text A longer text can be entered in some places. In addition, the display keyboard was expanded with the SAVE button and a larger text field. Programming Manual SONIC... -
Page 101: Wersi Oax Music Workstation
10 WERSI OAX Music Workstation 10.1 Update of the WERSI OAX operating software The WERSI OAX system is constantly being developed and expanded with new functions as well as sounds and and styles. As a customer, you can download and install the new versions from our website. You can find out how it all works in the following sections. -
Page 102: Reinstall Or Update The Software
WERSI OAX Music Workstation Reinstall or update the software A basic distinction is made between two types of installation: New installation: The OAX operating software is completely reinstalled. All your own storages such as total presets or styles are deleted. Update: The installation checks all areas of your instrument and only exchanges outdated files. - Page 103 The following display may not be displayed if your organ is already associated with the correct model. If the display appears, select the existing instrument type. You can choose from the keyboard OAX1, the OAX500LS, the OAX600 and 700 (in the version with and without speakers, the OAX800LS and the three-manual OAX1000).
- Page 104 WERSI OAX Music Workstation Now select from the following options:: a. Complete new installation -> ATTENTION! Your own data will be completely erased! Update the existing software -> your own data are retained. In our example, we select Update the existing software. 11.
- Page 105 If you select INSTALL, the new data will be copied to the hard drive and you see the message at the end: The term "new version" changes of course with every update. Press COMPLETE INSTALL starts the software immediately. OAX-System...
-
Page 106: Read The Operating Instructions On The Display
WERSI OAX Music Workstation 10.2 Read the operating instructions on the display You can read the operating instructions directly on the display of the OAX instrument. To access the operating instructions, press the SETTINGS field in the main display, go to page 2 and then select USER MANUAL or PROGRAMMING MANUAL. -
Page 107: Changes In The Different Software Versions
10.3 Changes in the different software versions You can always read what has changed in the software with the different versions. To do this, press the SETTINGS field in the main display, go to page 2 and then select UPDATE History. The information is loaded and loaded in the PDF reader and you can easily move through the document with the wiping technique. -
Page 108: The Microsoft Operating System Windows
WERSI OAX Music Workstation 10.5 The MICROSOFT operating system WINDOWS The OAX software is programmed for the Windows 10 operating system. The WERSI SONIC program is closed via SETTINGS and the "Exit SONIC program" button and you get to the WINDOWS ©... -
Page 109: The Midi-Interface
11 The Midi-Interface 11.1 MIDI Out MIDI sound expanders can be controlled directly via so-called MIDI sounds. These sounds can be used on the manuals or in the sequencer or in styles. If you want to use an expander, you want to play certain sounds of the expander on the manuals or in the automatic accompaniment / sequencer. - Page 110 The Midi-Interface 7. After you have made the desired settings, press "Edit " again and you will be asked whether you want to save the newly created MIDI expander sound. There you give your new MIDI-Out sound a name so that you can find it again. You can create hundreds of these MIDI Out sounds to get specific tones on your expander.
- Page 111 MIDI Advanced In the „MIDI Advanced“ area, you can assign eight further controllers to the desired MIDI controllers. Use the Edit CC display buttons to open a new window by assigning a new controller to the slider concerned. Tapping the controller name opens the display keyboard and you can give the controller a different name.
- Page 112 The Midi-Interface Controllers that are sent on MIDI Out The Routing and MIDI Standard send the following data to the expander: Controller Name Information PRG-Change PRG-Change MSB-Controller Bank-Select LSB-Controller Bank-Select Panorama Effect 1 Often the reverb send Effect 2 Effect 3 Often the chorus send Effect 4 Attack...
-
Page 113: Midi In
11.2 MIDI IN Input Controller Controller Wert Information CC32 CC10 Panorama CC11 Expression Pedal CC72 Release Time CC73 Attack Time CC74 Brightness (CuttOff) CC76 LFO1 Rate CC77 Filter Envelope Attack CC78 Filter Envelope Decay CC79 Filter Envelope Depth CC84 Start Note for Glide CC91 Reverb 1 (not for Drums) CC92... -
Page 114: For Your Own Notes
For your own notes 12 For your own notes Programming Manual SONIC... - Page 115 Brand Owner and Development MUSIC STORE professional GmbH Istanbulstraße 22-26 51103 Cologne - Germay E-Mail: info@wersi.net www.wersi.de Website:...
Need help?
Do you have a question about the WERSI SONIC OAX Series and is the answer not in the manual?
Questions and answers