Table of Contents

Subscribe to Our Youtube Channel
Related Manuals for SVINZ SCC009

Summary of Contents for SVINZ SCC009
- Page 1 USER MANUAL V06.07 Charging Alarm Clock SCC009 Thank you for your purchase of this SVINZ product. Please read this instruction manual carefully before using product to ensure proper use. Keep this manual in a safe place for future reference.
-
Page 2: Need Help
NEED HELP? Please contact a SVINZ® customer support representative first regarding any additional information on product features, specifications or assistance with setup. Please contact us via EMAIL: support@svinz.com WARNING: To reduce the risk of fire or electric shock, do not expose the appliance to rain or moisture. -
Page 3: What's Included
A. If liquid has been spilled on or into the product B. If the product has been exposed to rain, water or other liquids C. If the product does not operate normally by following the operating instructions, adjust only those controls that are covered by the operating instructions. D. -
Page 4: Product Information
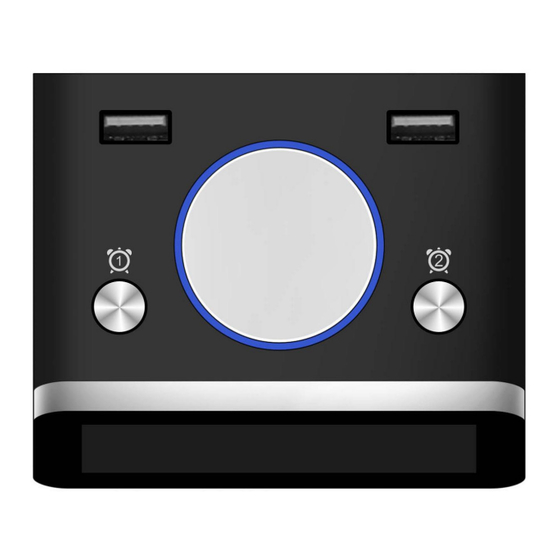
PRODUCT INFORMATION... - Page 5 ○ 1 Rotating Button ○ 2 Alarm Button 1 ○ 3 Alarm Button 2 ○ ○ 5 USB Charging Port ○ 6 DC-IN Jack ○ 7 Time Setting Switch ○ 8 Temperature C/F Switch ○ 9 Temperature Sensor ○ 10 12H/24H Switch Button ○...
-
Page 6: Connecting Power
OPERATING INSTRUCTIONS INTALLING THE BATTERIES Remove the battery compartment panel ○ , install 3 AAA batteries according to the image inside the battery compartment properly, close and secure the battery compartment. CONNECTING POWER Connect the power cord to the DC-IN jack on the bottom of the unit, and then plug the power cord onto wall outlet. -
Page 7: Usb Charging Function
Use the Thermometer C/F Switch ○ to switch between Celsius or Fahrenheit display ADJUSTING LCD BRIGHTENSS There are four dimming options available HIGH/MEDIUM/LOW/FAINTNESS. Press the Rotating Button ○ to toggle between the four brightness settings. USB CHARGING FUNCTION This alarm clock is equipped with 2 convenient & fast USB charging ports on the top that allows you to recharge many brands of smart phone, tablet and portable music player. -
Page 8: Warranty
WARRANTY Thank you for choosing SVINZ. We guarantee your investment in our product is a solid one. Extensive thought, research, planning and design goes into every product we make. High quality components combined with precision manufacturing allows us to maintain the highest possible production standards.
Need help?
Do you have a question about the SCC009 and is the answer not in the manual?
Questions and answers
He do I change time on Auto Dimming? on the
To change the time on the SVINZ SCC009 Auto Dimming:
1. Switch the Time Setting Switch (○7) to the SET mode. The number on the display will start flashing.
2. Spin the Rotating Button (○1) clockwise or counterclockwise to set the correct time.
3. When the correct time is set, switch the Time Setting Switch (○7) to the LOCK mode. The display will stop flashing and the time will be saved.
This answer is automatically generated
Instructions on digital pictures display