Table of Contents
Advertisement
Quick Links
User Manual
RA‐19‐LCD
19 inch TFT LED Arcade Monitor
©RetroArcade.us
WARNING
By using these documents you agree hereto:
1. You are qualified to install the components contained in this package and that any damage to the component,
device the component is being installed into, or injury to yourself or others is solely your responsibility.
2. You will install this component according to the supplied instructions inside this package.
NO LIABILITY FOR CONSEQUENTIAL DAMAGES. To the maximum extent permitted by applicable law, in no event
shall Holland Computers, Inc. or its suppliers be liable for any damages whatsoever (including, without limitation,
damages for loss of business profit, business interruption, loss of business information, or any other pecuniary loss)
arising out of the use of, or inability to use, this product, even if Holland Computers, Inc. has been advised of the
Possibility of such damages. Because some states/jurisdictions do not allow the exclusion or limitation of liability for
consequential or incidental damages.
Advertisement
Table of Contents

Summary of Contents for Retro Arcade RA-19-LCD
- Page 1 User Manual RA‐19‐LCD 19 inch TFT LED Arcade Monitor ©RetroArcade.us WARNING By using these documents you agree hereto: 1. You are qualified to install the components contained in this package and that any damage to the component, device the component is being installed into, or injury to yourself or others is solely your responsibility. 2. You will install this component according to the supplied instructions inside this package. NO LIABILITY FOR CONSEQUENTIAL DAMAGES. To the maximum extent permitted by applicable law, in no event shall Holland Computers, Inc. or its suppliers be liable for any damages whatsoever (including, without limitation, damages for loss of business profit, business interruption, loss of business information, or any other pecuniary loss) arising out of the use of, or inability to use, this product, even if Holland Computers, Inc. has been advised of the Possibility of such damages. Because some states/jurisdictions do not allow the exclusion or limitation of liability for consequential or incidental damages. ...
- Page 2 Before operating the monitor, please read this manual thoroughly. This manual should be retained tor future reference. FCC Class B Radio Frequency Interference Statement This equipment has been tested and found to comply with the limits tor a Cass B digital device, pursuant to Part 15 of the FCC Rules. These limits are designed to provide reasonable protection against harmful interference in a residential installation. This equipment generates, uses and can radiate radio frequency energy, and if not installed and used in accordance with the instructions, may cause harmful interference to radio communications. However, there is no guarantee that interference will not occur in a particular installation. If this equipment does cause harmful interference to radio or television reception, which can be determined by turning the equipment off and on, the user is encouraged to try to correct the interference by one or more of the following measures: Reorient or relocate the receiving antenna. Increase the separation between the equipment and receiver. Connect the equipment into an outlet on a circuit different from that to which the receiver is connected. Consult the dealer or an experienced technician for help. The device complies with Parts 15 of the FCC Rule. Operation is subject to the following two conditions: (1) this device may not cause harmful interference: and (2) this device must accept any interference received, including interference that may cause undesired operations. CANADA This Class B digital apparatus meets all requirements of the Canadian Interference‐Causing Equipment Regulation. CE: This device complies with requirement of EM C directive 89/336/EEC with regard to Electromagnetic Compatibility, and 73/23/EEC and 93/68/EEC with regard to Low Voltage directive. Socket‐outlet shall be installed near the equipment and shall be easily accessible. P a g e 2 | 10 ...
-
Page 3: Table Of Contents
Contents Notices, Warnings and Safety ............................ 4 SAFETY NOTICE ................................ 4 WARNING .................................. 4 PRECAUTIONS ................................ 4 Features .................................. 5 Package Contents ................................ 5 Installation .................................. 6 Power Source ................................ 6 Video Input ................................ 6 Mounting ................................... 6 Operating Instructions .............................. 7 ... -
Page 4: Notices, Warnings And Safety
Notices, Warnings and Safety SAFETY NOTICE 1. Changes or modifications not expressly approved by the manufacturer for could void the warranty and expose the user and/or others to hazards that can cause injury or death. 2. Shielded interface cables and AC power cord, if any, must be used in order to comply with the emission limits. 3. The manufacturer is not responsible for any radio or TV interference caused by unauthorized modification to this equipment. It is the responsibility of the user to correct such interference. WARNING To prevent fire or shock hazard, do not expose the monitor to rain or moisture. Dangerously high voltages are present inside the monitor. Do not open the cabinet. Refer servicing to qualified personnel only. PRECAUTIONS • Do not use the monitor near water, e.g. near a bathtub, washbowl, kitchen sink, laundry tub, swimming pool or in a wet basement. • Do not place the monitor on an unstable cart, stand, or table. If the monitor falls, it can injure a person and cause serious damage to the appliance. Use only a cart or stand recommended by the manufacturer or sold with the monitor. If you mount the monitor on a wall or shelf, use a mounting kit approved by the manufacturer and follow the kit instructions. • Slots and openings in the back and bottom of the cabinet are provided for ventilation. To ensure reliable operation of the monitor and to protect it from overheating, be sure these openings are not blocked or covered. Do not place the monitor on a bed, sofa, rug, or similar surface. Do not place the monitor near or over a radiator or heat register. Do not place the monitor in a bookcase or cabinet unless proper ventilation is provided. • The monitor should be operated only from the type of power source indicated on the label. If you are not sure of the type of power supplied to your home, consult your dealer or local power company. • Unplug the unit during a lightning storm or when it will not be used for long period of time. This will protect the monitor from damage due to power surges. • Do not overload power strips and extension cords. Overloading can result in fire or electric shock. • Never push any object into the slot on the monitor cabinet. It could short circuit parts causing a fire or electric shock. Never spill liquids on the monitor. • Do not attempt to service the monitor by yourself; opening or removing covers can expose you to dangerous voltages and other hazards. Please refer all servicing to qualified service personnel. • To ensure satisfactory operation, use the monitor only with UL listed computers which have appropriate configured receptacles marked between 100‐ 240V AC, Min. SA. • The wall socket shall be installed near the equipment and shall be easily accessible. P a g e 4 | 10 ... -
Page 5: Features
Featur es This m monitor is a col or active matri ix thin film tran nsistor (TFT) liq quid crystal dis splay (LCD) tha at uses amorph hous silicon n TFT as a switc ching device. T This model is co omposed of a T TFT LCD panel, , the voltage re eference, comm mon voltag ge, DC‐DC conv verter, column, , and row drive er circuit. This T TFT LCD has a 19‐inch diagon nally measured d active display area w with SXGA reso olution (1024 ve ertical by 1280 0 horizontal pix xel array). 9”TFT Color LE D Monitor risp Clear Disp lay visible from m all directions... -
Page 6: Installation
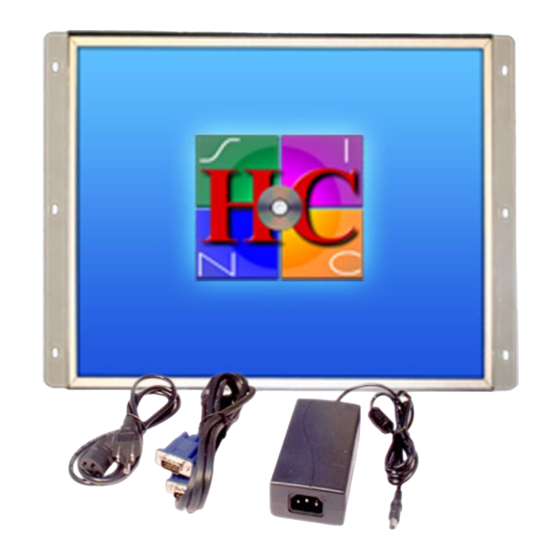
Installation Power Source Make sure that the power cord is the correct type required in your area. This LED monitor has an external universal power supply that allows operation at 100/120V AC voltage converted to 12VDC (No user adjustment is required.) Connect the AC‐power cord one end to your Power Supply’s AC‐input socket, the other end to wall‐outlet. Connect the round 12VDC plug from the power supply to the 12VDC power socket on the monitor. Video Input This monitor accepts only VGA input, any other type of input would need to be converted to VGA before use. Connect the VGA cable to the VGA connector on the monitor and the other end to your video source (PC, JAMMA Board, Converter, etc.) To connect this monitor to a EGA or CGA arcade you will need a GBS‐8200 convertor, sold separately See part number: RA‐CGA‐VGA‐CONVERT Mounting This monitor is designed to be mounted in a cabinet using the provided flanges with pre‐drilled holes. Use the appropriate hardware to secure the monitor to the cabinet. Ensure that all cables are secured and that a strain relief is provided to prevent damage to the monitor by loose cables that can pull on and possibly damage the connectors. P a g e 6 | 10 ... -
Page 7: Operating Instructions
Operat ting Instru uctions Genera l his monitor fea atures last stat te power. This s means that if the cord is un plugged or the ere is a loss of power utside of press sing the power r switch, the m onitor will retu urn to its last p power state wh hen power is estored. Using g this feature re equires no adju ustment and is s automatic. he power indic cator led will lig ght when the m monitor is on. he display pan el will remain d dark unless the ere is a VGA in nput signal. Control s ... -
Page 8: Osd Menu
OSD (O On Screen n Display) Menu The OSD m menu is used to o configure the e monitor in 6 s sections, using g the control bu uttons to navig gate: Troubl eshooting g Common P Problem Possible Solut ions No display Push power button Check k that the pow er led is lit and d green (See Po ower LED is no ot on below) Check k that the VGA cable is conne ected Check k that there is a a signal on the e VGA cable ... - Page 9 P a g e 9 | 10 ...
-
Page 10: Specifications
Specifications Driving System TFT Color LCD Size 19” Pixel Pitch 19” 0.294mm(H) x 0.294mm (V) TFT LED Panel 2 Brightness 270cd/m (Typical) Contrast 700:1 (Typical) Viewable Angle (H) 135 Video RGB Analog Interface Input H Frequency 31‐80KHz V Frequency 55‐75Hz Display Colors 16.2M Max Resolution 1280x1024 @ 75Hz Input Connector 0‐Sub 15pin Power Source 12VDC Operating Temperature to 40 C (41 to 104 Environmental Storage Temperature ‐20 to 65 C (‐4 to 149 Operating Humidity...
Need help?
Do you have a question about the RA-19-LCD and is the answer not in the manual?
Questions and answers