
Summary of Contents for U.S. Solar Mounts 30 Series
- Page 1 U.S. Solar Mounts TOP OF POLE MOUNTS 30 & 40 SERIES INSTALLATION MANUAL Models: 3160, 3260, 4160, 4260 REV 2 Ultra-Rugged Solar Mounting Solutions ©2020 U.S. Solar Mounts Corp. All Rights Reserved...
-
Page 2: Table Of Contents
USTOMER UPPORT U.S. Solar Mounts products are designed to be simple and easy to install. If, for whatever reason, you need help during installation, please give U.S. Solar Mounts’ customer support a call. We are happy to help ensure each installation goes as smooth as possible. Have a comment or suggestion on how we can improve your experience? Let us know. -
Page 3: Installer Responsibility
Complying with all applicable local or national building codes, including any that may supersede this manual. • Ensure that U.S. Solar Mounts and other products are appropriate for the particular installation and the installation environment. • Ensure that the selected mount can support the array under live load conditions. -
Page 4: Tools That You'll Need
12. Compass or Smartphone App In addition, the following materials will need to be acquired: 1. FOR 30 SERIES ONLY: 3” SCH40 Mounting Pipe (3-1/2” Outside Diameter) 2. FOR 40 SERIES ONLY: 4” SCH40 Mounting Pipe (4-1/2” Outside Diameter) 3. Concrete 4. -
Page 5: Safety, Warnings & Cautions
Safety, Warnings & Cautions We make every effort to remove sharp edges from our products. However, we highly recommend wearing gloves when handling metal parts in order to avoid sharp edges. Before you begin any digging for the post, you MUST make absolutely sure that there are no buried lines in the area that you’ll be working. -
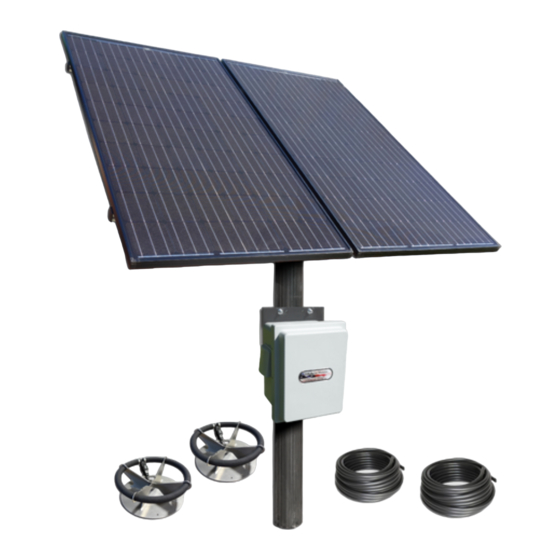
Page 6: Main Components & Overview
Main Components & Overview Upper & Lower Rib Pivot Bolt Rib Mounting Bolts Slip fitter Strong Back Set Bolts Brace Arm Bracket SCH40/80 Steel Mounting Pole Brace Arm Solar Module... -
Page 7: Locating The Array
Locating the Array Noon 10am East West South... - Page 8 Today 10 years from now...
-
Page 9: Pole & Foundation Installation
Pole & Foundation Installation You should allow the concrete to cure for at least 24 hours before removing braces. Adjust the pole to plumb using a standard construction level. Check the pole in 2 locations 90 apart as shown. Brace the pole with any suitable lumber or readily- available bracing material. -
Page 10: Foundation Diagram
Foundation Diagram SCH40/80 Steel Mounting Note: Pole Pole height may be adjusted 72” MAX Down for Southern Latitudes. Consult with US Solar Mounts For assistance in determining Proper pole height for your Location. GRADE Concrete -4k PSI MIN Volume: 6 CU FT / 0.2 YDS 48”... -
Page 11: Array Assembly
Array Assembly 1. Unpack the Slip-Fitter Assembly and lower it onto the top of the pole. North You’ll need to back the Set Bolts out in order to install the Slip-Fitter onto the Set Bolts pole. MAKE SURE that the Angle Brace Tab is aimed DUE NORTH. -
Page 12: Strong-Back & Angle Brace
Strong-Back & Angle Brace NOTE: The aluminum Strong-Back has been factory cut-to-length for use with US Solar Mounts supplied solar panels. If another source of module is used, the beam may need to be trimmed to a shorter length. Most 60-Cell modules will have their holes spaced between 36” and 44”... -
Page 13: 4160 - Installing The Mounting Ribs
3160 / 4160 – Installing the Mounting Ribs If you have a dual 60-Cell mount (3260 or 4260 TOP), jump to Section 11. Before the Panels can be installed, the Ribs will need to be installed on both ends of the Strong-Back. The Ribs are fastened to the Strong-Back using four (4) 5/16-18 hex bolts &... -
Page 14: 4160 - Installing The Panel
3160 / 4160 – Installing the Panel 1. Carefully unpack your solar module and set it onto the Ribs with the Junction Box on the North end as shown below. 2. Line up the mounting holes on the back side of the module frame with the holes in the Ribs. -
Page 15: 4260 - Installing The Panel Rails
3260 / 4260 – Installing the Panel Rails 3. Install four (4) carriage-head bolts, threads aiming down, into the holes on the top flange of the Rail Bracket. Add a lock-washer and start a hex nut onto the threads on the bottom side of the flange. -
Page 16: 4260 - Installing The Panels
3260 / 4260 – Installing the Panels Refer to the diagram below for details. Carriage Bolts and Serrated Flange Nuts... -
Page 17: Setting Array Elevation
Setting Array Elevation Your last assembly step is to set the Elevation of the array. The optimum year-round tilt angle for a solar array is determined by your latitude North of the equator. You can find your latitude in a multitude of different ways. 1. - Page 18 A few notes on Summer vs Winter Elevation Settings: The previous page briefly describes how to find the optimum “year-round” array tilt. While this setting may work for nearly all situations, it may be possible that a different tilt angle is needed for specific situations.
-
Page 19: Array Grounding
Array Grounding A properly installed solar array of any size or configuration needs to be solidly grounded. You should not rely only on the mounting pole for proper or effective grounding. Grounding of your pole top should accomplish the following: 1. - Page 20 One last check… Take a minute to go over your array one more time to check for loose hardware. Don’t be afraid to bang on it a little bit & listen for loose parts. Put your hands on each fastener one more time.
Need help?
Do you have a question about the 30 Series and is the answer not in the manual?
Questions and answers