Advertisement
Quick Links
Recommended equipment:
Wing servo's
Elevator
© Speedpulse model 2012
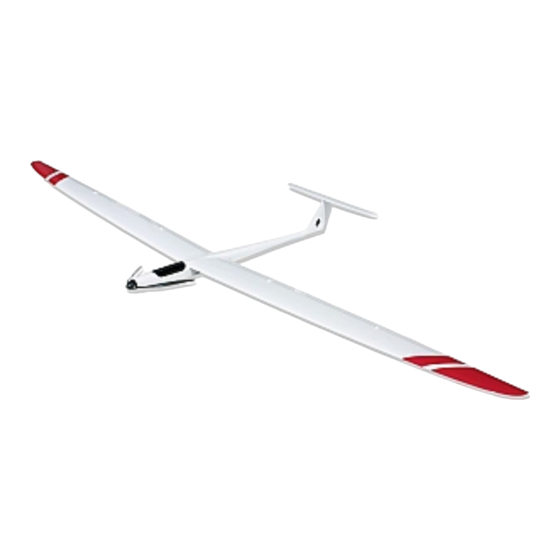
ENERGIC
Building instructions
Specifications:
Wingspan
Length
Wing area
Elevator area
Wing airfoil
Elevator airfoil
Weight (empty)
Hyperion Atlas DS095-FMD
Graupner DES448 BB MG
(max 10mm servo's)
Futaba S3156
Hyperion Atlas DS11-SCB
2455mm
1260mm
2
40,4dm
2
4,4dm
F3B special
SD8020 mod.
ca. 1200g
1
speedpulse@volny.cz
Advertisement

Summary of Contents for Speedpulse ENERGIC
- Page 1 Elevator area 4,4dm Wing airfoil F3B special Elevator airfoil SD8020 mod. Weight (empty) ca. 1200g Recommended equipment: Wing servo’s Hyperion Atlas DS095-FMD Graupner DES448 BB MG (max 10mm servo’s) Elevator Futaba S3156 Hyperion Atlas DS11-SCB © Speedpulse model 2012 speedpulse@volny.cz...
- Page 2 Wing: Flaps lever mounting: Make a hole in the carbon tube. If necessary cut the thread at the lever. Glue the lever with 5-min epoxy. © Speedpulse model 2012 speedpulse@volny.cz...
- Page 3 Ailerons lever mounting: Make a hole in the carbon tube. If necessary cut the thread at the lever. Glue the lever with 5-min epoxy. © Speedpulse model 2012 speedpulse@volny.cz...
-
Page 4: Servo Mounting
Draw the rod line. Check the position. Sand the edge of the servo frame (front). Use 5-min epoxy for glueing. It’s recommended to glue the frame with installed servo. You will have no work (sanding) with overflowed glue. © Speedpulse model 2012 speedpulse@volny.cz... - Page 5 Finished rods for ailerons (top) and flaps. Servo lever’s by ailerons and flaps (right) in neutral position. After setting the deflections and neutral positions glue the threat at the rods with thin CA glue. Install the servo covers. © Speedpulse model 2012 speedpulse@volny.cz...
- Page 6 Motor plate mounting: Sand the surface for motor plate. Sand a little cone at the motor plate. Check correct spinner position. Glue the plate with very thin CA glue. Glue the plate finally with 5-min epoxy. © Speedpulse model 2012 speedpulse@volny.cz...
- Page 7 Elevator: Make a hole for elevator lever. Sand the lever for better adhesion. Glue the lever with 5-min epoxy. Make a hole for elevator rod. © Speedpulse model 2012 speedpulse@volny.cz...
- Page 8 Install the cables for elevator servo and glue the servo cover. !!!!! Crimp the connector at the elevator cable after putting thru the fuselage, there is only a small (5mm) hole in the back rib. !!!! © Speedpulse model 2012 speedpulse@volny.cz...
- Page 9 Canopy: Sand the glueing area and the carbon rod. Place and fix the rod with CA glue. Glue it finally with 5-min epoxy. Antenna’s (ca. 100mm behind wing) © Speedpulse model 2012 speedpulse@volny.cz...
-
Page 10: Recommended Cable Lengths
Elevator 90cm Wing connector in fuselage 20cm Basic setting for Energic (+ = down, – = up): Elevator ± 3,5mm (measured in the middle) Ailerons + 5mm, –13mm Thermal: + 1,5–2mm, mix Flaps to Ailerons 100% (measured at the root) Speed: –... - Page 11 KIRA 600-30 + 6.7:1 + RFM 17x13 + 6 Li-Po 2200 55C (200A, 4kW) MEGA 22/40/2 + RFM 14x10 + 3 Li-Po 2800 55C (120A) KIRA 500-58 + 6.7:1 + RFM 14x10 + 3 Li-Po 2800 55C (180A) © Speedpulse model 2012 speedpulse@volny.cz...
Need help?
Do you have a question about the ENERGIC and is the answer not in the manual?
Questions and answers