Table of Contents
Advertisement
Quick Links
Scanmate
For Use with Scanmate Software v4.2
Equipment Manufactured By
DGH TECHNOLOGY , INC.
DGH TECHNOLOGY , INC.
DGH TECHNOLOGY , INC.
110 SUMMIT DRIVE
110 SUMMIT DRIVE
110 SUMMIT DRIVE
SUITE B
SUITE B
SUITE B
EXTON, PA 1934 1
EXTO N, PA 1934 1
EXTON, PA 1934 1
USA (6 10) 594 -9100
USA (6 10) 594 -9100
USA (6 10) 594 -9100
Page 1 of 53
DGH 8000 (SCANMATE-B)
ULTRASONIC B-SCAN
B
DGH 8000
OPERATOR'S MANUAL
Authorized Representative
EMERGO EUROPE
EMERGO EUROPE
EMERGO EUROPE
Molenstraat 15
Molenstraat 15
Molenstraat 15
Prinsessegracht 20
2513 BH, The H ag ue
2513 BH, The H ag ue
EC
EC
REP
REP
2513 BH, The H ag ue
EC
REP
2514 AP, The Hague
The Netherlands
The Netherlands
The Netherlands
The Netherlands
Phone: +31.70.345.8570
Phone: +31.70.345.8570
Phone: +31.70.345.8570
8000-INS-UMENG Rev. 4
0120
Advertisement
Table of Contents

Related Manuals for DGH TECHNOLOGY Scanmate-B DGH 8000

Summary of Contents for DGH TECHNOLOGY Scanmate-B DGH 8000
- Page 1 ULTRASONIC B-SCAN Scanmate DGH 8000 OPERATOR’S MANUAL For Use with Scanmate Software v4.2 Equipment Manufactured By Authorized Representative DGH TECHNOLOGY , INC. EMERGO EUROPE DGH TECHNOLOGY , INC. DGH TECHNOLOGY , INC. EMERGO EUROPE EMERGO EUROPE 110 SUMMIT DRIVE 110 SUMMIT DRIVE...
- Page 2 This page intentionally left blank. Page 2 of 53 8000-INS-UMENG Rev. 4...
-
Page 3: Table Of Contents
TABLE OF CONTENTS GENERAL DEVICE DESCRIPTION................5 DEVICE CLASSIFICATION ..................... 5 INDICATIONS FOR USE ....................5 WARNINGS AND CAUTIONS ..................6 Meaning of Signal Words ................6 Description of Symbols .................. 6 General Cautions and Warnings ..............7 PRESCRIPTION DEVICE STATEMENT ................ 9 OPERATOR QUALIFICATIONS .................. - Page 4 15.13 Angle Tool ..................... 27 15.14 Area Tool ....................... 27 15.15 Ruler Overlay ....................27 15.16 Zoom ......................28 15.17 Selecting Probe Orientation ................29 15.18 Saving B-Scan Images ................... 32 15.19 Saving B-Scan Videos ................... 32 15.20 Reviewing B-Scan Exams ................33 15.21 Saving B-Scan Images as Jpegs ..............
-
Page 5: General Device Description
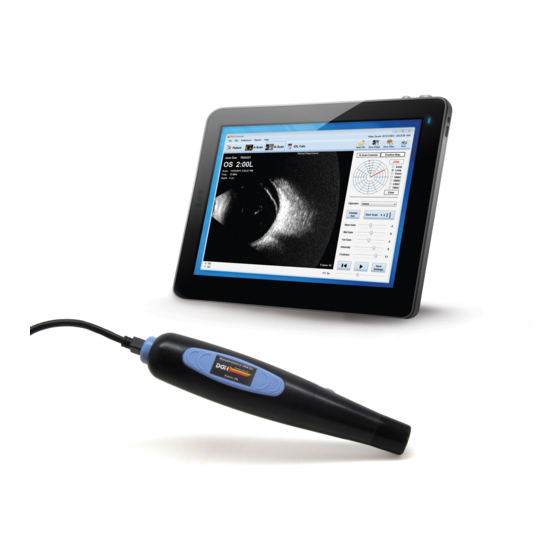
General Device Description The DGH 8000 is a diagnostic ultrasound device used by professionals in the ophthalmic field to produce cross-sectional images of the eye and orbit. The probe is comprised of a 12 MHz, single element transducer that is mechanically oscillated to perform a 60-degree sector scan of the eye. -
Page 6: Warnings And Cautions
This symbol instructs the operator to read the operating manual. This mark indicates that Notified Body 0120 (SGS United Kingdom Ltd) has certified the management system of DGH Technology, Inc. meets the 0120 requirements applicable requirements of 21 CFR 1010 (Performance... -
Page 7: General Cautions And Warnings
This symbol indicates that Emergo Europe is the European Authorized Representative for this device. This symbol indicates that DGH Technology, Inc. is the manufacturer of the DGH 8000 Scanmate-B device. The YYYY under the symbol indicates the yyyy year the device was manufactured. - Page 8 WARNING If the device is used in conjunction with other devices, current leakage may increase and electric shock may be caused. It is the user’s responsibility to ensure safety when the device is to be used in conjunction with other devices. If safety cannot be ensured, the simultaneous use of devices is not allowed.
-
Page 9: Prescription Device Statement
WARNING Portable RF communications equipment (including peripherals such as antenna cables and external antennas) should be used no closer than 30 cm (12 inches) to any part of the device, including cables specified by the manufacturer. Otherwise, degradation of the performance of this equipment could result. Prescription Device Statement CAUTION The DGH 8000 is a prescription device and is only to be used by, or under the... -
Page 10: Ultrasonic Exposure And Intensities
Ultrasonic Exposure and Intensities Tissue Exposure to Ultrasound Energy The ultrasound energy emitted by the DGH 8000 is low intensity and will have no adverse effects on the patient and/or operator. However, the operator is still cautioned to perform examinations using the principle of ALARA (As Low As Reasonably Achievable). -
Page 11: Splash Screen
11.2 Splash Screen The Scanmate splash screen will appear while the application loads. 11.3 Login Screen A single username and password is used to gain access to the software and database for all users. By default, the Scanmate software is set to automatically log in when the application is started using the username and password specified in System Preferences. -
Page 12: Configuring The Scanmate Software
Configuring the Scanmate Software 12.1 System Preferences The “System Preferences” window provides controls to set various configuration items for the system. The System Preferences window can be accessed by selecting Preferences → System from the Menu Bar. Note: Refer to the DGH 6000 Scanmate-A or the Scanmate Flex User Guide for instructions on configuring A-Scan related System Preferences. - Page 13 key or by a verbal command of “Hey Flex”. Voice control sensitivity can be adjusted in this menu as well. The Database Type textbox lists the database type currently being used by the Scanmate software. For more information on database types, refer to the Scanmate Installation Guide.
-
Page 14: Operator Preferences
12.2 Operator Preferences The “Operator Preferences” window provides controls to identify Operators and configure their preferences. The Operator Preferences window can be accessed by selecting Preferences → Operator from the Menu Bar. Note: Refer to the DGH 6000 Scanmate-A or the Scanmate Flex User Guide for instructions on configuring A-Scan related Operator Preferences. - Page 15 The Name combo box selects an existing operator from the database to view, edit, or delete their preferences. Selecting operator’s name will display that operator’s preferences on the screen. The Default Operator checkbox selects which operator’s preferences will be automatically loaded when the software is started. The Notes textbox allows the user to associate notes to an operator’s preferences.
-
Page 16: B-Scan Page Preferences
The Average preference turns on the frame-to-frame B-Scan averaging algorithm. For slower processors, averaging can be turned off to improve display performance at the expense of image quality. The Interpolate preference enables or disables the linear interpolation algorithm. For slower processors, interpolation can be turned off to improve display performance at the expense of image quality. -
Page 17: Doctor Preferences
12.4 Doctor Preferences The “Doctor Preferences” window provides controls for the user to identify Doctors and configure their preferences. Doctor Preferences define the default protocol for performing A-Scans and IOL Calculations. The Doctor Preferences window can be accessed by selecting Preferences → Doctor from the Menu Bar. Note: Refer to the DGH 6000 Scanmate-A or the Scanmate Flex User Guide for instructions on configuring A-Scan related Doctor Preferences. -
Page 18: The Patient Data Screen
The Patient Data Screen Upon startup, the Scanmate application will automatically open to the Patient Data Screen in Search Mode. The Patient Data Screen allows the user to Search, Create, Review and Edit patient records. 13.1 Patient Data Screen Controls The Patient Data Screen operates in three distinct modes of operation: “Search and View”, “Edit / Save Data”, and “New Patient.”... -
Page 19: Entering A New Patient
The New button is used to enter new patients in the DGH-Scanmate database. When clicked, the “Last Name”, “First Name”, and “ID#” combo boxes change to plain text boxes and allow the user to enter a new patient. The Search button is used to search for patients in the DGH-Scanmate database. -
Page 20: Searching For A Patient
• K1 and K2 (K1 and K2 values for OS and OD may be entered from the IOL Calculator Screen and are only needed for IOL Calculations) • Desired Refraction (Desired Refraction for OS and OD may be entered from the IOL Calculator Screen and are only needed for IOL Calculations) Select the Save button once all of the desired fields have been entered. -
Page 21: The A-Scan Screen
The A-Scan Screen The A-Scan Screen allows the user to perform and review A-Scan Measurements for the currently selected patient. Refer to the DGH 6000 Scanmate-A or the Scanmate Flex User Guide for instructions on using the A-Scan features of this program. Page 21 of 53 8000-INS-UMENG Rev. -
Page 22: The B-Scan Screen
The B-Scan Screen The B-Scan Screen allows the user to perform and review B-Scan exams for the currently selected patient. Refer to Section 13 for details on how to load or create patient records. The default settings for this page are dependent on the currently selected Operator. The default settings can be changed by selecting Preferences →... -
Page 23: Adjusting Pulse Power
15.2 Adjusting Pulse Power The Pulse Pwr slider adjusts the amount of energy used to pulse the transducer element in the probe. Adjusting the pulse power allows the user to distinguish between tissues with different acoustic densities. Exams are typically performed at the highest Pulse Power unless the image is saturated and better definition between tissue structures is desired. -
Page 24: Adjusting Image Controls
15.6 Adjusting Image Controls The three Gain Controls allow you to adjust the near, middle or far field gain of the displayed image. These sliders control gain in the imaging software, not the probe itself. Intensity Control adjusts overall intensity, or brightness, of the image. Contrast Control adjusts the overall contrast of the image. -
Page 25: Diagnostic A-Mode
15.9 Diagnostic A-Mode Select the A-Mode button to enable the diagnostic A-Scan overlay. Enabling the A-Scan Overlay will superimpose an A-Scan waveform over the B-Scan image or video. Use a left-click to place the vector in the desired position. 15.10 Adding Exam Comments Select the Comments button to enter comments. -
Page 26: Measurement Tools
15.11 Measurement Tools Mark the Measurement Tools check box to enable the use of the Caliper Tool, Angle Tool and Area Tool. Note: Measurement notations made with the Caliper Tool, Angle Tool and Area Tool are only saved on still image records, not on videos. 15.12 Caliper Tool Select the Caliper Tool button to take distance measurements. -
Page 27: Angle Tool
15.13 Angle Tool Select the Angle Tool button to take angle measurements. Left-click hold and drag the mouse across the image to produce the first side of the angle, then left-click hold and drag again to produce the second side. This can also be performed using touch controls. -
Page 28: Zoom
15.16 Zoom Double left-click on the image, or select the Zoom button to magnify the image. Additional double left-clicks on the image will continue magnification. The amount of zoom is displayed in the bottom left corner of the display. Left-click the Normal Zoom button to return the image to normal resolution. -
Page 29: Selecting Probe Orientation
15.17 Selecting Probe Orientation The position map allows the user to easily record the probe orientation of standardized probe positions or general clock positions. Notations are saved with the B-Scan image or video. Cilary Body Equator Anterior Equator Equator Posterior Posterior to the Equator Posterior Pole Optic Nerve... - Page 30 Longitudinal Probe Positions – Longitudinal scans provide a radial image from the posterior pole to the anterior periphery. The probe is positioned on the sclera, perpendicular to the limbus, while the patient is looking toward the area of the eye being examined.
- Page 31 Transverse Probe Positions – Transverse scans provide a lateral image of the globe that traverses several clock hours. The position of the transverse scan is indicated by the center of the clock hours in the scan as well as the portion of the globe being examined (P for Posterior Pole, E for Equator, EA for Anterior to the Equator, etc.).
-
Page 32: Saving B-Scan Images
Macula Scans HMAC – A horizontal macula scan (HMAC) is a horizontal axial scan where the probe has been aligned so that it is pointed directly at the macula. The marker on the tip of the probe should be pointed nasally (3:00 OD or 9:00 OS). The optic nerve shadow will be shifted towards the top of the display. -
Page 33: Reviewing B-Scan Exams
15.20 Reviewing B-Scan Exams Saved B-scan files can be opened by clicking the Open File button. This will open a window that shows all saved images and videos for the current patient. Double-clicking any image or video will open the file in the scan view window. The Push Pin allows the user to pin the scan view window to the left-hand side of the Scanmate application window so that both windows can be... -
Page 34: Saving B-Scan Videos As Avi Files
15.22 Saving B-Scan Videos as AVI Files The Scanmate software can convert saved B-Scan videos to AVI files so that they can be used outside of the Scanmate program. To create an AVI file, first load a B-Scan video from the Scanmate database and select →... -
Page 35: Performing A B-Scan Exam
15.24 Performing a B-Scan Exam The ultrasound probe must be cleaned and disinfected before each biometry procedure. (See Section 21 for Cleaning and Disinfection Instructions.) Note: † Indicates a command that may be executed through B-Scan voice controls. Refer to Section 15.25 for more information. Launch the Scanmate Software Application as described in Section 11. - Page 36 10. Direct the patient to look in the desired direction and gently apply the probe directly to the eye or over the eyelid. For best results, an acoustic coupling gel (such as GenTeal) should be used. 11. Once the desired image has been obtained, to Stop scanning†: - Click the Stop Scan button;...
-
Page 37: Voice Controls
15.25 Voice Controls Some controls can be operated via verbal commands from the user. Voice control can be enabled/disabled through the Preferences → System menu. Voice control can be configured to begin upon pressing the “Enter” key or by a verbal command of “Hey Flex”. -
Page 38: The Iol Calculator Screen
The IOL Calculator Screen The IOL Calculator Screen allows the user to perform and review intraocular lens power calculations for the currently selected patient. Refer to the DGH 6000 Scanmate-A or the Scanmate Flex User Guide for instructions on using the IOL Calculator. Page 38 of 53 8000-INS-UMENG Rev. -
Page 39: Creating Reports
Creating Reports Reports can be created for viewing from the Menu Bar. The DGH Scanmate software can produce IOL Calculator Reports, A-Scan Short Reports, A-Scan Custom Reports and B-Scan Reports. Reports can be printed out, saved as PDF files and added to the patient record database. -
Page 40: Using Reports
17.2 Using Reports All types of reports can be printed, browsed, and saved in the same ways. Clicking the small printer icon in the top left corner will send the report to the printer. The arrows and magnifier icon next to the printer icon will navigate through the report. -
Page 41: Database Management
Database Management Patient data, scan images, measurements, video files, and reports created by the Scanmate application are saved in an DGH-Scanmate database. The database allows patient records to be shared, centralized, or accessed remotely, according to the needs of each biometry department. For example, several operators in a large practice could use several Scanmate Flex, DGH 6000 or DGH 8000 units simultaneously, but all patient records would be stored in a central database. -
Page 42: Importing Legacy Files (.Bs Or .Cini)
19.1 Importing Legacy Files (.bs or .cini) It is possible to import .bs and .cini files from prior versions of the Scanmate-B software. To import a .bs or .cini file, select File → Import → B-Scan File. A browser window will open to select a .bs or .cini file to open. Because these files do not contain all the necessary information to be included in the DGH-Scanmate database, a dialog window will open requesting additional information when importing these file types. -
Page 43: Electromagnetic Compatibility
Electromagnetic Compatibility Like other medical equipment, the DGH 8000 Scanmate-B requires special precautions to ensure electromagnetic compatibility with other electrical medical devices. To ensure electromagnetic compatibility (EMC), the DGH 8000 must be installed and operated according to the EMC information provided in this manual. The DGH 8000 has been designed and tested to comply with EN 60601-1-2 requirements for EMC with other devices. - Page 44 Guidance and Manufacturer’s Declaration: Electromagnetic Immunity The DGH 8000 Scanmate-B is intended for use in the electro-magnetic environment specified below. The customer or the user of the DGH 8000 should ensure that it is used in such an environment. Field strength from fixed transmitters, such as base stations for radio (cellular/cordless) telephones and land mobile radios, armature radio, AM and FM radio broadcast and TV broadcast, cannot be predicted theoretically with accuracy.
-
Page 45: Cleaning And Disinfection
Cleaning and Disinfection WARNING Users of the DGH 8000 Scanmate-B have an obligation and responsibility to provide the highest degree of infection control possible to patients, co-workers and themselves. To avoid cross contamination, follow all infection control policies established for the office, department or hospital as they apply to personnel and equipment. - Page 46 Solutions Country Type Active ingredient FDA 510(k) Cidex® Liquid Gluteraldehyde K934434 Cidex Plus® Liquid Gluteraldehyde K923744 Wear protective gloves when performing the disinfecting procedure. Check the expiration date on the solution that is being used. Use only solutions that are within the expiration date. Mix the disinfection solution compatible with the probe according to label instructions for solution strength.
-
Page 47: Care And Maintenance
Disinfect the probe tip using only the liquid solutions. Using autoclave, gas (EtO), or other non DGH Technology approved methods will damage the probe and void the warranty. Regularly check the front face of the probe for cracks, as this may cause a loss of fluid, which would impair the performance of the probe. -
Page 48: Maintenance Of The Usb Probe
22.2 Maintenance of the USB Probe Periodic testing and maintenance of the USB Ultrasound Probe is NOT required. 22.3 Operating Conditions The DGH 8000 (Scanmate-B) should be operated within the following conditions: • Max operating temperature 40°C (104°F) • Min operating temperature 10 °C (50 °F) •... -
Page 49: Disposal
Warranty DGH Technology, Inc. “DGH” warrants each new DGH 8000 and its accompanying accessories (hereinafter called “Equipment”) to be free from defects in material and workmanship for twelve (12) months from the date of delivery to the original purchaser. -
Page 50: Lifetime / Shelf-Life
However, if you feel there is a problem with the unit or a transducer, please contact the Customer Service Department at the address below. DGH Technology, Inc. can also be contacted via our website at www.dghtechnology.com. When contacting us, please provide the model and serial number for the unit. -
Page 51: Appendix Acomputer System Specifications
APPENDIX A COMPUTER SYSTEM SPECIFICATIONS System Requirements Minimum Recommended Processor: 2.0 GHz 3.0+ GHz Architecture: 32-bit or 64-bit 64-bit Memory: 2 GB RAM 4 GB RAM Hard Drive: HDD or SSD Storage Space: 128 GB 500 GB Display: 1024 x 768 resolution Peripherals: Mouse/Touchpad, Keyboard Ports:... -
Page 52: Appendix Bsummary Of Acoustic Output (12.0 Mhz Probe)
APPENDIX B SUMMARY OF ACOUSTIC OUTPUT (12.0 MHz Probe) Index Mode Scanning Non-scanning Non-scanning Scanning Non-scanning =1 cm² >1 cm² aprt aprt Acoustic working 10.4 10.4 10.4 frequency (MHz) Output power (mW) 0.173 0.173 0.173 Bounded output power 0.173 0.173 0.173 (mW) Attenuated output... -
Page 53: Appendix Cscanmate-B Specifications
APPENDIX C SCANMATE-B SPECIFICATIONS Imaging mode - B Scan with Vector A-mode Functions - Standard USB Port (2.0) connectivity - Multiple freeze method: button on probe, keyboard, or soft key on screen - Zoom with enhanced resolution using 4 times over sampling - Auto Image saves on Freeze Resolution - Electronic, 0.015 mm;...
Need help?
Do you have a question about the Scanmate-B DGH 8000 and is the answer not in the manual?
Questions and answers