Table of Contents
Advertisement
Quick Links
Advertisement
Table of Contents

Summary of Contents for THORNADO TH-WP30A
- Page 1 TH-WP30A TH-WP40AE TH-WB80 TH-CP20V TH-CP30V WATER PUMP Owner’s Manual...
- Page 3 PREFACE Thank you for choosing a water pump of our company. Please keep the owner’s manual for reference. This manual should be considered a permanent part of the water pump and should remain with the water pump if it is resold. The manual instructs the user how to operate the water pump including before operation to get the best results.
-
Page 4: Table Of Contents
CONTENTS CONTENTS 1. SAFETY …………………………………………………………… 3 2. COMPONENT IDENTIFICATION ……………………………… 7 3. CONTROL SYSTEM …………………………………………… 14 4. PRE-OPERATION INSPECTION ……………………………… 17 5. OPERATION …………………………………………………… 22 6. STARTING THE ENGINE ……………………………………… 26 7. STOPPING THE ENGINE ……………………………………… 29 8. MAINTENANCE ……………………………………………… 31 9. -
Page 5: Safety
SAFETY 1. SAFETY Our company's water pump is designed to give safe and reliable service if operated according to instructions. Read and understand the Owner’s Manual before operating the water pump. Failure to do so could result in personal injury or equipment damage. Safety Messages Your safety and the safety of others are very important. - Page 6 SAFETY 1) Safety Instruction Clean water pump and high pressure pump are only designed for pumping clean water. Sewage pump has the apability of transmiting soft solids within the diameter of 25.4mm Chemical pumps is used for transmission of weak acid and base (PH4- 11), high ignition temperature liquid and sea water.
- Page 7 SAFETY the equipment and hurting the persons. Children and pets must be kept away from the area of operation due to a possibility of burns from the hot engine components. The machine is forbidden to be operated in a potentially explosive atmosphere.
- Page 8 SAFETY · 6 ·...
-
Page 9: Component Identification
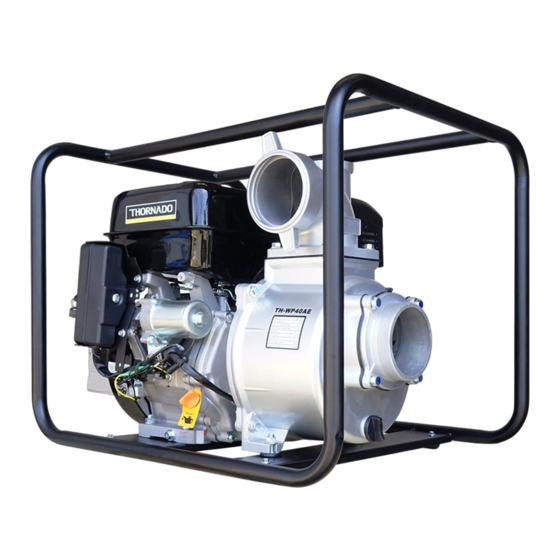
COMPONENT IDENTIFICATION 2. COMPONENT IDENTIFICATION 1" CLEAN WATER PUMP · 7 ·... - Page 10 COMPONENT IDENTIFICATION 1.5" CLEAN WATER PUMP SPARK PLUG DISCHARGE PORT MUFFLER FUEL TANK CAP ENGINE SWITCH FUEL TANK OIL DIPSTICK AIR FILTER PRIMING WATER FILTER CAP SUCTION PORT CHOKE LEVER OIL DRAIN PLUG PUMP DRAIN PLUG FUEL COCK RECOIL STARTER GRIP THROTTLE LEVER FUEL TANK CAP...
- Page 11 COMPONENT IDENTIFICATION 2"/3"/4"/6" CLEAN WATER PUMP DISCHARGE PORT FUEL TANK CAP THROTTLE LEVER CHOKE LEVER FUEL COCK RECOIL STARTER GRIP OIL DIPSTICK ENGINE SWITCH FRAME PRIMING WATER FILTER CAP AIR FILTER MUFFLER SUCTION PORT OIL DRAIN PLUG PUMP DRAIN PLUG ·...
- Page 12 COMPONENT IDENTIFICATION CHEMICAL PUMP FUEL TANK CAP DISCHARGE PORT THROTTLE LEVER CHOKE LEVER FUEL VALVE RECOIL STARTER GRIP ENGINE SWITCH OIL DIPSTICK OIL DRAIN PLUG FRAME PRIMING WATER FILTER CAP AIR FILTER MUFFLER SUCTION PORT PUMP DRAIN PLUG · 10 ·...
- Page 13 COMPONENT IDENTIFICATION HIGH PRESSURE PUMP( The illustrations employ the 2" high pressure pump as the example) PRIMING WATER FRAME FILTER CAP FILTER DISCHARGE FUEL TANK CAP PORT THROTTLE LEVER SUCTION PORT CHOKE LEVER MUFFLER FUEL PUMP VALVE DRAIN PLUG RECOIL STARTER GRIP OIL DIPSTICK ENGINE SWITCH...
- Page 14 COMPONENT IDENTIFICATION SEWAGE PUMP DISCHARGE PORT FUEL TANK CAP THROTTLE LEVER CHOKE LEVER FUEL VALVE RECOIL STARTER GRIP OIL DIPSTICK ENGINE SWITCH OIL DRAIN PLUG FRAME PRIMING WATER FILTER CAP AIR FILTER SUCTION PORT PUMP MUFFLER DRAIN PLUG · 12 ·...
- Page 15 COMPONENT IDENTIFICATION · 13 ·...
-
Page 16: Control System
CONTROL SYSTEM 3. CONTROL SYSTEM Before operating our company's water pump, carefully read and understand the owner’s manual and be familiar with each control function. Know how to operate and how to do in a urgency condition. 1) Fuel Lever Set the fuel lever to the “OPEN”... - Page 17 CONTROL SYSTEM ENGINE SWITCH ENGINE SWITCH CLOSE CLOSE OPEN OPEN 3) Choke Lever The choke lever is used for opening and closing the choke of the carburetor. Set the choke lever to the “CLOSE” position for cold starting. Set the choke lever to the “OPEN” position for normal operation or the Engine's warm starting.
- Page 18 CONTROL SYSTEM 4) Throttle Lever Adjust the throttle lever to change speed of the engine, thereby adjust the discharge water. For a bigger water discharge, set the throttle lever to the HIGH position, for a smaller water discharge, set the throttle lever to the LOW position.
-
Page 19: Pre-Operation Inspection
PRE-OPERATION INSPECTION 4. PRE-OPERATION INSPECTION For your safety and to maximize the service life of your equipment, it is very important to take a few moments before you operate the pump to your servicing dealer correct it, before you operate the pump. Improperly maintaining this pump or failing to correct problems before operation could cause a malfunction in which you could be seriously injured. - Page 20 PRE-OPERATION INSPECTION 2) Check The Suction And Discharge Hoses Check the general condition of the hoses. Be sure the hoses are in serviceable condition before connecting them to the pump. Remember that the suction hose must be of a reinforced construction to prevent hose collapse.
- Page 21 PRE-OPERATION INSPECTION OILING HOLE OIL DIPSTICK OIL LOWER MARK Engine operating with oil at the lower oil mark will cause engine damage. 4 ) Check Air Filter A dirty air filter will restrict air flow to the carburetor, reduce engine performance and thereby reduce water Pump performance.
- Page 22 PRE-OPERATION INSPECTION dirt, clean it, if it is damaged, replace with a new one. If it is an oil bath down. Assembly should be correct, Never run the water pump without the wear will result. 5) Check The Fuel Before each operation, check the engine oil level with the water pump stopped on a level ground.
- Page 23 PRE-OPERATION INSPECTION Refuel in a well-ventilated area. If the engine has run for a while, it has to be cooled before being refueled. Fuel can damage paint and plastic. Be careful not to spill fuel when 6) Fuel Recommendations We recommend unleaded gasoline because it produces fewer engine deposit and spark plug deposit and extends exhaust system's life.
-
Page 24: Operation
OPERATION 5. OPERATION 1) Safe Operating Precautions To safely utilize the full potential of this pump, you need a complete understanding of its operation and a certain amount of practice with its controls. Before operating the pump for the first time, please review the "Safety Instruction"... - Page 25 OPERATION DISCHARGE HEAD TOTAL HEAD SUCTION HEAD 3) Suction Hose Installation Use the commercially available hose and hose connector, and the hose clamp provided with the pump to install the suction, and tighten the SUCTION PORT SEALING WASHER HOSE CONNECTOR HOSE CLAMP RING SUCTON HOSE COUPLING...
- Page 26 OPERATION 1" water pump 25mm 1.5" water pump 40mm 2" water pump 50 mm 3" water pump 80 mm 4" water pump 100 mm 6" water pump 150mm Use a hose clamp to securely fasten the hose connector to the suction in order to prevent air and water leakage.
- Page 27 OPERATION friction and improve pump's output. Tighten the hose clamp securely to prevent the discharge hose from disconnecting under a high pressure. 5) Priming The Pump Before starting the engine, make sure to fill the pump with water: screw off the priming plug and prime the pump fully with clean water. Don't screw off the priming plug during operation of the pump to avoid damaging the equipment and injuring persons.
-
Page 28: Starting The Engine
STARTING THE ENGINE 6. STARTING THE ENGINE 1) Screw the priming plug off and prime the pump with water until the 2) Move the fuel valve lever to the “ON” position. FUEL VALVE LEVER FUEL COCK OPEN 3) To start a cold engine, move the choke lever to the “CLOSED” position. - Page 29 STARTING THE ENGINE 4) Move the throttle lever away from the “SLOW” position about 1/3 of the way toward the “FAST” position. THROTTLE LEVER FAST SLOW THROTTLE LEVER 5) Turn the engine switch to the “ON” position. ENGINE SWITCH ENGINE SWITCH(the “ON”...
- Page 30 STARTING THE ENGINE STARTER GRIP 7) If the choke lever was moved to the CLOSED position to start the engine, gradually move it to the OPEN position as the engine warms up. CHOKE LEVER CHOKE LEVER 8) Setting engine speed After starting the engine, move the throttle lever to the FAST position for self-priming, and check pump output.
-
Page 31: Stopping The Engine
STOPPING THE ENGINE 7. STOPPING THE ENGINE To stop the engine in an emergency, simply turn the engine switch to the OFF position. Under normal conditions, use the following procedure: 1) Move the throttle lever to the SLOW position. THROTTLE LEVER FAST 2) Turn off engine switch: Turn the engine switch to OFF position. - Page 32 STOPPING THE ENGINE 3).Turn fuel valve lever off: Turn the fuel valve lever to OFF position. FUEL COCK FUEL VALVE LEVER CLOSED CLOSE After use, remove the pump drain plug and drain the pump chamber. Remove the filler cap and flush the pump chamber with clean, fresh water.
-
Page 33: Maintenance
MAINTENANCE 8. MAINTENANCE The engine must be properly maintained to ensure its operation be safe, economy and trouble-free, as well as eco-friendly. In order to keep your gasoline engine in good working condition, it must be periodically serviced. The following maintenance schedule and routine inspection procedures must be carefully followed Frequency Thereafter, every... - Page 34 MAINTENANCE should govern. possible. Stop the engine before servicing. Put the engine on a level surface and remove the spark plug cap to prevent the engine from starting. Never run your engine in a poorly ventilated room or other enclosed area, be sure to keep good ventilation in working area.
- Page 35 MAINTENANCE OIL DIPSTICK WASHER OIL DRAIN BOLT UPPER MARK 4. Reinstall the oil dipstick and tighten it. Used engine oil may cause skin cancer if repeatedly left in contact with the skin for prolonged periods. Although this is unlikely unless you handle used oil on a daily basis, it is still advisable to thoroughly wash your hands with soap and water as soon as possible after handling used oil.
- Page 36 MAINTENANCE 4) Air Filter Service engine performance, if you operate the pump in very dusty areas, clean If so, rapid engine wear will result. 1. Wash the element with home detergents and warm water (or non- 2. Soak it in clean engine oil until it is saturated. Squeeze out excess oil. 3.
- Page 37 MAINTENANCE is damaged, replace the spark plug. Correct as necessary by carefully bending the side electrode. The gap should be: 0.70-0.80 mm. SPARK PLUG SOCKET WRENCH SPARK PLUG CAP 4. Check if the spark plug gasket is in good condition. In order to avoid damage to the thread in the cylinder head, screw in the spark plug carefully by hand.
-
Page 38: Storage
STORAGE 9. STORAGE 1) Remove priming plug and drain plug, flush the chamber with clean water, reinstall the priming plug and drain plug. After stopping the wipe it. Higher pressure flushing water can enter into the air filter and in corrosion and damage. So, operation must be performed only after stopping and cooling. -
Page 39: Troubleshooting
TROUBLESHOOTING 10. TROUBLESHOOTING 1) Engine ENGINE WILL CAUSE CORRECTION NOT START Move fuel valve lever to ON Fuel valve OFF. position. Check Control Parts Move choke lever to CLOSED Choke open. position unless engine is warm. Engine switch OFF. Turn engine switch to ON. Out of fuel. - Page 40 TROUBLESHOOTING 2) Water pump NO PUMP OUTPUT CAUSE CORRECTION Check pump chamber Pump not primed. Prime pump. Hose collapsed, cut or Replace hose. punctured. Strainer not completely Sink the strainer and the end of a suc- underwater. tion hose completely underwater. Check suction hose Replace sealing washer if it is missing Air leak at connector.
-
Page 41: Electric Diagram
ELECTRIC DIAGRAM 11. ELECTRIC DIAGRAM · 39 ·... -
Page 42: Specification
SPECIFICATION 12. SPECIFICATION ITEM MODEL TH-WP30A TH-WP40AE TH-WB80 TH-CP20V TH-CP30V Length (mm) Width (mm) Height (mm) Dry Weight (kg) 25.5 Suction Port 75mm(3") 100mm(4") 75mm(3") 50mm(2") 75mm(3") Diameter Discharge Port 75mm(3") 100mm(4") 75mm(3") 50mm(2") 75mm(3") Diameter Suction Head (maximum) (m)
Need help?
Do you have a question about the TH-WP30A and is the answer not in the manual?
Questions and answers