Advertisement
Loco Remote Mini B setup - www.locoremote.co.uk
The Mini B is suitable for 3V to 6V motors only. It can be powered by any type of battery with a suitable
voltage including NiMH, NiCd, Alkaline, Li-ion and Lipo. The absolute maximum battery voltage for the
Mini B is 6V.
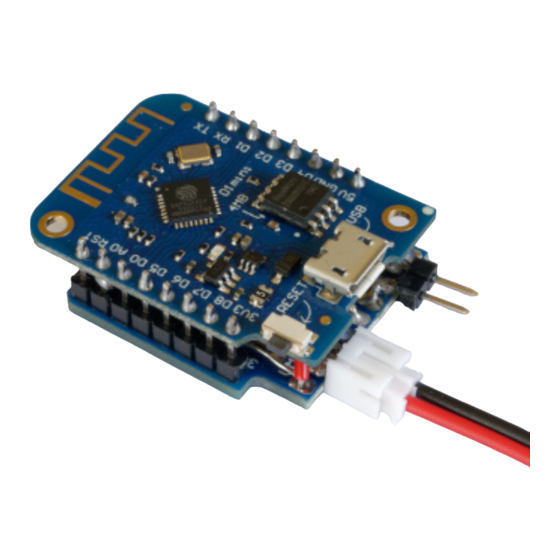
The diagram below shows all the models in the series. To identify how to connect to your loco, hold the Mini B
with all of the connectors pointing towards you with the metal USB connector on the top. The word USB is
written on the board just to its right. The USB connector is used to program the module during manufacture.
Please do not connect anything to it or try to power your module this way. It won't work!
the other supplied cable will connect to your battery. The cables can either be joined directly together, in which
case the Lipo battery must be disconnected when not in use, or a power on/off switch can be inserted between
them. If you choose to use Lipos, any 3.7V (1s) Lipo will work with the Mini B. If you choose one with a
different connector style from the one I supply then you will need to source a mating cable that can be
connected to the cable provided that plugs into the module. DO NOT USE other types of Lipo such as 7.4V (2s)
or 11.1V (3s), as they will destroy it!
and then disposed of appropriately. When trying a brand new Lipo battery for the first time connect it to the
Loco Remote outside your loco and allow it to discharge until the Loco Remote turns off the power to ensure the
battery has no manufacturing defects. It is strongly advised that you remove the Lipo battery from your loco
when not in use and store it in a Lipo safe bag - search eBay for these. If you are using either 3 or 4 x 1.2V
NiMH (AA or AAA size) or 3.7V 18650 Li-ion batteries instead then you will need to get a suitable cable to
connect these. You should also change the Shutdown on low battery setting from On to Off in
www.locoremote.co.uk/v1/settings with these battery types when you first connect to the Wi-Fi interface
of the Loco Remote (see below).
Connecting the battery
Two battery connection cables are included. One will plug
into the white rectangular battery connector on the
module. Make sure the
positive (red) lead
and the negative (black) lead on the right. Connecting
the other way round will destroy both the battery and
Loco Remote module. If you are using a 3.7V (1s) Lipo of
the type I recommend (a 600mAh or 1200mAh Lipo with
a mini charger – search for "Syma X5C battery" on eBay),
The standard way to charge the Lipo battery is to remove it from the loco and use
the mini charger supplied with the batteries. The LED is on while the battery is
charging and goes off when completed. Having a spare charged battery also means
the loco can quickly be up and running again after the initial battery runs down.
Lipo batteries must be treated with care. If the battery terminals are shorted or
connectors damaged then the battery will be destroyed and could catch fire! If the
battery shows any sign of getting hot or physically swelling in size then it must be
immediately disconnected, put in an open safe place, preferably in a Lipo safe bag
Connecting the motor
A DuPont header connection cable is included. This plugs into the motor connector.
Remove the header from the other end if necessary and solder the cable to your
motor lugs. If the loco goes the "wrong" way in forwards/reverse you can swap the
polarity of the cable.
is on the left
Advertisement
Table of Contents

Related Manuals for Loco Remote Mini B

Summary of Contents for Loco Remote Mini B
- Page 1 Loco Remote Mini B setup - www.locoremote.co.uk The Mini B is suitable for 3V to 6V motors only. It can be powered by any type of battery with a suitable voltage including NiMH, NiCd, Alkaline, Li-ion and Lipo. The absolute maximum battery voltage for the Mini B is 6V.
- Page 2 MyLocoSound in their automatic modes to get full variable speed engine noise. The sound cards should get their power from a separate battery as the 3V to 6V battery for the Mini B will probably not be enough. Connect the negatives on both batteries.
Need help?
Do you have a question about the Mini B and is the answer not in the manual?
Questions and answers