Table of Contents

Summary of Contents for SchleppMAXXE 1
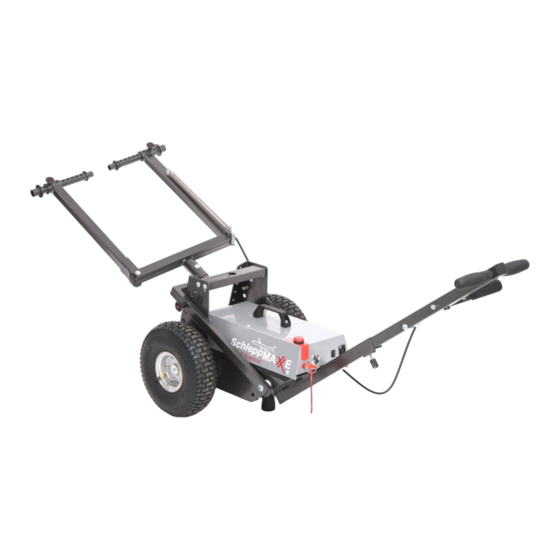
- Page 1 Operating Instructions SchleppMAXXE® Typ 1 & 2 Towflexx GmbH Axel Schickling Wöstendöllen 95-96, 49429 Visbek Tel.: +49 (0)4445 8203 info@towflexx-international.com Fax: +49 (0)4445 1747 www.schleppmaxxe.de Stand: 31.07.2017...
-
Page 2: Table Of Contents
Contents 1. Preface 1.1 Your aircraft tug 1.2 Intended usage 1.3 Improper usage 1.4 Target Group and previous experience 1.5 Used symbols regarding safety instructions 1.6 Safety notes 1.6.1 General safety notes 1.7 Important service note 2. Commissioning 2.1 Installation of universal adapter 2.2 Assembly of handgrip... -
Page 3: Your Aircraft Tug
This operating instruction conveys valuable knowledge about initial commissioning, tugging of SchleppMAXXE ® as well as maintenance. We would like to point out that any inspection and maintenance work must be executed at regular intervals, together with appropriate technical advices and operating materials. -
Page 4: Improper Usage
On the up and lower end even and flat transitions should prevent the aircraft tug from any damages, e.g. caused by heavy touchdown. To achieve full traction, up and down gradients should not exceed 1 per cent. The more higher the gradient, the more lower the traction. -
Page 5: Safety Notes
Mechanical and electro technical basic skills (respective training) o Reading this operating instruction 1.5 Used symbols in safety notes This operating instruction contains safety notes showing possible danger and redial danger. These safety notes and symbols have the following meaning:... -
Page 6: General Safety Notes
You will find specified safety notes regarding the individual operations in the corresponding chapter of this operating instruction. For further safety notes please look at the engine control. 1.7.1 General safety notes Before initial commissioning of the aircraft tug please read this operating instruction implicitly and make it available to other users. -
Page 7: Important Service Note
The user may only reconnect cable with serial connectors. Further changes must be carried out by specialized companies. In case of a failure or an error please refer to COMO SchleppMAXXE ® GbR. For repair of the electrical aircraft tug it is only allowed to use original replacement parts. -
Page 8: Assembly Of Handgrip
Please put the universal adapter to the coupling tube on the SchleppMAXXE ® and back it with bolt and safety splint as can be seen on the following photo. Open the hand lever. After that the Bowden cable and the tension spring are to be mounted and backed by means of a screw. -
Page 9: Adjustment Of Universal Adapter
When placing the battery portable box, you have to pay attention that both lugs of the portable box interlock to the guiding of the chassi. You can check the correct position of the plug connection by view of the side. 2.4 Adjustment of universal adapter ... -
Page 10: Handling Of Schleppmaxxe
A blinking status light displays the running power supply. To switch off the SchleppMAXXE please pull the circuit plug out and put it into the hand grip until next use. In case of under and overvoltage, the intelligent electronics of the drive control switches off autonomously, so that is why you can use your SchleppMAXXE until it switches off autonomously. -
Page 11: Handling In Basic Version
Before connecting your plane nose wheel for the first time you should have carried out all appropriate settings. Open the universal adapter by means of the hand grip and move the SchleppMAXXE® to the plane nose wheel. It is more comfortable to connect without help of the drive. -
Page 12: Steering Of Schleppmaxxe
The SchleppMAXXE ® is steered in curves via simple tilting through a wheel (pushing on the side). Should you want to shunt tighter you can move the SchleppMAXXE ® via hoisting and swiveling simultaneously to the right or the left. -
Page 13: Further Information
To connect SchleppMAXXE ® for recharge please make sure that there is a connection between charger and battery portable box. Therefore, please put the XLR connector into the charging socket on the battery portable box. Then switch on the power plug. -
Page 14: Manufacturer
There are comprehensive accessories in the price list available which should only be mounted or installed by trained personnel. Should an adapter doesn’t fit, please refer to your distributor or manufacturer. 4.4Final Disposal If you intend to take SchleppMAXXE® out of operation, please regard the following information for disposal: Stand: 31.07.2017... -
Page 15: Standards
Notice: The engine control is an electrical device which is subject to EU Directive 2002/96/EC and it is marked with an information sign accordingly. Notice: As the SchleppMAXXE ® entails many different materials (power units, cable, control system, batteries etc.) please dispose it environmentally by waste separation. - Page 16 6. Notes _______________________________ _______________________________ _______________________________ _______________________________ _______________________________ _______________________________ _______________________________ _______________________________ _______________________________ _______________________________ _______________________________ _______________________________ _______________________________ _______________________________ _______________________________ _______________________________ _______________________________ _______________________________ _______________________________ _______________________________ _______________________________ _______________________________ Stand: 31.07.2017...
Need help?
Do you have a question about the 1 and is the answer not in the manual?
Questions and answers