Table of Contents
Advertisement
Quick Links
Advertisement
Table of Contents

Summary of Contents for Buvan Majestic ComfyGo 601-7001
- Page 1 601|7001 User Manual / Warranty...
-
Page 2: Table Of Contents
Table of Contents Preface Product Performance Safety Instructions Usage and Operation Battery and Charger System Diagnostics Controller Maintenance Areas Tech Support Warranty Detail video explanation for Usage and Operations and Remote Pairing please visit our Youtube Channel. Detail information on page 9th. For all your spare parts need, please visit www.ComfyGoMobility.com Don't forget the register your product, detail information on page... -
Page 3: Preface
Preface - This manual contains operations, assembly methods, and simple faults solutions. The manual applies to our model: 601|7001 - This manual contains both wheelchair maintenance tips and trouble- shooting methods so please store it where you can access as re- quired. -
Page 4: Product Performance
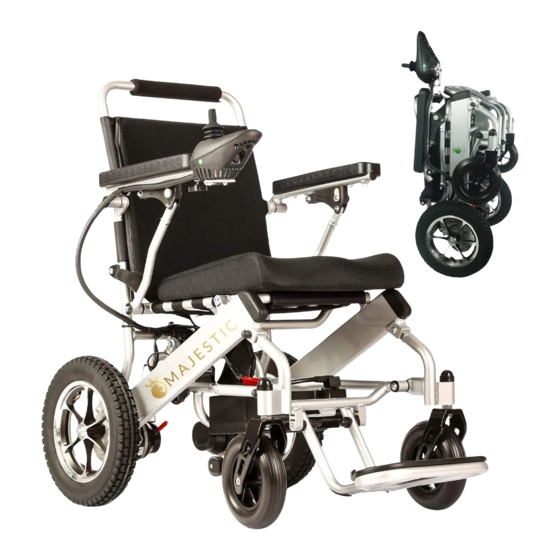
1. Product Performance - This series of electric wheelchairs are powered by Li-ion batteries and use DC motors. Users can control direction and adjust speed by using the joystick controls located on the arm. This wheelchair can be used at low speeds, good road conditions and will handle low slope. Performance Parameters and Technical Specs, 601|7001 Overall size 9800x600x950mm... - Page 5 1. Product Performance Application Range This electric wheelchair is engineered specifically to serve disabled or elderly people weighing less than 100kg (220 lbs.), intended for use for operation at walking speed, and is suitable for indoor use only. Please do not use this unit on motorways.
-
Page 6: Safety Instructions
2. Safety Instructions 2.1 Main Security Features - Classified based on the type of protection: Against electric shock, In- ternal power. - Classified based on the type of protection: Against electric shock, Type B application. - Classified based on the degree of inlet liquid protection: IPX - Classified based on the safe of use in a flammable anesthetic mix- ture with air or gas mixed with oxygen or nitrous oxide flammable an- esthetic gases occurs: Non-AP/APG type. - Page 7 2. Safety Instructions Avoid Riding in These Conditions Unless Accompanies by a Caretaker - Riding in inclement weather, such as rainy day, heavy fog, strong wind, snow, etc. - If your wheelchair gets wet, this may impact electronic functions so please wipe all water immediately.
- Page 8 2. Safety Instructions Precautions for Caregivers - Caregivers should confirm that the users’ feet are placed on the foot- rests’ proper position and ensure clothes do not attach to the wheels. - Caregivers should push the wheelchair to move forward to keep safe on steep slope or long slope.
- Page 9 2. Safety Instructions 2.5 Electromagnetic Compatibility - The wheelchair should be kept away from strong magnetic fields and large inductive electrical equipment, such as radio or TV stations, un- derground radio station or cell phone transmitting radio stations. If there are sources of electromagnetic interference nearby, please stay as far as possible from those sources to avoid electromagnetic inter- ference as your electric wheelchair should avoid electromagnetic in- terference.
-
Page 10: Usage And Operation
3. Usage and Operation Please visit YouTube for detailed Usage and Operations explanation. Simply search "ComfyGo Mobility Lightweight Foldable Electric Wheelchair 17.5" Wide (Model # 601|7001)" on YouTube or scan the QR code with your smartphone's camera. Please visit YouTube for a detailed Remote Control Pairing explanation. - Page 11 3. Usage and Operation 3.1 Wheelchair Adjustments Unfolding Your Wheelchair Holds the backrest with one hand and use your other hand to hold the seat and unfold the chair (Picture 1). Picture 1 Fully unfold the wheelchair, and then fasten the lock located under the backrest (Picture 2).
- Page 12 3. Usage and Operation Installing the Controller Insert the controller into the armrest tube. Keep the controller in hori- zontal position (Picture 5). Then lock the screw (Picture 6). Picture 5 Picture 6 Dismantle the battery by first disconnecting the battery plug and the controller plug (Picture 7), and then loosening the screw on the bat- tery case (Picture 8).
- Page 13 3. Usage and Operation Footplate The footplate can be pulled up or down. Install and Dismantle the Anti-tipper Press the button to install/dismantle the anti-tipper (Picture 10-11). Picture 10 Picture 11 Flipping-up Your Armrest Using one hand, press the armrest button, using the other hand, flip up your armrest (Picture 12).
- Page 14 3. Usage and Operation Switching Between Manual Mode and Electric Mode Manual mode: Turn off the power and brake the wheelchair first, then pull the red clutch out of the groove and spin it 30° (Picture 14 - 15). Picture 14 Picture 15 Electric mode: Spin the red clutch and put it back into its groove, lightly push the wheelchair until you hear a click sound (Picture 16).
-
Page 15: Battery And Charger
4. Battery and Charger 4.1 Charger Requirements The charger should only be used for charging the batteries. Do not use your wheelchair while it is charging. Charger Technical Data Input voltage: AC220V (110V) ±10% Output voltage: 24V/DC Output current: 1.5~5A Ingress protection level: IPX1 Meets requirement: GB 4706.1-2005 and GB 4706.18-2005... - Page 16 4. Battery and Charger - It’s normal for the fan to make a sound during the charging process. This is to cool the charger and does not pose a concern. - Prevent any liquid from seeping into the charger during the charging process.
- Page 17 4. Battery and Charger 4.3 Battery Use and Maintenance - Incorrect insertion of the battery may cause danger of explosion. Only use batteries that are provided with this unit. Contact your seller if you need replacement batteries. - While inserting the battery, ensure that the battery poles are placed correctly.
-
Page 18: System Diagnostics
5. System Diagnostics The LED indicators signal various technical malfunctions which may impact the following parts: the motor, brakes, battery, wire connec- tions. Use the table below to troubleshoot the particular technical issue. Technical issues can usually be detected without other service tools but do not hesitate to contact us if still needed: For Audio Signal Indicatin please check the table. - Page 19 5. System Diagnostics Description of LED Interpretation Issue/Solution light All LED lights are off, there is no The power has been turned off, Power is not connected sound wheelchair is in standby or sleep There may be a short fuse or mode burned out All LED lights are lit...
-
Page 20: Controller
6. Controller 6.1 Controller Panel Battery Power Gauge Power On/Off Button Horn Button Speedometer Speed Deceleration Speed Acceleration Controller 6.2 Controller Use Power Switch To turn on the battery power gauge lights from left to right, press the button. To turn them off, press again. In an emergency, you can directly turn power off by also pressing the power button. - Page 21 6. Controller Speed is divided into five sections, in the following ranges: 20%, 40%, 60%, 80%, 100% of the max speed. First gear: 20% of max speed. Fifth gear of speed: 100% of max speed. Horn Button Press the horn button to use the horn. Battery Power Gauge Battery gauge will function when power is on.
- Page 22 6. Controller 6.3 Remote Installation Detail video explanation for Remote Pairing please visit our Youtube Channel. Detail information on page 9th. Controller Power On/Off Button Horn Button Speed Acceleration Speed Deceleration...
- Page 23 6. Controller 1. Press the boot key to open the joystick (Picture 17). 2. Get the joystick speed to the lowest level (Picture 18). 3. Open the remote control (Picture 19). 4. Press and hold the deceleration button on the joystick until you hear "beep"...
-
Page 24: Maintenance Areas
7. Maintenance Areas 7.1 Maintaining Your Wheelchair Maintenance of wheelchair includes cleaning your wheelchair, check- ing the wheel and battery, and charging the batteries. For further de- tails on maintenance, please contact your dealer. We suggest that you have your wheelchair checked every six months and have an annual service scheduled through your dealer. - Page 25 7. Maintenance Areas 7.5 Wheelchair Malfunction Signals When malfunctions happen during the operation of this wheelchair, please turn off power before checking the unit. Symptom: Completely loses power, and all the LED lights on the con- troller panel are off. Instructions: Step 1: Check if the controller plug is loose.
-
Page 26: Tech Support
8. Tech Support Please visit https://www.comfygomobility.com/product-registration/ and register your product now. When you register your ComfyGo Electric Wheelchair, you ensure that you may be eligible for an extended warranty service. You will also receive product updates and important news from Comfy Go Mobilities. - Page 27 9.Warranty Policy - Our goal is to ensure you are delighted with your purchase. - According to our warranty agreement, All new products have a limit- ed warranty. All batteries have a six month warranty. Spare parts have a one year warranty. The limited warranty does not include: labor or device failure due to owner misuse or negligence, non-durable com- ponents and components subject to normal wear and need replace- ment from time to time (for example rubber materials, accessories,...
-
Page 28: Www.comfygomobility.com
get your freedom www.ComfyGoMobility.com...
Need help?
Do you have a question about the ComfyGo 601-7001 and is the answer not in the manual?
Questions and answers