Table of Contents
Advertisement
Quick Links
Advertisement
Table of Contents
Troubleshooting

Summary of Contents for Infinite Breeze CORDOVA HB54BN-LK
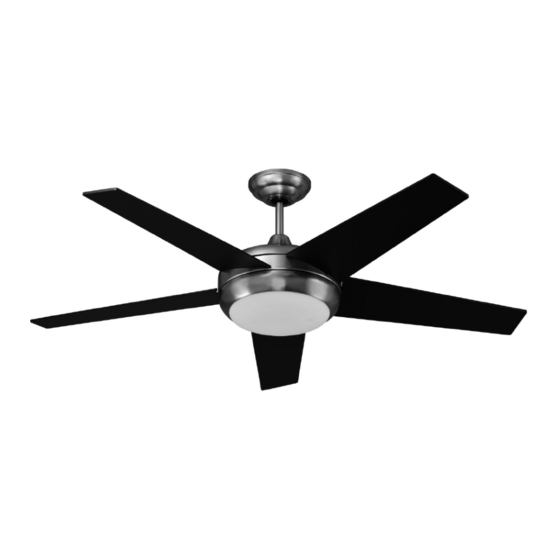
- Page 1 INSTALLATION OPERATION MAINTENANCE WARRANTY INFORMATION ® INFINITE BREEZE CORDOVA / FIONA DIRECT CURRENT CEILING FAN CORDOVA MODEL # HB54BN-LK FIONA MODEL # HB54WH-LK CAUTION READ INSTRUCTIONS CAREFULLY FOR SAFE INSTALLATION AND FAN OPERATION. HB54 – V6.0...
-
Page 2: Congratulations On Your Purchase
Date Purchased: Where Purchased: This Infinite Breeze ceiling fan runs on DC (Direct Current) power which gives it the benefit of being super energy efficient, while still maintaining high volume air-movement and silent operation. Energy Savings: The DC motor is the latest technology in fan design. Its highly efficient motor saves up to 65% more energy than ceiling fans with traditional AC motors. -
Page 3: Before Installation
Note: If you are installing more than one fan, keep the fan blades in sets as they were in shipping. If any parts are missing or damaged, contact Infinite Breeze Parts Department at 1-844-245-3267 Motor housing (1pc) -
Page 4: Preparing The Site
Standard Mounting (Figure 2) hangs from the ceiling on a downrod (included), for ceilings 8 feet or higher. For ceilings higher than 8 feet, you can purchase an extension downrod. All Infinite Breeze fans use sturdy 3/4” diameter pipe to assure stability and wobble-free performance. - Page 5 See figure 5 below for an adequate existing fan site. If your existing fan site is suitable, go to the Installing the Ceiling Plate section and begin installing your new Infinite Breeze fan. Figure 5 – Adequate exiting fan site...
- Page 6 Preparing a New Fan Site To prepare the fan site follow four steps: • Cutting the Ceiling Hole • Installing the Support Brace (if necessary) • Installing the Outlet Box • Preparing the Wiring Cutting the Ceiling Hole: Locate the site for the hole directly below the joist or support brace that will hold the outlet box and fan. Cut a 4”...
-
Page 7: Installing The Ceiling Plate
Preparing the Wiring: CAUTION: All wiring must be in accordance with national and local electrical codes and ANSI / NFPA 70. If you are unfamiliar with wiring, you should use a qualified electrician. Make sure the circuit breakers to the fan supply line leads and associated wall switch location are turned off. If you cannot lock the circuit breakers in the off position, securely fasten a prominent warning device, such as a tag, to the service panel. -
Page 8: Assembling The Fan
Place a flat washer on each of the two 3” screws and pass the screws through the slotted holes int eh ceiling plate as show in Figure 10. Figure 10 – Installing the Ceiling Plate Assembling the Fan Assembling the fan for a standard or angled ceiling Insert the downrod through the canopy as shown in Figure 11. -
Page 9: Installing The Blades
Installing the Blades: Insert the fan blades into the slot and secure using 3 blade screws and washers provided as shown in Figure 12. Figure 12 – Installing the Blades Hanging the Fan: Raise the fan and place the ball joint into the mounting bracket slot. Make sure that the guide pin of the bracket is fitted into the corresponding slot of the ball joint. - Page 10 Figure 14 – Remote Control Wiring • Connect the black wire to the black wire . • Connect the white wire to the white wire. • Connect the green wire to the green wire. Green Green White White Black Black Installing the Canopy: Tuck all wires and the antenna into the canopy.
-
Page 11: Installing The Light Fixture
Installing the Light Fixture: This Infinite Breeze DC Ceiling Fan is designed to be used with the attached Light Fixture, using two 60-Watt Bulbs (Included) and is not removable. Warning: Use only the supplied light fixture for this fan model. - Page 12 Using your Ceiling Fan with Remote Control Note: The pairing of Transmitter and Receiver is not required if only one Ceiling fan is installed. When more than two ceiling fans are installed near each other, please refer to the instruction above. Pairing Transmitter and Receiver –...
- Page 13 Remote Control Buttons ○ 1 FAN SPEED CONTROL BUTTON: Press the button to turn on the fan and control the ceiling fan speed from low to high. ○ I Button is for the lowest speed ○ VI Button is for the fastest speed. NOTE: When you turn on the fan the first time or switch the main power to the controller, you will need to Start the fan on high speed first and then choose lower speeds.
-
Page 14: Troubleshooting
Troubleshooting Troubleshooting the Remote & Receiver Pairing Should the remote and receiver lose control after installation or during use, the pairing of the remote and the receiver must be repaired. Below are the operating symptoms and method to repair the pairing of the DC ceiling fan remote and receiver. Issues •... - Page 15 Balancing / Wobbling Trouble Shooting Please note that all ceiling fans are not the same, even in the same model. Some may move more or less than others. Movement of a couple of centimetres is quite acceptable and does not suggest the fan will fall down. Even though all blades are weighted and grouped by weight, it is impossible to eliminate wobble altogether.
-
Page 16: Operating Your Ceiling Fan
Operating your Ceiling Fan Turn on electrical power to the fan. The fan remote controls power to the fan and the light and the wall switch controls power to the fan. Ceiling Fans work best by blowing air downward (counter clockwise blade rotation) in warm weather to cool the room with a direct breeze. -
Page 17: Normal Wear & Tear
Normal Wear & Tear Threaded components may work themselves slightly loose or blade brackets even bend slightly due to vigorous cleaning or bumping, which may result in extra wobble and noise. Normal wear and tear is not covered under this warranty, but a little care and maintenance can reduce or prevent this problem. -
Page 18: Technical Information
• Fan wall controller makes slight buzz and gets warm especially on lower setting • These occurrences are not covered by the manufacturer’s warranty. Technical Information Infinite Breeze DC FAN Rated Voltage Rated power (motor) Battery for remote Model Numbers... -
Page 19: Warranty Conditions
Warranty Conditions This product is guaranteed against electrical defects in material or manufacturing workmanship for faults when under normal domestic/residential conditions for a certain period of time from the date of purchase. This warranty covers parts and labor costs for the motor subject to the following conditions: The correct controller being fitted to the fan. - Page 20 Prior to requesting service, please consult the Trouble-shooting checklist that is printed in the manual • All electric motors, including fans, make some noise and may feel hot to touch – this is not a fault. • Some fans wobble more than others – even the same model. •...
- Page 21 Infinite Breeze cannot be held responsible for any repair other than those carried out by it or one of its Authorized Service Agents. Please keep this warranty information in a safe place. This information must be produced in the event of service being required.
Need help?
Do you have a question about the CORDOVA HB54BN-LK and is the answer not in the manual?
Questions and answers