
Related Manuals for LIVINOX LBO-LINOX 9EM-87SS

Summary of Contents for LIVINOX LBO-LINOX 9EM-87SS
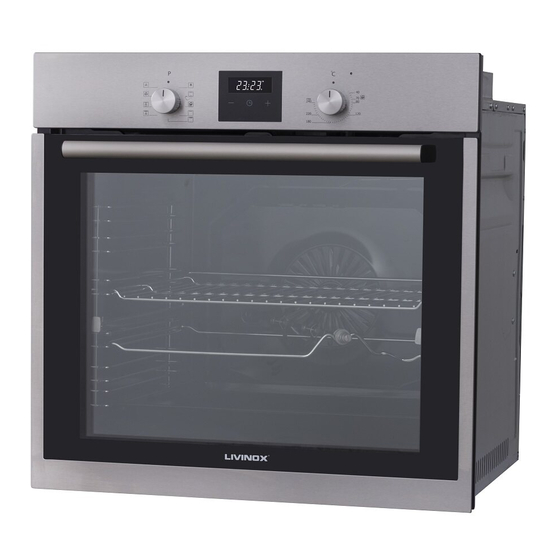
- Page 1 BUILT-IN ELECTRIC OVEN 60cm LBO-LINOX 9EM-87SS LBO-LINOX 9ED-87SS LBO-LINOX 6XEM-87SS LBO-LINOX 6EM-75SS INSTRUCTION MANUAL...
- Page 2 Dear Customer, Thank you for relying on this product. We aim to allow you to optimally and efficiently use this environment-friendly product produced in our modern facilities under precise conditions with respect to sense of quality in total. We advise you to read these operating manual thoroughly before using the oven and keep it permanently so that the features of the built-in oven you have purchased will stay the same as the first day for a long time.
-
Page 3: Table Of Contents
CONTENTS Important Warnings ……………………………………….. Introducing The Appliance ……………………………….. Technical Specifications …………………………………. Installation Of Appliance …………………………………. Important Warnings For Installation .……………………. Oven Installation And Mounting …...……………………. Control Panel ……………………………………………… 14 Program Types ……………………………………………. 16 Cooking Recommendations …………………………….. 17 Cooking Table ……………………………………………. Using The Oven ………………………………………….. -
Page 4: Important Warnings
IMPORTANT WARNINGS 1. WARNING: To avoid electric shock, ensure that the appliance circuit is open before changing the lamp. 2. WARNING: All supply circuit connections must be disconnected before accessing terminals. 3. WARNING: The accessible parts may be hot during use of grid. - Page 5 13. Hard and abrasive cleaners or hard metal scrapers should not be used to clean the oven glass door, as these can scratch the surface and cause breaking. 14. Ensure that door is fully closed after food is placed. 15. Children under 8 years of age should be kept away, if they cannot be monitored continuously.
-
Page 6: Introducing The Appliance
INTRODUCING THE APPLIANCE 1.Control Panel 4.In Tray Wire Grill 2.Deep Tray* 5.Standard Tray 3.Roast Chicken Skewer* 6.Oven door 7. Lamp 8. In Tray Wire Grill 9. Standard Tray... -
Page 7: Technical Specifications
TECHNICAL SPECIFICATIONS SPECIFICATIONS 60 cm Built-In Oven (LINOX 6EM-75SS) Lamp Power 15-25W Thermostat 40-240/Max °C Lower Heater 1200W Upper Heater 1000W Turbo Heater 1800W Grill Heater Small grill 1000W Big grill 2000W Supply Voltage 220V-240V 50/60 Hz. SPECIFICATIONS 60 cm Built-In Oven (LINOX 6XEM, 9EM &... -
Page 8: Important Warnings For Installation
WARNING: Check for any damage on the product before installing it. Do not have product installed if it's damaged. Damaged products pose danger for your safety. Important Warnings for Installation: Cooling fan shall take extra steam out and prevent outer surfaces of appliance from overheating during operation of oven. -
Page 9: Oven Installation And Mounting
60 cm Built-In Oven Installation and Mounting Place of use for product must be located before starting installation. Product mustn't be installed in places which are under the effect of strong air flow. Carry the product with minimum two people. Do not drag the product so that floor isn't damaged. - Page 10 Supply cord mustn't be under the oven, squeeze in between oven and furniture or bend. Fix the oven to the furniture by using the screws provided with the product. Screws must be mounted as shown in Figure 5 by passing them through plastics attached to frame of the product.
- Page 11 Figure 3...
- Page 12 Figure 4...
- Page 13 Figure 5 IMPORTANT WARNINGS Electrical Connection and Safety This oven must be installed and connected to its place correctly according to manufacturer instructions and by an authorized service. Appliance must be installed in an oven enclosure providing high ventilation. Electrical connections of the appliance must be made only via sockets having earth system furnished in compliance with rules.
-
Page 14: Control Panel
Your oven has been manufactured as 220-240 V 50/60 Hz. AC power supply compliant and requires a 16 Amp fuse. If your power network is different that these indicated values, refer to an electrician or your authorized service. When you need to replace the electrical fuse, please ensure that electrical connection is made as follows: •... - Page 15 You can make necessary adjustments by turning right or left when button is popped enough. Figure 7* Thermostat Button: Helps cooking temperature of the food to be cooked in the oven. You can set the desired temperature by turning the button after placing the food into the oven.
-
Page 16: Program Types
PROGRAM TYPES Heating program types your appliance important explanations of them are provided below for you can cook different foods appealing to your taste. Lower and Upper Heating Elements Lower Heating Element and Fan Turbo Heater and Fan Lower-Upper Heating Element Grill and Roast Chicken and Fan Upper Heating Element and Fan... -
Page 17: Cooking Recommendations
Turbo heater and fan: Suitable for baking and roasting. Keep heat setting lower than "Lower and Upper Heater" program since heat is conveyed immediately via air flow. Grill and fan: Suitable for cooking meat type foods. Do not forget to place a cooking tray in a lower rack inside the oven and a little water in it while grilling. -
Page 18: Cooking Table
COOKING TABLE LBO-LINOX 6EM-75SS Cooking Cooking Cooking Cooking Food Time Function Temperature (°C) Rack (min.) Cake Static / Static+Fan 170-180 35-45 Small Cake Static / Turbo+Fan 170-180 25-30 Static / Static+Fan 180-200 35-45 Pastry Static 180-190 20-25 Cookie Static 170-180 20-25 Apple Pie Static / Turbo+Fan... - Page 19 COOKING TABLE LBO-LINOX 6XEM-87SS / LBO-LINOX 9EM-87SS / LBO-LINOX 9ED-87SS Cooking Cooking Cooking Cooking Food Time Function Temperature (°C) Rack (min.) Cake Static / Static+Fan 170-180 30-35 Small Cake Static / Turbo+Fan 170-180 25-30 Static / Static+Fan 180-200 30-35 Pastry...
-
Page 20: Using The Oven
USING THE OVEN Initial Use of Oven Here are the things you must do at first use of your oven after making its necessary connections as per instructions: 1. Remove labels or accessories attached inside the oven. If any, take out the protective folio on front side of the appliance. 2. -
Page 21: Replacing Oven Lamp
REPLACING OVEN LAMP WARNING: To avoid electric shock, ensure that the appliance circuit is open before changing the lamp. (having circuit open means power is off) First disconnect the power of appliance and ensure that appliance is cold. Remove the glass protection by turning as indicated in the figure on the left side. -
Page 22: Cleaning And Mounting Oven Door
CLEANING AND MOUNTING OVEN DOOR Figure 16 Figure 17 Figure 16.1 Figure 16.2 Figure 17.1 Figure 17.2 Open the door fully Set the hinge lock Later, close the For easier removal by pulling the oven to the widest angle opened oven door of oven door, when door toward as in Figure 16.2. -
Page 23: Maintenance And Cleaning
MAINTENANCE AND CLEANING 1. Remove the power plug from electrical socket. 2. Do not clean inner parts, panel, trays and other parts of the product with hard tools such as bristle brush, wire wool or knife. Do not use abrasive, scratching materials or detergent. 3. -
Page 24: Accessories
ACCESSORIES (Optional) Deep Tray * Used for pastry, big roasts, watery foods. It can also be used as oil collecting container if you roast directly on grill with cake, frozen foods and meat dishes. Tray Used for pastry (cookie, biscuit etc.), frozen foods. -
Page 25: Troubleshooting
TROUBLESHOOTING You may solve the problems you may encounter with your product by checking the following points before calling the technical service. Check Points In case you experience a problem about the oven, first check the table below and try out the suggestions. Problem Possible Cause What to Do... - Page 26 Problem Possible Cause What to Do Water dripping Water or steam may generate Let the oven cool down and under certain conditions then wipe dry with a cloth. Steam coming out depending on the food being from a crack on oven cooked.
-
Page 27: Handling Rules
HANDLING RULES 1. Do not use the door and/or handle to carry or move the appliance. 2. Carry out the movement and transportation in the original packaging. 3. Pay maximum attention appliance while loading/unloading and handling. 4. Make sure that the packaging is securely closed during handling and transportation. -
Page 28: Environmentally-Friendly Disposal
Do not dispose of the packaging materials together with the domestic or other wastes. Take them to the packaging material collection points designated by the local authorities. DISTRIBUTED BY: LIVINOX MALAYSIA SDN. BHD. Block B-1-29, Dataran Cascades No. 13A, Jalan PJU5, Kota Damansara 47810 Petaling Jaya, Selangor...
Need help?
Do you have a question about the LBO-LINOX 9EM-87SS and is the answer not in the manual?
Questions and answers
How to unlock timer