Table of Contents
Advertisement
Quick Links
Advertisement
Table of Contents

Summary of Contents for BlueNova CPS 5000-King 5.2k
- Page 1 Installation Manual CPS 5000-King 5.2k...
-
Page 2: Table Of Contents
Table of Contents A. INTRODUCTION 1. GENERAL INFORMATION 2. DOCUMENT SCOPE 3. TERMINOLOGY B. SAFETY FIRST 1. GENERAL SAFETY PRECAUTIONS 2. OPERATIONAL GUIDELINES & GOOD PRACTICE C. STRUCTURAL INFORMATION 1. LIST OF COMPONENTS 2. PRODUCT LAYOUT D. INSTALLATION 1. PRE-INSTALLATION 1.1 Product Applications 1.2 Requirements &... -
Page 3: Introduction
Uninterruptable power supply B. Safety First 1. GENERAL SAFETY PRECAUTIONS Product installation should be performed by a qualified electrical technician or authorised BlueNova® representative only, in strict accordance with the relevant instructions contained within this document. The following precautions should be taken:... -
Page 4: Operational Guidelines & Good Practice
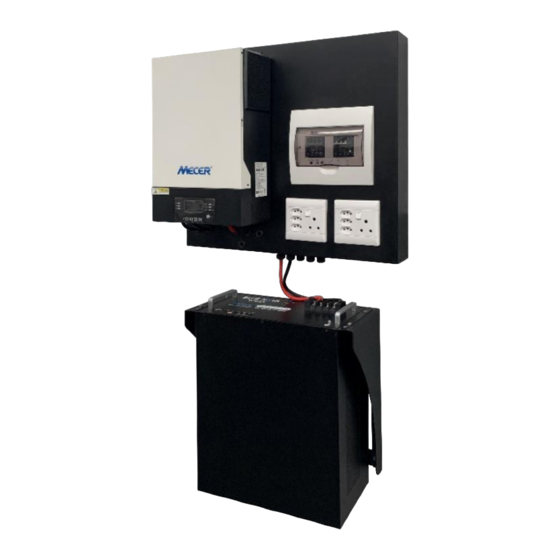
For health & safety reasons, the following guidelines should be adhered to: Always wear the necessary protective gear during installation and/or maintenance. C. Structural Information 1. LIST OF COMPONENTS The CPS 5000-King 5.2k wall-mountable unit is shipped with the following pre-assembled subcomponents included: Component Supplier Batteries: BN52V-100-5.2k... -
Page 5: Product Layout
1.3 Wiring Diagram The simplified wiring diagram below illustrates how the CPS 5000-5.2k’s components have been connected to each other. Note that the solar panel array connection has been illustrated even though solar panels are not supplied by BlueNova. -
Page 6: Standard Installation (Ups Application)
2. STANDARD INSTALLATION (UPS APPLICATION) The following procedure describes how to correctly install your CPS 5000-5.2k: STEP 1 Remove the pre-assembled main unit from the packaging. Also remove the 2 x 10mm rawl bolts included. STEP 2 Drill 2 x horizontally level holes spaced 68.5cm apart into a sturdy concrete or brick wall. -
Page 7: Adding Solar (Pv Application)
STEP 5 Check to ensure that all subcomponents on the main unit are secure, then tilt the whole unit upright. With one person on each side of the unit, lift it and hook it over the installed rawl bolts in the wall. Note: Each bolt head should fit into the respective keyhole cut-out at the top of the unit chassis. -
Page 8: Battery Display Panel
Reference the integrated battery display. If the batteries are not charged, repeat steps 1 to 3 above. Should the system not start up at this point, please contact BlueNova technical support. F. Emergency & First Aid 1.
Need help?
Do you have a question about the CPS 5000-King 5.2k and is the answer not in the manual?
Questions and answers