Table of Contents
Advertisement
Dear KetoCoach™Owner aka Awesome Person
You did it! You're making an effort to improve your health through measuring ketones.
You're awesome. And we're honored to be along for the journey.
First of all, thank you for choosing the KetoCoach™ Blood Ketone Monitoring System
to help you accurately monitor your blood ketone level. Your new KetoCoach™
Blood Ketone Monitoring System is an autocoding system that does not require you
to manually select the correct calibration (commonly known as "coding the meter").
Pretty cool! All of the information you need to use and maintain the KetoCoach™
Blood Ketone Monitoring System is included in this manual. Before you begin using
your new KetoCoach™ Blood Ketone Monitoring System, please read all of the
instructions provided in this User's Manual, then follow the
instructions in test strips package insert.
For questions or support, please visit our website at www.ketocoachx.com or call
1-800-587-5496. We're here to help you have a great experience with our product.
1
Advertisement
Table of Contents

Summary of Contents for KetoCoach S11006
- Page 1 Blood Ketone Monitoring System is an autocoding system that does not require you to manually select the correct calibration (commonly known as "coding the meter"). Pretty cool! All of the information you need to use and maintain the KetoCoach™ Blood Ketone Monitoring System is included in this manual. Before you begin using your new KetoCoach™...
- Page 2 It is not to be used for diagnosis or screening of diabetes, or for neonatal use. The KetoCoach™ Blood Ketone Monitoring System is comprised of the KetoCoach™ Blood Ketone Meter and KetoCoach™ Blood Ketone Test Strip and KetoCoach™ Ketone Control Solution.
- Page 3 Important Safety Instructions • The meter and lancing device are for single patient use. Do not share them with anyone including other family members. Do not use on multiple patients. • All parts of the kit are considered biohazardous and can potentially transmit infectious diseases, even after you have performed cleaning and disinfection.
- Page 4 3. Do not use the system at altitudes above 10,335 feet (3,150meters). 4. Do not use when Hematocrit is outside the acceptable hematocrit range for testing of 20% to 60%. 5. Severe dehydration (excessive water loss) may cause inaccurate results. If you believe you are suffering from severe dehydration, consult your healthcare professional immediately.
-
Page 5: Table Of Contents
The KetoCoach™ Meter Display Screen ........10... - Page 6 Understanding Your Test Results . . . . . . . . . . . . . . . . . . . . . . . . . . . . . . . . . . . . . . . . 38 Understanding Your Blood Ketone Test Results .
-
Page 7: Understanding Your Ketocoach™ Blood Ketone Monitoring System
(vial or foil-wrapped) Note: • Contents may change without notice. • Lancets and Lancing Device are optional components. • KetoCoach™ Blood Ketone Test Strip, KetoCoach™ Ketone Control Solution are necessary but sold separately. Please contact us at www.ketocoachx.com for purchasing information. -
Page 8: The Ketocoach™ Meter
The KetoCoach™ Meter Test Strip Port This is where you insert the test strip and the meter will turn on automatically. Meter Display Show your test results, memory values, average, and other messages. Enter ( ) and ▲▼buttons Press and hold ( ) for 2 seconds to turn the meter on or off, or press ( ) to go into setup mode when not testing. - Page 9 Ejection Switch Push and eject a used test strip. Meter will turn off automatically when the test strip is ejected. Battery Compartment Holds two CR 2032 3V Lithium coin cell batteries. The USB is not active in this meter.
-
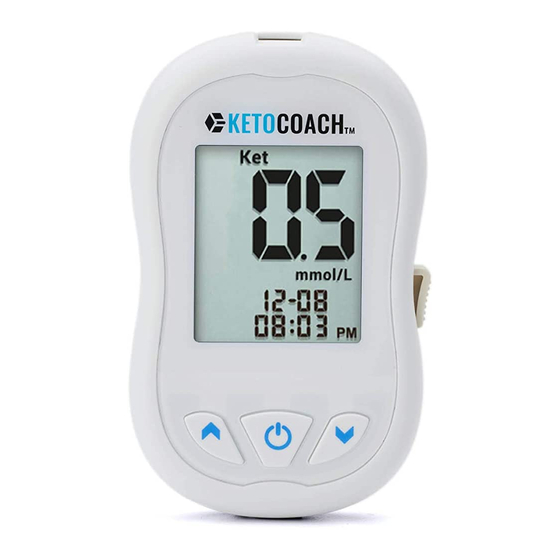
Page 10: The Ketocoach™ Meter Display Screen
The KetoCoach™ Meter Display Screen BEEPER ALARM/ CLOCK MEMORY TEMPERATURE MAIN DISPLAY AREA CONTROL SOLUTION MODE (CTRL) BLOOD DROP UNIT TEST STRIP HOUR/MINUTES BATTERY... - Page 11 MAIN DISPLAY AREA..Displays test results, stored test values, calculated result averages, and messages MEMORY ......Indicates the number in the main display area is a stored test value (see page 40) BATTERY ......Appears when the battery is low and needs to be replaced TEMPERATURE .....Appears when it is either too hot or too cold to test (outside the ranges 50°F~104°F for ketone test) TEST STRIP ....This icon will flash to prompt you to insert a test strip for...
-
Page 12: The Ketocoach™ Blood Ketone Test Strip
IMPORTANT: • Be sure to use only the KetoCoach™ Blood Ketone Test Strip with the KetoCoach™ Meter. Other brands of test strips will not work with the meter. • The KetoCoach™ Blood Ketone Test Strip is sensitive to moisture and light. For vial test strips, it is important to close the vial cap of the test strip bottle tightly after each use. -
Page 13: Setting Up Your New System
Setting Up Your New System Inserting (or Changing) the Battery The batteries need to be inserted before using your KetoCoach™ Meter for the first time or when the “ ” icon appears on the meter display screen. Material you will need: •... - Page 14 Step 2. Insert the new batteries with the + side up. They do not snap into place but rest on the metal contact. The door holds the batteries down. Put the battery door back in place and snap it closed. NOTE: •...
-
Page 15: Setting The Clock
Setting the Clock Material you will need: • Your KetoCoach™ Meter Begin Set Up Step 1. Press and hold “ ” to turn on the meter. Step 2. The flashing test strip icon will appear on the meter display screen. - Page 16 Set Year Step 4. Press “ ” and the current year will flash. Use “ ” or “ ” to select the ▲ ▼ correct year. Press “ ” to confirm your choice and advance to set the month. Set Month Step 5.
- Page 17 Set 12-hour or 24-hour Time Format Step 7. The time format will flash. Use “ ” or “ ” to select the time format of ▲ ▼ your choice. Press “ ” to confirm your choice and advance to set the hour. Set Hour Step 8.
- Page 18 NOTE: • Anytime during setup, you may either press “ ” to exit, or insert a KetoCoach™ Blood Ketone Test Strip to begin testing. The changes you have done so far will be memorized by the meter. After setting up your clock, you can turn off the meter by holding and pressing “ ”, continue to set your meter, or insert a test strip to begin testing (see Testing Your Blood Ketone on page 31, or Control Solution Testing on page 24).
-
Page 19: Setting The Alarm
Setting the Alarm You can set up to three alarms for ketone testing on your KetoCoach™ Meter. You must set the clock before setting the alarms. When an alarm rings, a melody will play for 20 seconds. Pressing “ ” or inserting a test strip will silence the alarm. - Page 20 Step 4. The display screen will indicate alarm 1 status (the default is OFF). You can turn it on by pressing “ ” or “ ”. Press “ ” to confirm your ▲ ▼ choice and advance to set the hours. Step 5.
-
Page 21: Turning On/Off Tone Sound
Control Solution Testing on page 24), or press and hold “ ” to turn off the meter. Turning ON/OFF Tone Sound The KetoCoach™ Meter comes with beeper sound ON as preset. Turning off the beeper will cause you to miss many important cues from your meter – such as... - Page 22 Step 1. Press and hold “ ” to turn on the meter. Step 2. The flashing test strip icon will appear on the meter display screen. Step 3. Press “ ” or “ ” until meter display screen shows “ ”.
- Page 23 NOTE: • Anytime during setup, you may either press “ ” to exit, or insert a test strip to begin testing. The changes you have done so far will be memorized by the meter. Begin testing by inserting a test strip (see Testing Your Blood Ketone on page 31 or Control Solution Testing on page 24), or press and hold “...
-
Page 24: Control Solution Testing
You should perform control solution testing when: • Using the meter for the first time • You open a new bottle of KetoCoach™ Blood Ketone Test Strips • You leave the cap of the test strip vial open for a while •... - Page 25 IMPORTANT: • Use only the KetoCoach™ Ketone Control Solution (Level 2) with the KetoCoach™ Blood Ketone Test Strip. Other brands of control solution will produce inaccurate results. • Always check the expiration date. DO NOT use control solutions if expired.
- Page 26 IMPORTANT: • Do not use a test strip that has expired. Check the expiration date which is printed on the test strip bottle (for vial test strip) or box (for foil-wrapped test strip). • Use each test strip immediately after removing it from the bottle. •...
- Page 27 Step 2. The flashing blood drop and test strip icons appear on the lower left of the meter display screen. Step 3. Press “ ” or “ ” to enter the control mode. You will see “ctl ” on the ▲...
- Page 28 Step 6. The screen will begin to count down. After 8 seconds, the control solution testing result will appear on the meter display screen. A “ctl” flag will also be attached when results are shown on the screen. Step 7. Compare the reading on the screen to the control range printed on the test strip bottle (for vial test strip) or box (for foil-wrapped test strip).
- Page 29 Step 8. Remove the used test strip either by pushing the ejection switch or by pulling it out with your hand and throw it into a proper wastebasket, the meter will turn off automatically. The meter will also time-out after 1.5 minutes of inactivity. IMPORTANT: •...
-
Page 30: Control Solution Troubleshooting
Possible Causes What you can do … • Wrong brand of control • Make sure you are using KetoCoach™ Ketone solution being used Control Solution (Level 2). • Expired or contaminated • Make sure the testing environment is between control solution or 10˚C~40˚C (50˚F ~104˚F) and relative humidity... -
Page 31: Testing Your Blood Ketones
Testing Your Blood Ketones Materials you will need: • Your KetoCoach™ Meter • A new KetoCoach™ Blood Ketone Test Strip • Lancing device with a sterile, unused lancet Before you begin, make sure: • You set up your meter properly and run a control test. See Setting Up Your New System on page 13 and Perform a Ketone Control Solution Test on page 24 for more details. -
Page 32: Preparing Your Lancing Device
Preparing Your Lancing Device CAUTION: • The lancets are for single use only. Always use a new, sterile lancet each time you perform the test. • DO NOT share your lancing device or lancets with other people. Sharing or reusing lancets can lead to disease transmission. - Page 33 Step 3. Hold the lancing device (puncture) or lancet against the puncture site and lance it. Follow manufacturer’s instruction for how the lancing device (puncture) or lancet should be used. TIP: • To avoid soreness, select a site on the side of your fingertips. To avoid calluses, choose a different site each time for obtaining the blood sample.
-
Page 34: Performing A Blood Ketone Test
Performing a Blood Ketone Test Step 1. Insert a KetoCoach™ Blood Ketone Test Strip to turn on the meter. IMPORTANT: • Check the expiration date printed on the test strip bottle (for vial test strip) or box (for foil-wrapped test strip). Do not use expired test strips. - Page 35 Step 2. Wait for the flashing blood drop and test strip icons to appear on the left of the meter display screen. Step 3. Hold the lancing device against the side of your fingertip and press the release button to create a puncture. TIP: •...
- Page 36 Step 4. Gently bring the test strip and touch the drop of blood at a slight angle. The test strip acts like a straw to pull the blood in. Keep the test strip in the blood drop until the meter beeps to indicate the test strip has enough blood to test.
- Page 37 Step 7. Remove the used lancet from your lancing device according to instructions and discard it into a proper wastebasket. CAUTION: • If you see “HI” or “LO” is displayed, your blood ketone level may be beyond the meter measurement range (above 8.0 mmol/L or below 0.1 mmol/L). Test again using fingertip testing.
-
Page 38: Understanding Your Test Results
Understanding Your Test Results Understanding Your Blood Ketone Test Results Ketones are made when the body is using fat for energy instead of using glucose because not enough insulin is available to use glucose for energy. It is a warning sign that your diabetes is out of control or that you are getting sick The normal adult blood ß-Ketone range for a person without diabetes is less than 0.6 mmol/L. - Page 39 What to do if you get a high reading If the meter displays results that are “HI”: • Treat your diabetes according to the instructions from your doctor and/or consult with your healthcare provider. • Test your meter with a control solution, refer to Control Solution Testing on page •...
-
Page 40: Viewing Stored Readings From Memory
Viewing Stored Readings of Ketone Test Results from Memory Your KetoCoach™ Meter can store up to 500 ketone test and control results with date and time. You will need to set your meter date and time before using the memory, see Setting Up Your New System on page 13. - Page 41 Step 4. The most recent test result will appear on screen. Press “ ” to view your results from ▲ the most recent to the oldest. When scrolling to the end of results in the memory, the display screen will show “nil”. Down Down Down...
- Page 42 After you finish viewing memory, either begin testing by inserting a test strip (see Testing Your Blood Ketone on page 31, or Control Solution Testing on page 24), or press and hold “ ” to turn off the meter.
-
Page 43: Caring For The Meter
Caring for your KetoCoach™ Meter is easy. Follow these simple guidelines to keep your KetoCoach™ Meter working properly. NOTE: • Do not get water inside the KetoCoach™ Meter. Never immerse the meter or hold it under running water. • Do not use glass or household cleaners on the meter. - Page 44 Your meter and lancing device is validated to withstand cleaning and disinfection cycle of once per day for an average period of five years (1825 cleaning cycles and 1825 disinfection cycles over the 5 year use life of the meter) using Clorox Healthcare Bleach Germicidal Wipes (EPA Registration Number: 67619-12).
- Page 45 NOTE: • If towelettes seem very dry, invert the canister once or twice to distribute the disinfectant on the towelettes. If the towelettes are excessively wet or dripping, squeeze the excess (dripping) liquid out before using them on the meter. •...
- Page 46 5. Discard used towel in a sealed container where it will not be touched by others. 6. Allow to air dry. 7. Wash hands with soap and water and dry thoroughly. NOTE: • If the meter or lancing device is being operated by a second person who is providing testing assistance to the user, the meter or lancing device should be cleaned and disinfected prior to use by the second person.
- Page 47 • Control solution out of range. • Clouding meter LCD display. • Corrosion or erosion of plastic housing or buttons. • Cracking of plastic housing. • Malfunction of any meter button. Purchase Information for Clorox Healthcare Bleach Germicidal Wipes Clorox is the product of Clorox, the catalog number is 30577 (150 count) or 35309 (70 count).
-
Page 48: Storage And Precautions
If you need assistance or have question about cleaning and disinfection for the meter, please contact customer service at www.ketocoachx.com or call 1-800-587-5496. Storage and Precautions • Handle the meter with care; severe shock, such as dropping the meter, could damage the electronics. - Page 49 door openers, radio transmitters, or other electrical equipment that are sources of electromagnetic radiation, as these may interfere with the proper operation of the meter. • Dispose of the meter according to your local regulations for correct disposal. • Discard used lancet and test strip according to your local regulations.
-
Page 50: Solving Problems
Solving Problems This section details the significant display screen messages and error codes you may encounter when using your KetoCoach™ Meter and KetoCoach™ Blood Ketone Test Strip. Message What It Means What You Should Do Damaged meter • Replace the batteries and turn the meter electronic or test on again. - Page 51 Message What It Means What You Should Do Not enough sample • Remove the test strip and repeat the test on the test strip to with a new test strip. See Testing Your start Blood Ketones on page 31. Test strip removed •...
- Page 52 Message What It Means What You Should Do Ketone test result • Below 0.6 mmol/L ( including LO) lower than 0.1 mmol/L is a normal blood ketone level. See Understanding Your Test Results on page 38. Low battery • Change the batteries according to instructions for Inserting (or Changing) the Battery on page 13.
- Page 53 Message What It Means What You Should Do Temperature out of • Move the meter into an area that is range between 10°C ~40°C (50°F ~104°F) for ketone test, and allow 10 to 15 minutes for it to reach the new temperature.
-
Page 54: Product Warranty
Product Warranty AmVentureX warrants the KetoCoach™ Meter to be free of defects in workmanship and materials under normal use for a period of five (5) years from the date of purchase to the consumer. The liability of AmVentureX is limited to repair or replacement and in no event shall AmVentureX be liable for any collateral or consequential damages or loss. -
Page 55: Specifications
Specifications Test Strips: KetoCoach™ Blood Ketone Test Strip Test Range: 0.1~8.0 mmol/L Calibration: Plasma Blood Sample Size: ≥ 0.8 μL Hematocrit Range: 20~60% Display Type: LCD screen with back lighting Memory: 500 test results with date and time Dimensions: 96L x 58W x 16H (mm) -
Page 56: Supplies
Supplies S11006 KetoCoach™ Kit S11007 KetoCoach™ meter only S5640790 KetoCoach™ Blood Ketone Test Strip, 10's foiled S5640789 KetoCoach™ Blood Ketone Test Strip, 25's foiled S5640791 KetoCoach™ Blood Ketone Test Strip, 50's foiled S5800335 KetoCoach™ Ketone Control Solution L2...
Need help?
Do you have a question about the S11006 and is the answer not in the manual?
Questions and answers
meter turns on, but screen is so pale I can't read it