Table of Contents
Advertisement
Quick Links
Advertisement
Table of Contents

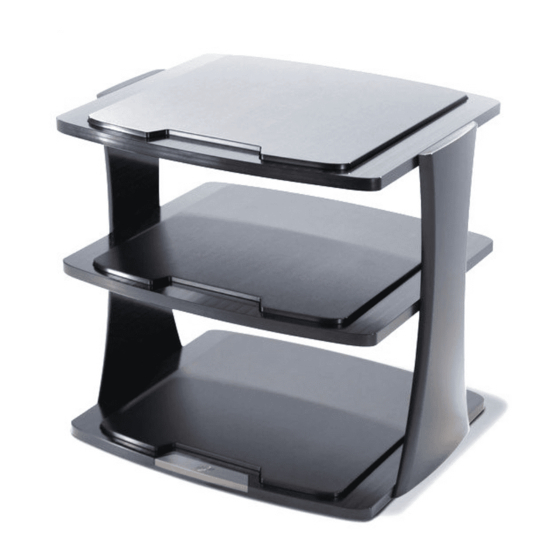
Summary of Contents for YG Acoustics RACK Series
-
Page 2: Table Of Contents
Important Safety Instructions ............3 A Message from Yoav Geva ............4 Introduction ..................5 About the Manual and Limited Warranty ............... 6 Configuration ..................7 Unpacking ..................8 Contents of the Cartons ....................8 A Note about Semi-Cosmetic Surfaces ............... -
Page 3: Important Safety Instructions
Important Safety Instructions Please read all instructions in this Owner’s Manual carefully and completely before you start assembling and/or using your YG Acoustics™ Rack. Always disconnect AC power before connecting or disconnecting any cables, or when cleaning any component. -
Page 4: A Message From Yoav Geva
A Message from Yoav Geva Dear Music Lover, Congratulations and thank you for your purchase of a YG Acoustics™ Rack. You have acquired a product that is at the leading edge of the art of science and sound. We are confident that it will bring musical joy into your home for many years to come. -
Page 5: Introduction
Introduction YG Acoustics™’ Rack series was initially designed as a tool for internal use. The factory’s critical listening room needed a vibration-free, solid platform to allow equipment to play under optimal conditions. In a challenging environment, full of hostile vibration, other equipment racks couldn’t deliver the desired result. -
Page 6: About The Manual And Limited Warranty
Save these instructions for future reference. YG Acoustics™ Rack is covered by a limited 5-year warranty, so save the bill of sale to protect your purchase and aid in any service-related questions. The terms of such limited warranty are set forth on the limited warranty card. -
Page 7: Configuration
Configuration As with YG Acoustics™’ world-famous speakers, Rack is available in several modular configurations. The construction allows for the addition of shelves, and for horizontal expansion, without the need to replace the existing Rack. Rack 1.3 – 3 shelves. -
Page 8: Unpacking
Each YG Acoustics™ Rack is packed in one or more cartons with a shipping weight of up to approximately 82 kg (180 lbs). To avoid personal injury and possible product damage, we strongly urge you to allow your dealer to perform the whole unpacking process using specialized tooling. - Page 9 3 shelf inlays 2 uprights 3 YG Acoustics™ spikes (4 available upon request) 3 black composite disks to prevent the spikes from damaging the flooring (4 available upon request) 2 hex keys – a small one for adjusting spikes, and a larger one for bolting shelves to uprights.
-
Page 10: A Note About Semi-Cosmetic Surfaces
The undersides of Rack shelves and inlays, and the inner side of Rack uprights, are semi-cosmetic surfaces (just like with bottoms of YG Acoustics™ speakers). This means that a visual finish is applied to them as if they were cosmetic surfaces, but minor cosmetic blemishes may appear due to the utilized machining and anodizing processes. -
Page 11: Assembly
Assembly 1. The entire assembly process is a job for two professionals - enlist the help of a second technician for performing the tasks below safely and carefully. Prepare a soft, clean surface for assembly, to prevent damaging parts. Place one of the uprights on the surface, curved face down and screw holes facing upward. - Page 12 2. Attach the top shelf to the upright’s topmost row of holes using 3 screws. Snug- tighten the screws, but do not fully tighten yet.
- Page 13 3. Attach the middle shelf/shelves to the desired row(s) of holes using 3 screws each. Snug-tighten the screws, but do not fully tighten yet. Make sure the trapezoidal tabs on all shelves (marked with yellow arrows in the second photo below) face the same direction.
- Page 14 4. Attach the bottom shelf, which has wider spaced holes, to the bottom-most row of holes using 3 screws. Snug-tighten the screws, but do not fully tighten yet. Make sure that the titanium-colored trapezoid faces the same direction as the above- mentioned trapezoidal tabs.
- Page 15 5. Attach the next upright (curved with screws facing downward for Rack 1.3, or shared for Rack 1.6 as shown) using 3 screws per shelf. First snug-tighten, and then fully tighten all 6 screws per shelf. The recommended tightening torque is 11.5 Nm .
- Page 16 6. Carefully rotate Rack so that the titanium-colored trapezoid faces upward, and the rear of all shelves is on the soft work surface.
- Page 17 7. For Rack 1.3 or Rack 1.4, skip the next two stages and continue to stage 9 below. For Rack 1.6, attach the remaining 3 shelves from top to bottom, using 3 snug-tight screws per shelf. Monitor the direction of the trapezoidal tabs and titanium-colored trapezoid to make sure they continue to match.
- Page 18 8. Attach the remaining upright using 3 screws per shelf, and fully tighten all 6 screws of the last 3 shelves. Use the same torque/Loctite process as described above.
- Page 19 9. Tilt the Rack upright, move into position, and only then install spikes with or without floor-protector disks if desired. The photo below, which shows spikes installed before tilting upright, is provided for illustration purposes only to help locate spike-holes.
- Page 20 10. Using the precise Setup calculation-sheet below, tune each shelf using the appropriate number of isolators or stainless steel balls. If more than the included isolators or stainless steel balls are required, they may be purchased separately. Shown below are three of the many possible setups – 3 stainless steel balls, 3 isolators and 6 isolators.
- Page 21 11. Carefully place an inlay in each shelf. There is a gap of approximately 1.2 mm (.05”) all around between the inlay and the shelf. Position carefully so that the gap is uniform throughout, to prevent the inlay from rubbing against the shelf during operation.
-
Page 22: Setup
Warning: space the middle shelf/shelves of YG Acoustics™ Rack as evenly as possible to avoid any tall unsupported sections of the uprights. Position components carefully to maintain even weight distribution across each shelf. - Page 23 ≥ 57.5 to < 61.4 kg (≥ 126.7 to < 135.5 lbs) 16 isolators – load limit top/middle shelves ≥ 61.4 to < 65.4 kg (≥ 135.5 to < 144.3 lbs) 17 isolators ≥ 65.4 to < 69.4 kg (≥ 144.3 to < 153.1 lbs) 18 isolators ≥...
-
Page 24: Maintenance
Maintenance YG Acoustics™ Rack has a high-quality finish on its various parts, which does not require any routine maintenance. Use a soft cloth, slightly dampened with water only, to remove any fingerprints or to wipe off dust, and immediately follow with a dry cloth. -
Page 25: Technical Specifications
Rack 1.4 – 69 kg (152 lbs) Rack 1.6 – 97 kg (213 lbs) YG Acoustics™ constantly strives to update and improve existing products as well as create new products and technologies. Therefore, specifications and construction details are subject to change without notice. -
Page 26: Troubleshooting
Contact Details Please contact your YG Acoustics™ dealer, or us directly, with any questions you may have about our products. You can reach us at: YG Acoustics LLC 4941 Allison St., Unit 10...
Need help?
Do you have a question about the RACK Series and is the answer not in the manual?
Questions and answers