Table of Contents
Advertisement
Quick Links
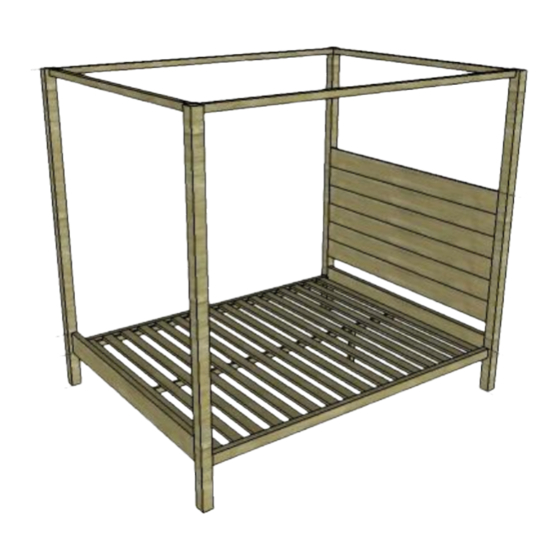
Contemporary DIY Four Poster Bed
Here are a few housekeeping items before you start that will make this project even easier to tackle.
First, this bed needs to be assembled in the space in the bedroom it will be in. The assembled parts are
larger than a doorway. I stained and waxed my wood pieces before assembling. Since the wood was
already finished, I placed a heavy moving blanket on the floor to protect the wood from scratches.
Time to complete: 2-3 days
Lumber:
2 - 1" x 2" x 8ft poplar
16 - 1" x 3" x 6ft poplar
2 – 2" x 2" x 6ft poplar
6 - 1" x 6" x 6ft maple
3 – 2" x 2" x8ft maple
2 – 2" x 3" x 8ft maple
2 – 2" x 6" x 6ft maple
4 – 3" x 3" x 8ft maple
Materials:
Pocket screws 1 ¼
Advertisement
Table of Contents

Related Manuals for RYOBI NATION H2OBungalow Contemporary DIY Four Poster Bed

Summary of Contents for RYOBI NATION H2OBungalow Contemporary DIY Four Poster Bed
- Page 1 Contemporary DIY Four Poster Bed Here are a few housekeeping items before you start that will make this project even easier to tackle. First, this bed needs to be assembled in the space in the bedroom it will be in. The assembled parts are larger than a doorway.
- Page 2 Pocket screws 2 ” Wood screws 1 ¼ ” Wood screws 1 ½ “ Wood glue Sand paper Stain or paint to finish Cut List: Maple 4 - 3” x 3” at 78 ¾” bed posts 2 - 2” x 2” at 60 ½“ top rails 2 - 2”...
- Page 3 and position the upper rail on top of the guide. This will center the pieces perfectly while joining all of the pieces to the bedposts. Step 2 Install headboard planks. Set the pocket hole jig for ¾” material and drill pocket holes in each end of the headboard planks. Secure the planks to the bed posts using glue and 1 ¼”...
- Page 4 Step 4 Attach the upper and lower side rails. Drill pocket holes in each end of the side rails and upper rails with the jig set to 1 ½”. Secure them to the bed posts using 2 ” pocket screws. Use the wood guide to position.
- Page 5 Step 5 Attach the slat cleats. Secure the cleats to the side rails using countersunk 1 ½” wood screws approximately every 12”. The bottom edge of the cleat will be flush with the bottom edge of the side rail. Step 6 Assemble and attach center support.
- Page 6 Secure the support to the headboard and footboard using 2” pocket hole screws. *Do not glue* Step 7 Attach the slats. Cut the pieces for the slats. Place them approximately 2 ½’ apart and 3 /4’ from the headboard and footboard. Secure the slats using countersunk 1 ¼” screws. *Do not use glue*...
Need help?
Do you have a question about the H2OBungalow Contemporary DIY Four Poster Bed and is the answer not in the manual?
Questions and answers