Advertisement
Quick Links
WARNING: DO NOT LEAVE
CHILDREN UNATTENDED
WHILE INSTALLING OR
OPERATING THE MOTORIZED
TABLE. THIS IS NOT A TOY
AND SHOULD NOT BE
MANAGED BY CHILDREN.
TABLE COULD CLOSE
UNEXPECTEDLY.
PLEASE USE CAUTION.
A SS EM B LY TIP S
• Assemble this product on a soft surface to prevent scratching
the product.
• Hardware can be found inside drawers or underneath the product.
• Do not discard any of the packaging until you have successfully
assembled the product.
ST EP 1
Unpack Box #4; the base of
the table, and place it in the
area where you would like to
set the table.
Thank your for selecting one of our pieces to become part of your home. We are here to guide you during the assembly.
If you need help or need extra hardware simply contact our support team at support@casabiancafurniture.com or call us at
1(800) 652-6344. Mon-Fri 9:00am - 5:00pm EST. Talenti Casa is Registered Trademark distributed by Casabianca Home.
C A RE I N ST R U C T IO NS
Care Instructions Case goods (C): Dust with a soft, dry cloth.
All spills should be cleaned up immediately. Use glass cleaners
on glass only. DO NOT use any abrasive cleaning supplies.
S T EP 2
Unpack Box #3; the frame of
the table.When unpacking it,
do NOT remove the four (4)
plastic tie straps.
A S S EM B LY I NS T R UC TI ON S
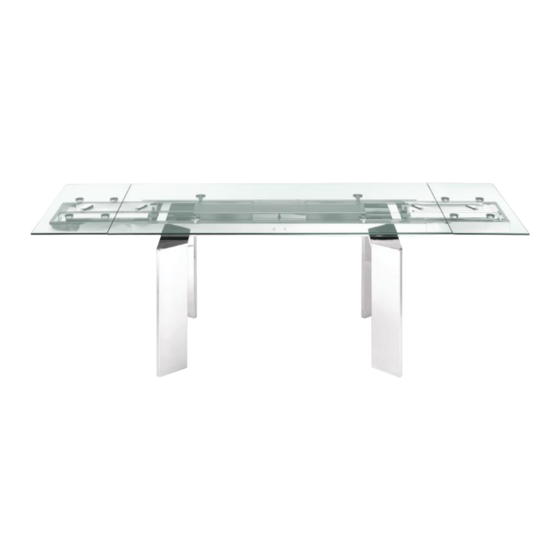
h e y !
i m n o t y o u r
t y p i c a l t a b l e
I a m m o t o r i z e d
1
Advertisement

Summary of Contents for Talenti Casa Astor TC-MT05CLR
- Page 1 Thank your for selecting one of our pieces to become part of your home. We are here to guide you during the assembly. If you need help or need extra hardware simply contact our support team at support@casabiancafurniture.com or call us at 1(800) 652-6344. Mon-Fri 9:00am - 5:00pm EST. Talenti Casa is Registered Trademark distributed by Casabianca Home. WARNING: DO NOT LEAVE...
- Page 2 ST EP 3 S T E P 4 Place frame upside Then place the base down on top of a blanket on top and align the or foam. four (4) holes of the base with the four (4) holes on the frame on each end.
- Page 3 ST EP 9 S T E P 1 0 Place the center glass on Remove the four top of the rails and make (4) plastic tie raps sure the pins go inside and make sure the the four (4) cylinders on extension bars are the frame.
- Page 4 S T EP 1 5 Place each extension carefully on top of the metal frame, align the sides with the center top. S T EP 1 6 S T E P 1 7 Tighten the extensions Tighten center top with with the M8 Cap screw.