Table of Contents
Advertisement
Quick Links
Advertisement
Chapters
Table of Contents
Troubleshooting

Subscribe to Our Youtube Channel
Related Manuals for Saba SA-HV02DS

Summary of Contents for Saba SA-HV02DS
-
Page 2: Table Of Contents
目錄 安全說明 .......................... 1 產品特徵 .......................... 2 產品組成 .......................... 3 主機及附件 ........................3 主機圖解/儲塵盒 ......................4 充電基座/遙控器 ......................5 顯示幕 ..........................6 產品操作 .......................... 7 電池充電 .......................... 7 開/關機/待機/睡眠 ......................7 預約清掃 .......................... 8 清掃模式 .......................... 9 水箱安裝 ........................10 產品維護... -
Page 3: 安全說明
安全說明 使用本產品前,請閱讀以下安全說明並遵循所有常規的安全預防措施。 !請仔細閱讀本說明書 !請保留好本說明書 !任何與本說明書不符的操作都很有可能導致本產品損壞 注意 1. 只有授權的技術人員方可拆卸本產品,嚴禁自行拆解本產品; 2. 本產品只能使用包裝原配備的變壓器,使用其他變壓器將可能導致產品受損; 3. 雙手潮濕時請勿接觸電線、插座或變壓器; 4. 請勿使布簾、各類纏繞物質或用戶身體部位捲進產品驅動輪; 5. 請勿將本產品靠近煙頭、打火機或者其他明火; 6. 如果產品需要清潔,請在充電結束後對本產品進行清潔; 7. 請勿過度折彎電線,或將重物及尖銳物品擱置於機器之上; 8. 本產品為戶內家用產品,請勿在戶外使用; 9. 本產品禁止重壓; 10. 請勿在潮濕環境中使用本產品(如浴室); 11. 使用本產品前,請移除地面所有易損物品(如玻璃杯、燈具等)以及有可能纏 住邊刷和吸風通道的物品(如電線、紙片、窗簾等); 12. 請勿將本產品置於易掉落的地方(如桌椅上); 13. 運輸過程中或長時間不使用本產品時,請關掉機器側面的電源開關; 14. 充電前請仔細檢查電源適配器變壓器是否已和插座接好; 15. 為預防絆倒,本產品工作時請告知房間內的其他成員; 16. 儲塵盒已滿時請先清空再使用本產品; 17. 本產品使用環境溫度為 0℃ 至 40℃; 18. -
Page 4: 產品特徵
產品特徵 超強吸力 本產品具有超強吸力,即便是細小的灰塵也會被徹底清理乾淨! 智能化吸力調節 當探測到不同地面環境時,本產品會依據不同地面狀況,自行調節吸力功率的大小,這不僅大大提高 了清掃的效率,而且更能節省多達 30%的電量。 人性化設計 操作簡單、易上手。只需輕輕一按 “CLEAN”鍵, 便可操控機器。 儲塵盒可用水沖洗 儲塵盒及過濾網都可以直接用水進行沖洗,不需花費您過多的勞動;而且用水沖洗儲塵盒還可以避免 灰塵飛揚造成的二次污染。... -
Page 5: 產品組成
產品組成 主機及附件 序號 描述 數量 主機 充電基座 變壓器 遙控器 抹布*1 水箱*1 HEPA 濾網 清潔刷 邊刷*2 更換備品*2 說明書... -
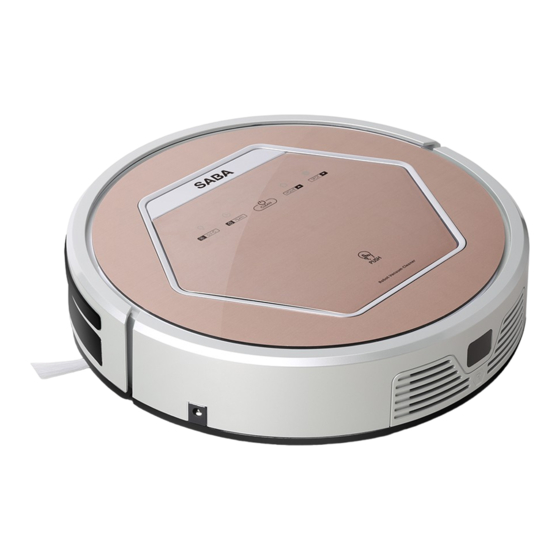
Page 6: 主機圖解/儲塵盒
產品組成 主機圖解 保險桿 裝飾條 顯示幕 觸摸按鍵 中間蓋 電源總開關 輪子 邊刷 吸塵口 紐扣電池蓋 電池蓋 下蓋 萬向輪 UV 燈 輪子 充電插口 自動充電極片 邊刷 中間蓋 儲塵盒 初級濾網 儲塵盒 提手 儲塵盒 HEPA 濾網 HEPA 濾網支架... -
Page 7: 充電基座/遙控器
產品組成 電源指示燈 充電基座 上蓋 變壓器插口 充電端點 遙控器 1. 開/關機鍵 2. 方向鍵 3. 重點清掃 4. 自動回充 5. 模式選擇 注意: 1. 通過按壓遙控器上 面的前 、 後、 左、右 鍵 , 可以控 制 機 器的清 掃 方 向。 2. 使用遙控器之前,請先安提2 顆4 號電 池。 若長時間不使用遙控器請將電 池取出。 3. -
Page 8: 顯示幕
產品組成 顯示幕 顯示部分 數字 顯示時間設定、充電狀態、出錯代碼等等。 按鍵部分 2.“ 紫外燈按鍵 ” 待機模式下,按此鍵設定工作時紫外燈亮或滅。 3.“ ”預約按鍵 待機模式下,按此鍵進入/退出預約模式。 4.“ ”清掃鍵 A. 從睡眠模式切換到待機模式: 或者長按3 秒使機器從待機模式切換到睡眠模式; B. 在預約清掃模式下,按此鍵完成並確認預約; C. 在待機模式下,按此鍵使機器開始工作。 5. “ ”自動回充/數位+鍵 A. 在預約清掃模式下,按此鍵使設“預約”間增加; B. 在其他模式下,按此鍵使機器自動尋找充電基座。 6. “ ”重點清掃/數字-鍵 A. 在預約清掃模式下,按此鍵使“預約”時間減小; B. 在其他模式下,按此鍵使機器開始螺旋式重點清掃。... -
Page 9: 產品操作
產品操作 電池充電 1. 放置好充電基座 把充電基座置於靠牆邊位置,並移除充電基座 左右各1米前方2米的所有障礙物,如右圖所示。 2. 若機器處於關機狀態請打開電源開關; 3. 用戶可以用以下兩種方式之一對機器進行充電: a. 直接將電源適配器變壓器插孔插到機器,另一頭接通電源,如圖a所示: b. 按主機或遙控器上“HOME”按鍵,使機器自動尋找充電基座,如圖b所示: 圖a 圖b 注意: a. 機器充電時,顯示幕會從左到右顯示“11:11”字樣; b. 充電完成時,顯示幕會顯示“FULL”; c. 待機模式下電量不足時,機器會播報語音,“請充電”; d. 工作模式下電量不足時,機器會自動尋找充電座充電。 有效延長電池壽命方法: a. 首次使用請讓機器充電滿12個小時; b. 電量不足時,請儘快進行充電; c. 清掃完成或者電量過低時,機器會自動開始尋找充電基座充電; d. 如果長時間不使用機器,請將電池充滿電,然後取出置於通風且乾燥的地方; e. 如果機器超過3個月不使用,使用前請用充電器對機器進行一次12小時充電。 開/關機/待機/睡眠 1. 開/關機 a. 確保電源開關處於“開”位置; b. -
Page 10: 預約清掃
產品操作 2. 待機 待機是指機器電源導通,等待用戶操作,可由以下方式進入: a. 工作狀態下,按主機 鍵進入待機模式; b. 按遙控器上的“開/關”鍵使機器停止。 3. 睡眠 睡眠模式下,按主機 鍵或遙控器開關鍵可喚醒機器。通過以下方式進入睡眠 模式,可最大限度延長電池使用時間; a. 待機模式下,長按主機 鍵3秒以上進入睡眠模式。 b. 待機模式下,若連續60秒以上無操作,則機器自動進入睡眠模式。 預約清掃 您可以通過預約使機器在某個特定的“預約”時間自動開始清掃。 怎麼對機器進行預約設置 注意:機器只能在待機或充電模式下進行設置,若機器處於睡眠狀態請按主機“CLEAN”鍵或遙 控器“開/關”鍵將其喚醒:若處於工作狀態請先將其停止。 1. 在機器顯示幕上設定 機器時間設置 a. 待機或充電模式下,按PLAN鍵進入機器時間設置,數碼管顯示當前機器時間; b. 按機器上的“CLEAN”鍵進入小時設置,此時數碼管左側兩位閃爍,按“HOME”鍵小時數增 加,按“SPOT”鍵小時數減小; c. 再按一次“CLEAN”鍵進入分鐘設置,此時數碼管右側兩位閃爍,按“HOME”鍵小時數增加, 按“SPOT”鍵小時數減小; d. 設置完成後,再接一次“CLEAN”鍵確定並保存設置。 預約時間設置 待機或充電模式下,連按兩次“PLAN”鍵進入預約設置,此時數碼管顯示之前己設置好的預 約時間。若之前無設置則顯示“00:00”; b. -
Page 11: 清掃模式
產品操作 注意: a. 通過機器顯示幕設置的預約時間自身時間為參考。比如,設定預約時間為9:00,則機器會在 每天的9:00(機器時間)自動開始清掃。因此,設置預約時間前請先設置機器時間,使其與 實際時間大體相符,以避免不必要的困擾。 b. 一旦設定,則機器每天都會在設定的時間自動開始清掃。 c. 當機器面板顯示時間數位時,表示機器處於系統時間或預約時間設置下;區別:系統時間調 整時,主機顯示面板“UV”燈不亮;設置預約清潔時間,“UV”指示燈變亮。 d. 遙控器上“開/關”鍵與主機面板上 鍵功能一樣。 清掃模式 多重清掃選擇模式,可依環境不同需求,選擇不同的清掃模式。 各模式講解與圖示 開機自動進入自動模式(模式2) 在自動情掃模式下,機器會自動清掃房間,並且依據不同的環境 自行調節清掃模式。 注意:按主機“CLEAN”鍵或遙控器“開/關”鍵即 可進入自動清掃模式。 自動模式下,機器偵測到重災區自動進入重點清掃模式(重點清掃80 秒)後執行原本模式; 強制重點清掃模式:按遙控器的“SPOT”鍵進入; 注意:建議在地面上有較多垃圾時使用重點清掃模式。 螺旋清掃模式(模式1) 延邊清掃模式(模式3) 當探測到牆邊時,機器會進入沿牆走模式,開始邊緣清掃。 弓字軌跡清掃模式(模式4) “弓”字軌跡清掃主要用於沒有傢俱,大面積區 域裏快速清掃。清掃快捷,效率高效。... -
Page 12: 水箱安裝
產品操作 注意: 通過遙控器可以選擇機器的清掃模式:待機或者在機器清掃過程中。遙控器對準機器, 按壓遙控器MODE鍵,當機器上顯示幕顯示模式數位元1111為螺旋清掃,模式數位元2222為 自動清掃,模式數位元3333為沿邊清掃,模式數位元4444為“弓”字軌跡清掃。 水箱安裝 1. 安裝拖地布 如圖1所示,把拖地布裝入水箱底板。 2. 水箱加水 如圖2所示,打開水箱膠塞,在水箱內注入自來水後,再把膠塞裝入水箱,以免漏水。 3. 安裝水箱組件 如圖3所示,把機器翻轉過來,再把水箱組件如圖所示裝入主機。 膠塞 注意: A. 若加掛水箱產品出現異常運作時,請檢視水箱與拖地布是否按照正確。 B. 加掛水箱請注意地面必須是平整的與無任何會勾住拖地布的尖銳物。 C. 加掛水箱時,請關閉UV燈。 D. 返回充電或預約行程時,請務必移除水箱拖地布組件。... -
Page 13: 產品維護
產品維護 邊刷清潔 1. 檢查邊刷是否受損或有異物; 2. 用清潔工具或抹布清潔邊刷; 3. 若發生捲曲或變形,可將邊刷取下置於溫水中約5秒; 4. 當邊刷受損無法使用時,請及時更換。邊刷最大使用壽命12個月。 儲塵盒及濾網清潔 每次使用後請清空儲塵盒,具體步驟如下圖所示: 注意: a. 當濾網使用15-30天後,建議水洗一次,高效網 HEPA濾網最大使用壽命24個月; b. 安裝前,請確保濾網處於乾燥狀態; c. HEPA濾網和初級濾網都是可以更換的附件; d. 請勿將濾網置陽光下暴曬。 按壓 A.按压中间盖上的“PUSH”标记打开中间盖 B.取出储尘盒 E. 倒掉集塵盒裏的垃圾 取出 HEPA 滤网 D. 拉開集塵盒蓋並取出初級濾網 和 HEPA 濾網 F. 用水沖洗集塵盒及初級濾 G. 用清潔刷清理 HEPA 濾網,請勿 H.將初級及濾網和... -
Page 14: 感測器及輪子清潔
產品維護 感測器及輪子清潔 用清潔工具或軟布輕輕拭擦感測器及輪子,如下圖標記的位置。 充電端子清潔 用清潔工具或軟布清潔充電基座及主機上的充電端子,如下圖標記的位置。 吸風通道、重點清掃感測器清潔 用清潔工具或軟布清潔吸風通道及重點清掃感測器,如下圖標記的位置。 注意:請勿將水,稀釋劑等液體直接接觸感測器。... -
Page 15: 簡易故障排除
簡易故障排除 感測器類故障 故障代碼 故障原因 解決方法 AUBF 吸入口紅外檢測到灰塵量過多 清潔吸風通道 AUBN 沒有儲塵盒或安裝不到位 請放置儲塵盒或安裝到位 E1xx 左碰撞開關不靈活 E2xx 右碰撞開關不靈活 檢查前擋靈敏性 E3xx 左右兩邊碰撞開關不靈活 E4xx 左輪組懸空 將機器置於實地 E5xx 左輪組懸空,左碰撞開關不靈活 E6xx 左輪組懸空,右碰撞開關不靈活 將機器置於實地和檢查前擋靈敏性 E7xx 左輪組懸空,左右兩邊碰撞開關不靈活 E8xx 右輪組懸空 將機器置於實地 E9xx 右輪組懸空,左碰撞開關不靈活 Eaxx 右輪組懸空,右碰撞開關不靈活 將機器置於實地和檢查前擋靈活性 Ebxx 右輪組懸空,左右兩邊碰撞開關不靈活 Ecxx 左右兩邊輪組懸空 將機器... -
Page 16: 驅動類故障
簡易故障排除 感測器類故障 故障代 解決方法 故障原因 碼 Ex1x 前擋左邊紅外感應到障礙 清潔前擋透鏡 Ex3x 前擋左邊和中間紅外感應到障礙 清潔前擋透鏡 Ex4x 前擋右前紅外感應到障礙 清潔前擋透鏡 Ex5x 前擋左和右前紅外感應到障礙 清潔前擋透鏡 Ex6x 前擋中間和右前紅外感應到障礙 清潔前擋透鏡 Ex7x 前擋左、中間、右前紅外感應到障礙 清潔前擋透鏡 Ex8x 前擋牆壁檢測紅外感應到障礙 清潔前擋透鏡 Ex9x 前擋牆壁檢測和左邊紅外感應到障礙 清潔前擋透鏡 ExAx 前擋牆壁檢測和中間紅外感應到障礙 清潔前擋透鏡 ExBx 前擋牆壁檢測 、左邊、中間紅外感應到障礙 清潔前擋透鏡 ExDx 前擋牆壁檢測、左邊、右前紅外感應到障礙 清潔前擋透鏡 ExEx 前擋牆壁檢測、右前、中間紅外感應到障礙... -
Page 17: 電池拆換
簡易故障排除 如何對照代碼訊息? 1. 單一代碼: A. 顯示 E001,尋找故障代碼表上 E001 即可對照故障原因與解決辦法,E001 即可對照問題進行簡易 故障排除。 B. 顯示 E004,尋找故障代碼表上 E004 即可對照故障原因與解決辦法,E001 即可對照問題進行簡易 故障排除。 2. 兩個代碼以上: A. 顯示 EC07,先尋找對應錯誤代碼表裏面的 Ecxx 再尋找 Exxx. B. 顯示 EE91,先尋找對應錯誤代碼裏面的 Exx1 再尋找 Eexx 與 Ex9x。 注意: A. xx 是 LCD 顯示不定的數位或者字元。 B. -
Page 18: 產品規格
產品規格 分類 項目 參數 電子類 電壓 DC 14.4V 電池規格 Ni-Mh 2000mAH 消耗功率 功能參 儲塵盒容量 0.5L 數 充電類型 手動充電/自動充電 自動清掃,重點清掃,螺旋形清掃,延邊清掃,弓字軌跡 清潔模式 充電時間 4-6 小時 清潔時間 90 分鐘 主機按鍵類型 觸摸接鍵 英文語音內容 Please wait 請稍等 Please charge 請充電 Start charging 開始充電 Charging finish 充電完成... - Page 19 Contents Safety Instructions.......................1 Product Features........................2 Product Components......................4 Main Body and Accessories....................4 Main Body Diagram / Dust Bin..................... 5 Charging Station / Remote Control..................6 Display Panel.......................... 7 Product Operation....................... 8 Battery Charging........................8 Starting Up / Standby/ Sleep/Power Off................9 Scheduling..........................10 Cleaning Modes........................11 Water Tank and Mopping Cloth Usage................
-
Page 20: Safety Instructions
Safety Instructions 。 。 Before using this product, please ad the safety instructi ns and foll w all 陪 gular safety p cautions. 陪 陪 。 nly authorized technicians can disassemble the product. Users are not allowed to 。 disassemble or repai「 the product. nly use the original batte『y and powe「... -
Page 21: Product Features
Product Features Powerful Suction & Intelligent Suction Adjustment p。,werful Suction 。 。 Suction p f this product is strong enough to ensure that even tiny dust on the floor will be cleaned tho ughly! 『口 Intelligent Suction Adjustment This product is able to automatically adjust its suction power when different floor environments are detected. - Page 22 。 duct Features 2. Spot cleaning mode The robot will clean intensively in a spiral way when it detects a ve叩dirty area. 3. Edge cleaning mode In this mode the robot will clean along the wall or obstacles. 4. Scheduling mode After being scheduled, the robot will leave the charging station and start working at the scheduled time.
-
Page 23: Product Components
Product Components Main Body and Accessories Desc iption Q TY 『 Main Body Charging Station Adapter Remote Control (batte not included) 『y Water Tank *1 Moping Cloth *1 HEPA Filter Cleaning Brush Side Brushes *2 Spare Brushes*2 User Manual ⑧ EEE) 夫... -
Page 24: Main Body Diagram / Dust Bin
Product Components 。 Main b dy diagram Bumpe『 。『 田。 n strip LED display 。 uch key Cover 。 , w er switch ightwheel ight side brush uction passage Bu世。n batte cover· 『y 。由。 m cover· nive salwheel 『 Cover Dust bin P『imary filte『... -
Page 25: Charging Station / Remote Control
Product Components Charging Station Top cover Charging socke harging poles 。 。 Remote c Display screen Set appointment Automatic recharge Direction button ON/OFF Mode selection Set the time of remote control 吗UF 用川V 曰旷 Key cleaning mode Note: A. Install two AAA type batteries into the ·... -
Page 26: Display Panel
Product Components Display Panel 。 。 「D「U 「h「U 口 口 口 。。 @ LED Panel 88 " ” 曰: LED p a nel LED panel shows the time setting, charging status and error codes by using 。 numbe s, lette s or graphs. -
Page 27: Battery Charging
。 Product peration 1. Batte叩Charging A. Charging station placement 、 Place cha咱ing station against the wall and 陪mo叫'e obstacles from within 1 meter at both 唱、‘ ’ -..<� 唱、· ’ 电 sides and about 2 mete S in front of the station, 「... -
Page 28: Product Operation
Product Operation 2.Starting Up/ Standby/ Sleep/ Power O 何 A. Starting up a. Keep pressing the power switch at the ight sideof the robot for more than 3 『 seconds. 啤v b. Press on main body o ON/OFF on remo怡control to start cleaning. 『... -
Page 29: Scheduling
Product Operation 3.Scheduling n schedule the robot and set it to start cleaning automatically at a ce由In 臼 time every day. 。 Note: The robot can only be set when it is in Standby or Charging mode. If the robot is in sleep mode, press d险 n main body o ON/OFF button on remo旭... -
Page 30: Cleaning Modes
。 。 duct Operati 4. Cleaning Modes 1 ). Auto cleaning In this mode, the robot will clean a room automatically and adjust its cleaning mode according to the environment. Note: g岛 Press ON/OFF on remote control or on robot to start auto cleaning. -
Page 31: Water Tank And Mopping Cloth Usage
Product Operation 。 Water Tank and M pping Cloth Usage 1. Attaching mopping cloth Stick mopping cloth on the bottom of wate tank as shown in四g 1. Make sure 『 the sticking side and mopping cloth face the appropriate sides, and then stick the mopping cloth on its sticking side. -
Page 32: Product Maintenance
Product Maintenance 1. Cleaning Side Brushes Clean the side brush when it gets dirty and it if it's damaged. Max life s阳n for 臼 陪 side brush is 12months. Note: Beto eplacing side brushes, check and make mark on side b sh match with the 。... -
Page 33: Cleaning Sensors And Wheels
。 duct Maintenance 3. Cleaning Sensors and Wheels 。 Slightly wipe all the sensors and wheels, as marked in币gure bel w, with soft cleaning cloth or tool. 4. Cleaning Charging Poles Clean the cha · g ing poles, as marked in the figure below, with soft cleaning cloth 『... -
Page 34: Trouble Shooting
bleshooting l』 。 Error Code for Sens Error Code Cause Solution Suction passage blocked Clean su n passage AUBF 田。 Put back dust bin and pla四it in position Dust bin not placed in p r robotwi ut dust bir AUBN 。... - Page 35 bleshooting l』 。 。 Error de f r Sensors Erro『Code Cause Solution EXX8 bumpe『right i n fared se rs de acle Clean bumpe『sens。『lens 。 。 Le 由 a 回 - drop sens r de ects c i ff , fr bumper r i g ht EXX9 infared se...
-
Page 36: Troubleshooting For Motors
Trol』bleshooting 。。 Troublesh ting for Motors Erro Code Cause Solution 『 Check if n is pre and clean dust bin L01X Fan ove loaded 届四, 恒 『 LOX1 Left wheel aded 。 『 。 LOX2 Right wheel ove loaded 『 LOX3 Left and right wheels ove loaded 『... -
Page 37: Battery Removal
Battery Removal A. Remove the screws on battery cover with a screw driver. B. Remove the batte『y cover. C. Grasp the insulating tape at two sides of the battery and lift the battery. D. Unplug the wire connector that links battery and robot. Product Specifications Classification Items... - Page 39 SA-HV02DS...
Need help?
Do you have a question about the SA-HV02DS and is the answer not in the manual?
Questions and answers