
Subscribe to Our Youtube Channel
Summary of Contents for HOMCOM 853-028V70
- Page 1 INcsa013_UK_FR 8 53-028V70_8 53-028V90 Garment steamer and iron Défroisseur à vapeur pour Vêtements et Fer à Repasser IMPORTANT, RETAIN FOR FUTURE REFERENCE: READ CAREFULLY USING INSTRUCTION...
-
Page 2: Description Of Parts
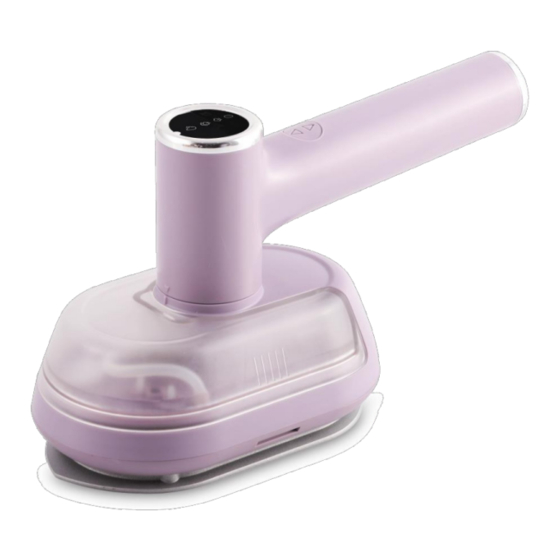
DESCRIPTION OF PARTS 1. Brush 2.Cup 3. Water tank 4. Axle 5. Axle cover 6. Display panel A 7. Steam button A 8.Handle 9. Handle cover 10.House 11. Base 12.Skirt 13.Soleplate 14.Water inlet cover... -
Page 3: Important Safeguards
IMPORTANT SAFEGUARDS 1. Please read all instructions carefully before using the appliance for the first time. 2. Before connecting the appliance, check if the voltage indicated on the rating plate corresponds with the mains voltage in your home. 3. Do not use appliance for anything other than intended use. 4. - Page 4 Installation instructions Hold the handle with one hand, hold both sides of the water tank with the other hand, and pull it out in the direction of the arrow to take down the water tank. Remove water tank Water tank assembly Brush Install the brush: hold the handle of the iron with your hand, hold the brush with your other hand in the direction of the arrow, align with the clasp, and then install the brush on...
- Page 5 Remove the brush: hold the handle of the iron with one hand, hold the protruding position on the handle edge with the other hand and pull it out in the direction of the arrow, and the brush can be removed Remove the brush From Iron to Garment steamer position Hold the brush head, hold the handle with the other hand, and rotate the handle 90...
- Page 6 INSTRUCTIONS FOR USE The following are the allowed states of the machine: Iron position, can use dry ironing function, steam function You can possible only those fabrics that have the two-point mark(··) label And three-point mark(···) label. Garment steamer without brush, can use dry ironing function, steam function You can possible only those fabrics that have the two-point mark(··) label And three- point mark(···) label.
- Page 7 Preparation Put away the clothes Pull out the water tank, turn the water tank over, open the water inlet cover (14), and add 100g clean water into the water tank. In order to prolong the service life of the product, it is recommended to use pure water or distilled water, and close the water inlet cover.
- Page 8 2. After cleaning for 1 minute, the indicator light will automatically switch to the dry ironing state, and the dry ironing indicator light will flash into the delay state. After 40 seconds of delay, the product will be heated to dry the residual water in the soleplate. Note: when the dry hot or steam indicator light is always on, Press and hold the steam button A (7) for 5 seconds, and you can enter the cleaning function from any state of dry ironing or steam.
-
Page 9: Description Des Pièces
DESCRIPTION DES PIÈCES 1. Brosse 2. Récipient d'eau 3. Réservoir d'eau 4. Mandrin 5. Couvercle du mandrin 6. Panneau d'affichage A 7. Bouton de vapeur A 8. Poignée 9. Couvercle de poignée 10. Boîtier 11. Base 12. Jupe 13. Semelle 14. -
Page 10: Mesures De Protection Importantes
MESURES DE PROTECTION IMPORTANTES 1. Veuillez lire attentivement toutes les instructions avant d'utiliser l'appareil pour la première fois. 2. Avant de brancher l'appareil, vérifiez si la tension indiquée sur la plaque signalétique correspond à la tension du secteur dans votre maison. 3. - Page 11 Instructions d'installation Tenez la poignée d'une main, tenez les deux côtés du réservoir d'eau de l'autre main, et tirez dans le sens de la flèche pour retirer le réservoir d'eau. Retirer le réservoir d'eau Ensemble de réservoir d'eau Brosse Installez la brosse: tenez la poignée du fer à repasser avec votre main, tenez la brosse de votre autre main dans la direction de la flèche, alignez-vous avec le fermoir, puis installez la brosse sur la buse Installer la brosse dans la direction de la flèche...
- Page 12 Retirez la brosse: tenez la poignée du fer d'une main, tenez la partie saillante du bord de la poignée de l'autre main et la tirer dans le sens de la flèche, et la brosse peut être retirée. Retirer la brosse De la position du fer à...
- Page 13 MODE D'EMPLOI Les états suivants sont les états autorisés de la machine: Position du fer, permet d' utiliser la fonction de repassage à sec et la fonction de vapeur. Vous pouvez uniquement les tissus qui ont l'étiquette de marque à deux points (··) Et l'étiquette de marque à...
- Page 14 Préparation Rangez les vêtements Retirez le réservoir d'eau, retournez le réservoir d'eau, ouvrez le couvercle d'entrée d'eau (14), et ajoutez 100 g d'eau propre dans le réservoir d'eau. Afin de prolonger la durée de vie du produit, il est recommandé d'utiliser de l'eau pure ou de l'eau distillée et de fermer le couvercle d'entrée d'eau.
- Page 15 2. Après le nettoyage pendant 1 minute, le voyant passera automatiquement à l'état de repassage à sec et le voyant de repassage à sec clignote en état de retard. Après 40 secondes de retard, le produit sera chauffé pour sécher l'eau restante dans la semelle. Note: lorsque le voyant de chaleur sèche ou de vapeur est toujours allumé, appuyez et maintenez le bouton de vapeur A (7) pendant 5 secondes, et vous pouvez entrer dans la fonction de nettoyage à...
Need help?
Do you have a question about the 853-028V70 and is the answer not in the manual?
Questions and answers