Table of Contents
Advertisement
Quick Links
Advertisement
Table of Contents

Related Manuals for djm direct DJMMIG130

Summary of Contents for djm direct DJMMIG130
-
Page 2: Device Description
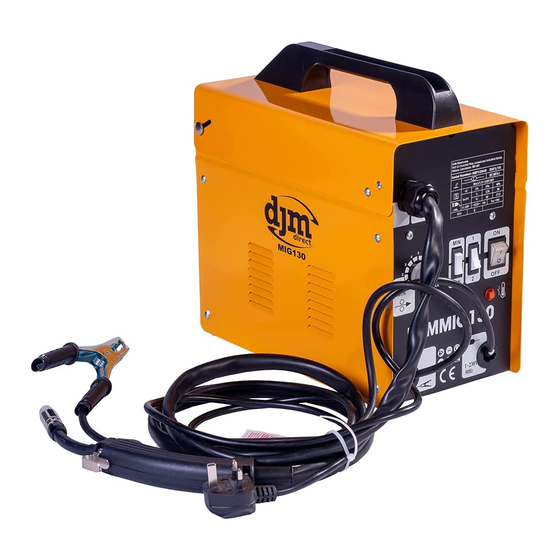
1.Introduction 2.Device Description MANUFACTURER: DJMMIG130(NO GAS) DJM Direct.com Unit 43 Churchill Way, 1. Handle Lomeshaye Industrial Estate, 2. Thermostat control lamp Nelson, Lancashire BB9 6RT UK 3. Housing cover 4. ON/OFF switch 5. Welding wire speed controller DEAR CUSTOMER 6. Switch for welding current adjustment We hope your new tool brings you much enjoyment and success. -
Page 3: Intended Use
DJMMIG195(GAS/NO GAS) 3. Unpacking Open the packaging and remove the device carefully. 1. Handle ● Remove the packaging material as well as the packaging and ● 2. Thermostat control lamp transport bracing (if available). 3. Housing cover Check if the delivery is complete. ●... - Page 4 handled without gloves. First aid facilities and a qualified first aid Walls, ceilings, and floor near work should be protected by heat person should be available unless medical facilities are close by for resistant covers or shields. Fire watcher must be standing by with immediate treatment of flash burns of the eyes and skin burns.
- Page 5 apron, and fire-resistant leggings. Avoid outer garments of untreated should consult with their doctor before going near arc welding, cotton. Bare skin protection: Wear dark substantial clothing, Button gouging, or spot welding operations. collar to protect chest and neck and button pockets to prevent entry 5.3.6 To protect against shock: of sparks.
-
Page 6: Preparation Of The Working Area
✗ NEVER attempt any electrical or mechanical repair electrode circuit unless the welding power source is off. b) unless your are a qualified technician. If you have a Equipment without output on/off control (no contactor) Welding problem with the machine contact your local dealer. power sources used with shielded metal arc welding and similar ✗... -
Page 7: Assembly And Installation
Various welding wires are required for different applications. The 8. Technical Data welding set can be used with welding wires with a diameter of 0.9 mm(For DJMMIG130) or 1.0mm(For DJMMIG195). The appropriate Specifications: feed rollers and contact tubes are supplied with the set. The feed... -
Page 8: Operation
- Inserting the welding wire and adjusting the wire guide - Pull the pressure roller spring and swing it upward. - Push the pressure roller holder(E) upwards and Pull the pressure - Pull the pressure roller holder(E) downwards . roller spring(D) and swing it downward. - Screw the appropriate contact tube for the welding wire diameter - Swing the screws (F) 90 °and pull off upwards. - Page 9 10.3 OPERATING THE WELDER When using the welder in a gasless configuration the shielding gas is Setting the welding current created from the flux within the welding wire. When using the welder outside, you may need to erect a wind break -The welding current can be set to 2 different levels using the to make sure the shielding gas is not blown away, thereby leaving a welding current adjustment switch .
-
Page 10: Maintenance
- Hold the welding screen in front of your face and move the welding nozzle to the point on the workpiece where you wish to complete the weld. Now press the torch switch. - When the arc is burning, the welding set will feed wire into the weld pool. -
Page 11: Parts List And Parts Diagram
13.Parts List and Parts Diagram DJMMIG130 Description Description Description Description Screw Spacer Potentionmeter Water joint Handle PC board Earth clamp Top panel Rivet Welding torch Plug Left panel Guard ring of torch Kickstand Screw Middle panel Transformer Knob Plastic foot... - Page 12 DJMMIG195 Description Description Description Description M4X12 bolt M4x15 bolt Switch Ø3 steel wire Left panel Wire shaft collar Main switch Right panel Reactor M4x15 bolt Indicator light M5x70 bolt Transformer M8 nut Potentiometer M5x25 bolt handle M5 nut M8 plastic nut Electrode holder Back panel M5 spring cushion...
-
Page 13: Low Voltage Directive
MIG WELDER – Part. No.DJMMIG130 DJMMIG195 2014/35/EU Low Voltage Directive 2014/30/EU EMC Directive EN IEC 60974-1:2018+A1:2019 EN 50445:2008 EN 60974-10:2014+A1:2015 EN 61000-3-11:2000 EN 61000-3-12:2011 Data: 18/11/2020...
Need help?
Do you have a question about the DJMMIG130 and is the answer not in the manual?
Questions and answers