
Summary of Contents for Flowmeter EASYVAC
- Page 1 SERVICE MANUAL SERVICE MANUAL ® EASYVAC VACUUM REGULATOR PUBLICATION CODE: MS003 EDITION: no. 6 DATE: February 2010...
-
Page 2: Table Of Contents
PERSONNEL. • AFTER UNPACKING CONNECTION, IF NECESSARY, STERILISE THE EASYVAC VACUUM PERFORM THE FUNCTIONAL TEST DESCRIBED REGULATOR WITH A VALIDATE ETHYLENE OXIDE IN THE CHAPTER "PERIODIC CHECKS" OF STERILIZATION CYCLE (E.G. 14% EO 12 H. / 50 KPA / OPERATING MANUAL MO002 ON THE DEVICE. -
Page 3: Your Local Dealer And Service Center
The equipment described in this publication is designed and manufactured by FLOW METER S.p.A. - Via del Lino, 6 - 24040 LEVATE (Bg) – Italy – Tel. +39-035-594047 – Fax +39-035-594821 – e-mail: info@flowmeter.it http://www.flowmeter.it EASYVAC VACUUM REGULATOR MS003 February 2010... -
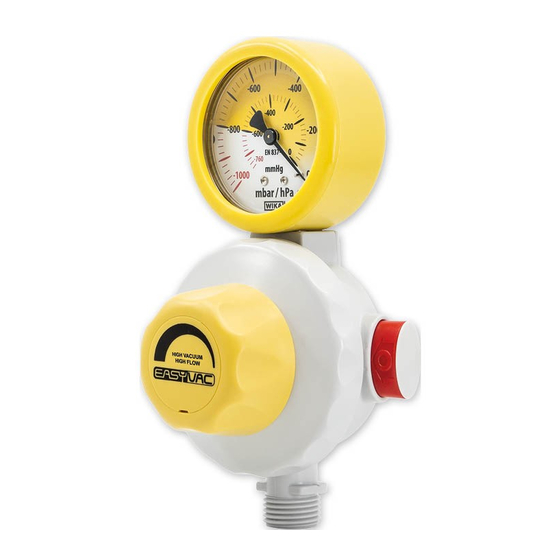
Page 4: Table Of Illustrations
SERVICE MANUAL Table of illustrations Drawing no. TITLE PAGE Spares for EASYVAC vacuum regulator ........... EASYVAC VACUUM REGULATOR MS003 February 2010... - Page 5 SERVICE MANUAL Drawing no. 1.1 EASYVAC VACUUM REGULATOR MS003 February 2010...
-
Page 6: List Of Spare Parts
Lid for EASYVAC regulator with membrane and adjusting knob 000010200 I-O button switch complete with gaskets 000010192 Vacuum gauge -1000 mbar for EASYVAC regulator complete with fixing support, gaskets and protection cover 000010193 Vacuum gauge -600 mbar for EASYVAC regulator complete with fixing support,... -
Page 7: Maintenance Operations
Table of illustrations on page 4, must be replaced. The replacement methods are provided with the assistance of the following illustrations: Holding the EASYVAC vacuum regulator firmly, Using a screwdriver, push the green button pull out the red button, until it is completely free of outwards, until it is completely removed from the its quick coupling, and remove it completely. - Page 8 WARNING: DO NOT USE OIL TO LUBRICATE THE PARTS. 2.3.2 CLEANING OF THE MEMBRANE AND THE BODY The vacuum pressure membrane and the one inside the body of the EASYVAC vacuum regulator should be cleaned periodically, to ensure the device keeps working properly.
- Page 9 2.3.3 REPLACEMENT OF THE LID WITH MEMBRANE In order to ensure correct functioning of the EASYVAC vacuum regulator, the lid (1), complete with the silicone membrane as shown in the drawing specified in the Table of illustrations on page 4, should be periodically replaced.
- Page 10 If the periodic checks on the accuracy value of the vacuum gauge indicated in the operating manual of the EASYVAC device shows this value falls outside the tolerance levels or in the case of accidental damage to the vacuum gauges, they must be replaced, as specified in the Table of illustrations on page 4.
- Page 11 EASYVAC vacuum can be felt. Tighten for another ¼ turn, positioning regulator, pushing it right in. Be careful to ensure the...
Need help?
Do you have a question about the EASYVAC and is the answer not in the manual?
Questions and answers