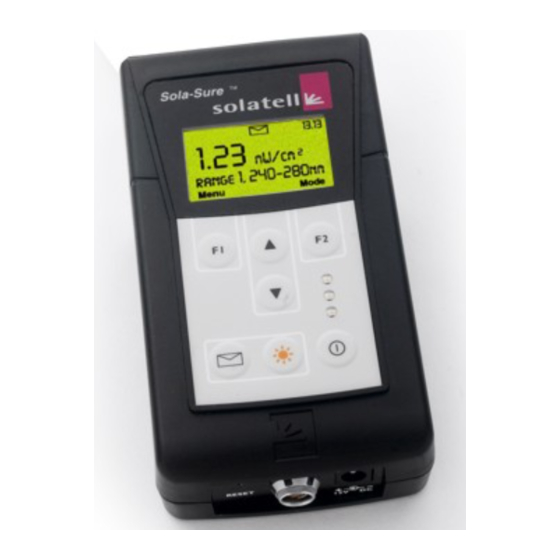
Summary of Contents for Solatell Sola-Sure
- Page 1 Solar Sure Manual Solatell Ltd. King Henry’s Drive Croydon CR9 0BG +44 (0) 1689 808033 salesteam@solatell.com PART NUMBER 51702010003 Revision 1.0 Version B...
-
Page 2: Table Of Contents
Stray Light .....................4 Stray Light Compensation ................4 Erythemal Action Spectra ................4 MED.......................4 Te Time......................4 Auto-Ranging Scan..................4 What Information Does the Sola-Sure Display and What Does It Mean? ..5 Areas ......................5 Te Times ......................5 Sola-Sure Buttons and Icons ................6 Buttons ......................6 Icons .......................6 Using the Sola-Sure....................7... - Page 3 Sola-Sure Manual 10.2.2.4 Default Settings................13 10.2.2.5 Scan Interval ................13 10.2.2.6 Continuous Scan ................14 10.2.2.7 Optimisation.................14 10.2.2.8 Stray Light ...................14 10.2.2.8.1 Stray Mode................14 10.2.2.8.2 Wavelength Limit ..............14 10.2.3 Set Intensity Range ................14 10.2.4 Information ..................14 10.2.4.1 Stored data ...................14 10.2.4.2 Last data ..................14 10.2.4.3...
-
Page 4: Key To Notations In This Manual
Sola-Sure. F1/2 (Function) Key – When referring to either the F1 or F2 Key, the text in the brackets indicates the text that is displayed on the Sola-Sure screen above the relevant key to indicate its function. Main Screens – The main screens are the screens that display information about the scan, namely the Total UVR, UVB, UVA, UVA1, UVA2, Te Time: FDA/CDEH and Te Time: CIE/IEC screens. -
Page 5: Sola-Sure Terminology
3.2 Stray Light Compensation Stray Light Compensation is a method of removing the Stray Light from the reading taken by the Sola-Sure to ensure that the data presented only represents the light of interest. 3.3 Erythemal Action Spectra The Erythemal Action Spectra defines the skins response to UV Light. -
Page 6: What Information Does The Sola-Sure Display And What Does It Mean
320-340 nm The Energetic Area readings give the Power per Unit Area (mW/cm ) that radiates on the Sola-Sure (and ultimately the person in the sun bed). These readings are not Erythemally weighted. 4.2 Te Times The Sola=Sure calculates two Te Times, one based on the FDA/CDRH Erythemal Action Spectra and MED denominator and one based on the CIE/IEC Erythemal Action Spectra and MED value. -
Page 7: Sola-Sure Buttons And Icons
Stored data. Indicates how close to saturation the previous scan was. Arial Icon Displays the time during normal operation and the time Clock left for the scan to finish when the Sola-Sure is scanning. - 6 -... -
Page 8: Using The Sola-Sure
6.1 Switching the Sola-Sure on and off. The Sola-Sure can be turned on and off by pressing the Power Key. The Sola-Sure will take a few seconds to start up. Once on, the Sola-Sure will power off immediately by pressing this key. -
Page 9: Stray Light Compensation
Stray Light Compensation is a feature that removes Stray Light from the reading taken by the Sola-Sure and requires no user interaction. By default the Sola-Sure will have Stray Light Compensation set to Solarium Mode and the Stray Wavelength Limit set to 295nm, although it is possible to alter these settings it is not recommended. -
Page 10: Taking A Reading With A Sola-Sure
This is a maximum Sample Time because if the first scan does not saturate then the Sola-Sure will not take any more readings as it already has all the data it needs. As a general rule, the shorter wavelength accuracy can be improved by increasing the Optimisation Level. -
Page 11: Scan Warning Messages And Saturation
8.4 Scan Warning Messages and Saturation 8.4.1 Saturation If the Intensity Range of the Sola-Sure is set too low (too sensitive) for the lamp it is measuring then saturation will occur. Saturation is the point where the Sola-Sures detector array has “absorbed” the maximum amount of light it can to take an accurate reading. -
Page 12: Other Settings
Logging highlight the Off menu item and press the F1 (Select) Key. 9.3 Continuous Scan and Scan Interval The Sola-Sure can be set to automatically scan at a set time interval or scan as quickly as possible. The interval is defined by the Scan Interval setting and the feature can be activated or disabled using the Continuous Scan setting. -
Page 13: Lock
(Select) Key, to disable Continuous Scan highlight the Off menu item and press the F1 (Select) Key. 9.4 Lock To ensure that no accidental alterations are made to the settings of the Sola-Sure it is possible to enable a lock preventing any changes. To enable or disable the Lock: •... -
Page 14: Appendix A - Menu Navigation And Menus Purpose
Allows the setting of the internal clock on the Sola-Sure 10.2.2.4 Default Settings Resets the settings on the Sola-Sure to their factory default settings. 10.2.2.5 Scan Interval Alters the time interval in minutes between scans when Continuous Scan feature is active. - Page 15 Sample Time. (NOTE – the Probe Temperature will only be displayed if a probe with a Thermocouple is attached.) 10.2.4.4 Product Info Displays the Calibration due date, Serial Number, Attachment Information, Software version, Hardware version, Wavelength range and Saturation dose for the Sola-Sure. - 14 -...
- Page 16 Sola-Sure Manual 11 Trademarks and Acknowledgements Brands and product names mentioned in this manual may be trademarks or registered trademarks of their respective companies and are hereby acknowledged. - 15 -...

Need help?
Do you have a question about the Sola-Sure and is the answer not in the manual?
Questions and answers