Table of Contents

Related Manuals for Univa U336 NCP Series

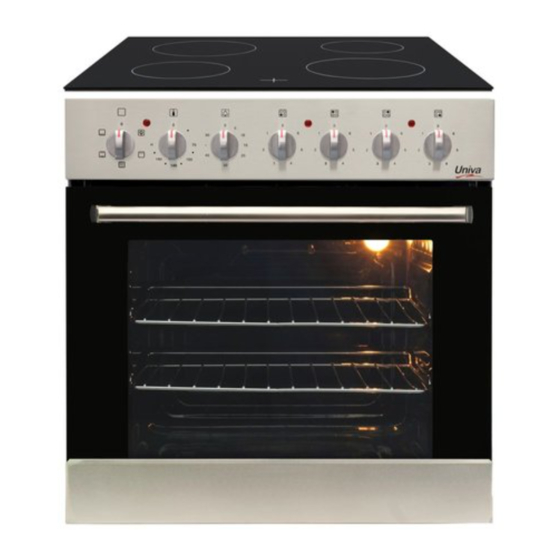
Summary of Contents for Univa U336 NCP Series
- Page 1 5607900-G/2021 V2.0 Eye-level and Under Counter Ovens & Hobs Convection & Multifunction -Instruction Manual - IN ORDER TO OBTAIN THE GREATEST SATISFACTION FROM YOUR COOKWARE APPLIANCE, IT IS RECOMMENDED YOU READ THE INSTRUCTIONS CAREFULLY.
-
Page 2: Table Of Contents
INTRODUCTION Dear Customer: Thank you for buying a quality Univa Electric Built-In Oven and Hob, designed to give years of safe, convenient, economical and trouble-free cooking and baking. To ensure that you get the best performance from your appliance, please read this instruction manual carefully. -
Page 3: Safety Warnings
SAFETY AND WARNINGS The appliance is not intended for use by persons (including children) with reduced physical, sensory or mental capabilities, or lack of experience and knowledge, unless it is done under the supervision of a responsible adult. Do not allow children to play or tamper with the appliance. During use the appliance becomes hot. -
Page 4: Unpacking
UNPACKING During transportation, protective packaging was used to protect the appliance against any damage. After unpacking, please dispose of all elements of packaging in a way that will not cause damage to the environment. All packaging materials used for the appliance are environmentally friendly; they are 100% recyclable and are marked with the appropriate symbol. -
Page 5: Connection To The Power Supply
CONNECTION TO THE POWER SUPPLY This appliance has a ‘Y’ type supply cord connection and must be installed by a licensed electrician, who will ensure that the stove is correctly connected and safely earthed. After installation, inspect the unit to make sure all connections are secured and professionally installed and tightened. -
Page 6: Installation
U336* NCP (No Control Panel)HOB CONNECTION TO U336*OVEN: FROM HOB FROM OVEN IMPORTANT! Connect four Pairs of socket plugs to the corresponding color make sure the connections are fit tightly! U336CERAN NCP (No Control Panel) HOB CONNECTION TO U336*OVEN: The two wires coming from the Ceran Hob with round connectors should be installed to the “L”... - Page 7 Kitchen cupboards adjacent to the appliance i.e. synthetic laminates, adhesives and surrounding edges should be able to withstand temperatures up to 120 C without discolouring or delaminating. Ensure adequate ventilation for eye-level or under counter oven and hob installation. ...
- Page 8 Do not over-tighten the screws. Do not seal the oven into the cabinetry with silicone or glue. This makes future servicing difficult. UNIVA will not cover the costs of removing the oven, or of damage caused by this removal.
- Page 9 INSTALL OVEN RACK: Oven rack Oven rack installation for all ovens CUPBOARD APERTURE FOR MODELS U336* NCP(No Control Panel) HOBS: U336* NCP CERAN HOB APERTURE U336* NCP HOB APERTURE 558 W x 488 D 575 W x 480 D...
- Page 10 CUPBOARD APERTURE FOR MODELS U156* CONTROL SWITCHES PANEL HOBS: U156 CERAN HOB APERTURE U156* HOB APERTURE 575 W x 480 D 575 W x 480 D IMPORTANT! Surfaces, synthetic laminates and adhesives used must be heat resistant (120°C minimum).The materials of the mounting cabinet should take account of these characteristics.
- Page 11 IMPORTANT! For adequate ventilation, a minimum space of 30mm (ceran hob) - 50mm (solid plate hob) is required between the upper part of the oven and the bottom of the HOB. There needs to be a vent hole in the front of the cabinet. ...
-
Page 12: Operating Instructions Ovens
OPERATING INSTRUCTIONS - OVENS CONTROL KNOBS ON THE OVEN: 1. Oven function selection knob 2. Oven indicator light 3. Temperature control knob 4. Ringer Timer 5. Plate selector (U336 only) 6. Plate in use indicator light (U336 only) USING OVEN: The following symbols are indicated on the oven, depending on the model. - Page 13 Thermostat – All functions of the oven are thermostatically controlled. "H" is the maximum temperature of 230°C. Timer – 60 Minute ringer timer. 60 MINUTE RINGER TIMER: Set the time by turning the switch clockwise. The timer is set for a maximum of 60 minutes and will ring once the selected time has lapsed.
- Page 14 Heat up the appliance for +- 30 minutes to ensure any production residues or layers are burnt off and removed, then switch the oven off. WARNING! When using the pre-heating function, it is recommended that the oven door is closed. When the grill is in use, accessible parts can become hot - Keep children away from the oven.
-
Page 15: Operating Instructions Hobs
Select the correct shelf position to grill The oven door must be partially open during grill OPERATING INSTRUCTIONS - HOBS USING SOLID PLATES HOB (U336NCP/U156): Plate Controls: 1. Left Front 2. Left Back 3. Right back 4. Right Front Turn corresponding knob for selected plate clockwise, the plate indicator light will show the plate is on. - Page 16 If any liquid is spilled on the plate while in use, wipe it off as soon as possible. Never scrub the plate with harsh scouring powders, detergents or agents. Never use steel wool on the plate. Do not let moisture lie on a cold plate, wipe it off and switch the plate on for a few minutes so that it can dry thoroughly.
-
Page 17: How To Save Energy
NOTE THE FOLLOWING: Before switching on, check which knob controls the desired cooking zone. It is best to place the pot or pan on the cooking zone before switching on, and remove it only after switching off. Use only flat-bottomed pans/pots with a regular surface (caution must be taken with cast iron pans). -
Page 18: Cleaning And Maintenance
Do not uncover the pan too often (a watched pot never boils!). Do not open the oven door unnecessarily. Switch off the oven in good time and make use of residual heat. For long cooking times, switch off heating zones 5 to 10 minutes before cooking is completed. - Page 19 CAUTION! Do not use cleaning products containing abrasive materials for the cleaning and maintenance of the glass front panel. Do not use any abrasives, steel wool, chloride, etc., to clean the enameled surfaces. Simply wipe with a damp cloth while the surface is still warm or use one of the leading brands of oven-enamel cleaners on the market.
- Page 20 Spillage (especially sugar solution such as jam) should be wiped off immediately with a damp cloth while the hob is still warm. If necessary stubborn spills may be removed using a blade scraper and smooth top cleaner (Scraper can be purchased from most Hardware and Retail Stores).
- Page 21 1. Open the oven door fully. 2. Lift up and turn the small levers located on the hinges (right and left). 3. Partially close the oven door and lift it free of the side panel retaining slots. 4. Disengage the hinges and remove door. Do not forget to close the levers at the hinge housing when reinstalling the door.
- Page 22 HOW TO REPLACE THE OVEN LAMP WARNING! Ensure that the appliance is switched off before replacing the lamp to avoid the possibility of electric shock. LAMP SPECIFICATION -Voltage: AC 220-240V/50Hz -Wattage: 25W -Type: E 14 Resistant to high temperatures (300°C) Replacement lamps are available from service technician.
-
Page 23: Troubleshooting
TROUBLESHOOTING If you cannot find an answer to the problem in the chart below, or if the problem cannot be fixed, technical help is needed. Contact Customer Care! PROBLEM POSSIBLE CAUSE WHAT TO DO Check that the stove is connected to the power The oven or hob is not supply and the power is heating and the... -
Page 24: Specifications
SPECIFICATIONS OVEN U336* U336*F U246* U246*F TYPE ✔ ✔ -Built-in oven ✔ ✔ -Eye level oven ✔ ✔ - Convection oven ✔ ✔ - Multi-function oven DIMENSIONS-OVEN -Height (mm) -Width (mm) -Depth (mm) -Weight (kg) 33.5 33.5 APERTURE-OVEN -Height (mm) -Width (mm) -Depth (mm) -Oven Capacity (L) Gross... - Page 25 U336* U336C* U156* U156C* TYPE ✔ ✔ -NCP HOB ✔ ✔ - CONTROL SWITCHES HOB ✔ - NCP CERAN HOB ✔ - CONTROL SWITCHES CERAN HOB DIMENSIONS-HOB -Height (mm) -Width (mm) -Depth (mm) APERTURE-HOB -Width (mm) -Depth (mm) PLATE -1000W Solid Plates -1500W Solid Plates -2000W Solid Plates -1200W Radiate Plates...
-
Page 26: Univa Guarantee
UNIVA GUARANTEE This guarantee is issued by Univa in respect of all products manufactured and sold by Univa. The liability to Univa is limited to the following conditions: This guarantee operates in favour of the original purchaser of new appliances only and cannot be ceded, assigned or transferred. - Page 27 If the customer is unable to prove the date of purchase of the appliance to the reasonable satisfaction of the representative of a Univa authorized service agent or if no fault or defects are found in the appliance, a Univa authorized service agent shall be entitled to charge for the work done and travelling expenses incurred.
- Page 28 ➢ Howick Mews, Waterfall Park, Bekker Road, Vorna Valley, Midrand, Gauteng, South Africa ➢ P.O. Box 1482, Halfway House, Gauteng, 1685 ➢ Sales and Marketing Tel: +27 11 315 0015 Email: sales@univa.co.za ➢ Customer Care: Tel: +27 11 315 0015 Email:support@univa.co.za www.univa.co.za...
Need help?
Do you have a question about the U336 NCP Series and is the answer not in the manual?
Questions and answers