Table of Contents
Advertisement
Quick Links
Advertisement
Table of Contents

Summary of Contents for Thinklite AIR TL FLAIR
- Page 1 TL FLAIR IAQ MONITOR INSTALLATION AND COMMISSIONING GUIDE...
- Page 2 Contents of Package 1. Magnetic Monitor Cover 2. ThinkLite Flair Monitor 3. Wall Mount 4. Sensor Modules (x2) 5. Outlet Adaptors (including international) 6. Instruction Guide 7. Ethernet Cable 8. Monitor Power Cord 9. Mounting Screws 10. Wall Plug...
- Page 3 Installation STEP 1. Powering on the Flair • To power your Flair, connect the charging cord to Micro-USB port on the bottom of your Flair. • The TL Flair monitor has an 8-hour battery life for backup power, in case there is any power outage in your facility, you will be able to monitor for an additional 8 hours before the monitor turns off.
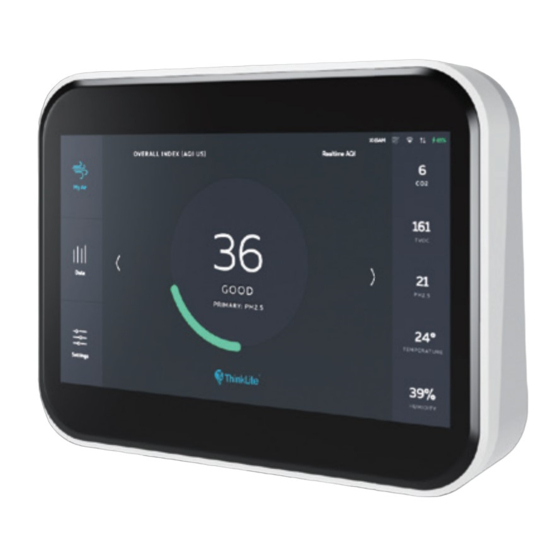
- Page 4 STEP 3. Turning On Your Flair • When you first turn on your Flair, you should see the ThinkLite logo appear on your screen. • Next, you will see your devices main page open. There will be a number in the middle of your screen with your AQI, or your “Air Quality Index”.
- Page 5 STEP 4: Mounting The Flair • We strongly recommend mounting flair on a wall to ensure optimal performance. • For installing your TL Flair, there are 2 different ways to mount your monitor. • 1 way is to mount your TL Flair on your own and have the wire on the outside of the wall plugged into an outlet.
- Page 6 STEP 7: Account Set-Up • Our ThinkLite Air team will use the email associated with your order to make your new ThinkLite Air account. You will be receiving an email from "ThinkLite Air" inviting you to your monitor's dashboard. •...
Need help?
Do you have a question about the AIR TL FLAIR and is the answer not in the manual?
Questions and answers